Original BMW Accessories. Installation Instructions. - Offenga ...
Upload
khangminh22Category
view
4download
0
How to change: BMW E60 fuel filter– replacement guide
VIDEO TUTORIAL
This replacement procedure can be used for: BMW 5 (E60) 525 d, BMW 5 Touring (E61) 525 d
The steps may slightly vary depending on the car design.
WWW.AUTODOC.CO.UK 1–19
Important!

REPLACEMENT: FUEL FILTER – BMW E60. TOOLS YOUNEED:
WWW.AUTODOC.CO.UK 2–19
All-purpose cleaning spray
Drive socket # 10
Torx bit T40
Ratchet wrench
Fluid container
Flat Screwdriver

Replacement: fuel filter – BMW E60. Tip from AUTODOCexperts:
CARRY OUT REPLACEMENT IN THE FOLLOWING ORDER:
1
Lift the car using a jack or place it over an inspection pit.
WWW.AUTODOC.CO.UK 3–19
Ensure adequate ventilation of the workplace. Fuel vapors arepoisonous.
Please note: all work on the car – BMW E60 – should be done withthe engine switched off.

2
Prepare a container for fluids.
3
Remove the snap ring of the fuel pressure regulator retainer clip. Use a flat screwdriver.
WWW.AUTODOC.CO.UK 4–19

4
Loosen the fastening clamp of the fuel filter pipe. Use a flat screwdriver.
5
Loosen the fuel filter mounting. Use a drive socket #10. Use a ratchet wrench.
WWW.AUTODOC.CO.UK 5–19

6
Detach the tubes from the fuel filter.
Replacement: fuel filter – BMW E60. AUTODOCrecommends:
7
Remove the fuel filter. Put the old filter cartridge in the container.
WWW.AUTODOC.CO.UK 6–19
Be careful! Fuel may leak from the filter housing and hoses.
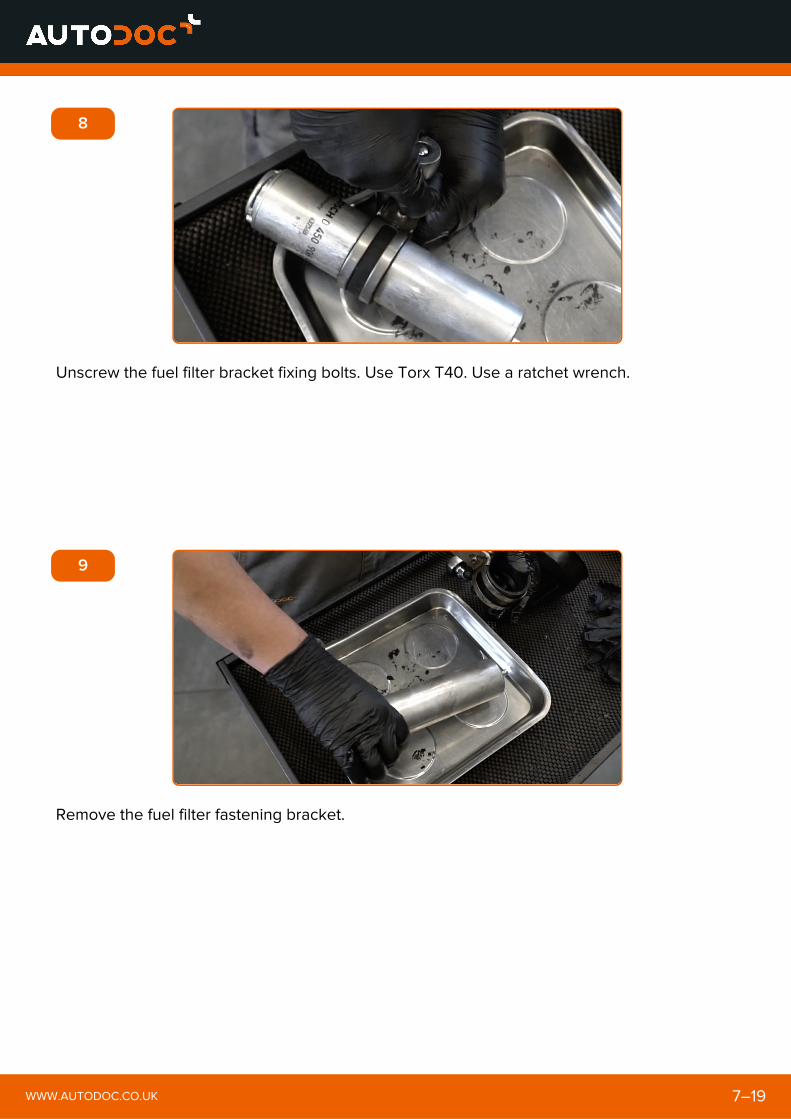
8
Unscrew the fuel filter bracket fixing bolts. Use Torx T40. Use a ratchet wrench.
9
Remove the fuel filter fastening bracket.
WWW.AUTODOC.CO.UK 7–19
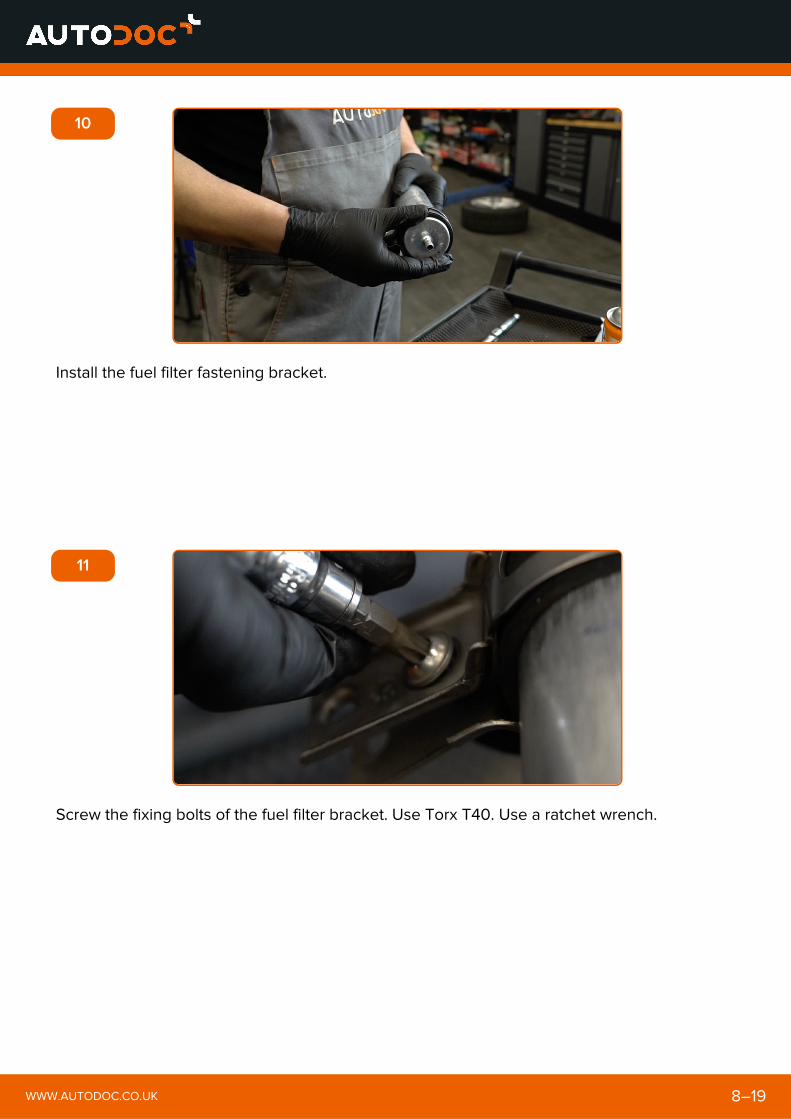
10
Install the fuel filter fastening bracket.
11
Screw the fixing bolts of the fuel filter bracket. Use Torx T40. Use a ratchet wrench.
WWW.AUTODOC.CO.UK 8–19

12
Install a new fuel filter.
Replacement: fuel filter – BMW E60. Tip from AUTODOC:
WWW.AUTODOC.CO.UK 9–19
Make sure that the fuel filter is positioned correctly. Consider thefuel flow direction mark.
During installation, take care to prevent dust and dirt from gettinginto the fuel filter housing.
BMW E60 – It's important to only use high-quality filters.

13
Attach the tubes to the fuel filter.
14
Install the snap ring of the fuel pressure regulator's retainer clip.
WWW.AUTODOC.CO.UK 10–19

15
Screw in the fuel filter mounting bracket. Use a drive socket #10. Use a ratchet wrench.
16
Tighten the fastening clamp of the fuel filter pipe. Use a flat screwdriver.
WWW.AUTODOC.CO.UK 11–19
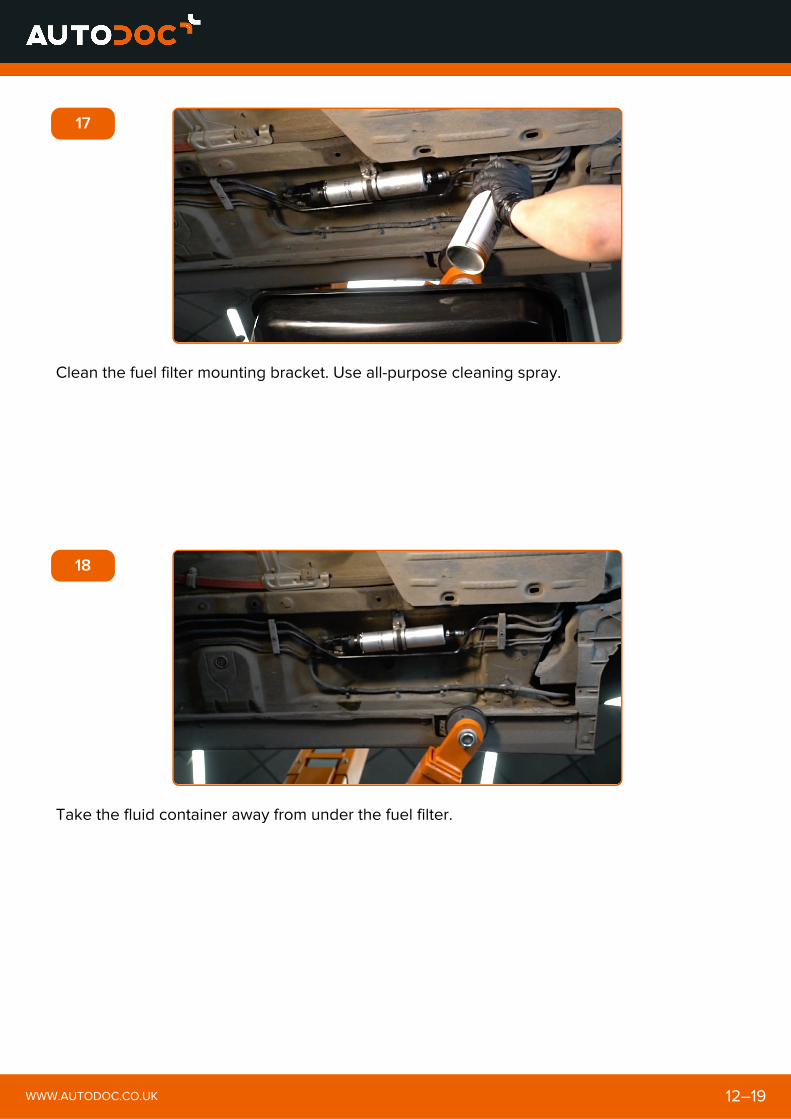
17
Clean the fuel filter mounting bracket. Use all-purpose cleaning spray.
18
Take the fluid container away from under the fuel filter.
WWW.AUTODOC.CO.UK 12–19
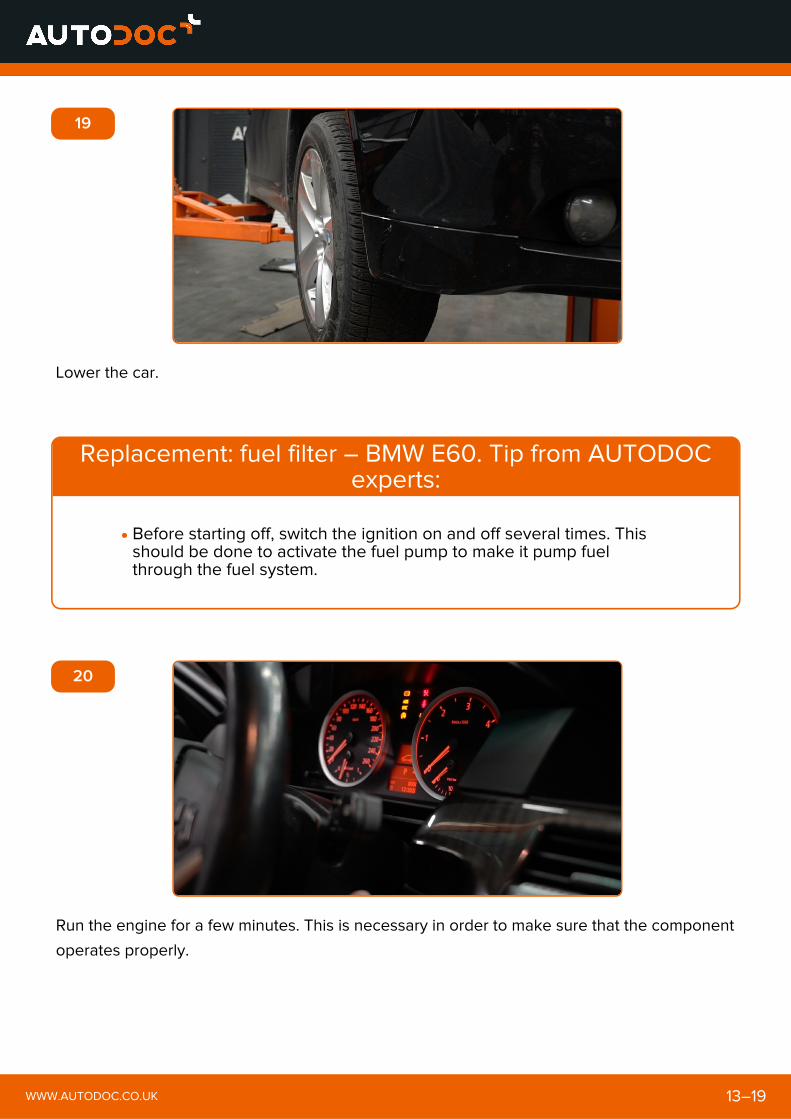
19
Lower the car.
Replacement: fuel filter – BMW E60. Tip from AUTODOCexperts:
20
Run the engine for a few minutes. This is necessary in order to make sure that the component
operates properly.
WWW.AUTODOC.CO.UK 13–19
Before starting off, switch the ignition on and off several times. Thisshould be done to activate the fuel pump to make it pump fuelthrough the fuel system.

21
Shut off the engine.
Replacement: fuel filter – BMW E60. Tip:
WWW.AUTODOC.CO.UK 14–19
To protect the environment from pollution, be sure to dispose of theused filters at special collection points.

DID YOU FIND THESE INSTRUCTIONSHELPFUL?
YES NO
BECOME A MEMBER OF AUTODOC CLUB!
WWW.AUTODOC.CO.UK 15–19

AUTODOC — TOP QUALITY AND AFFORDABLE CARPARTS ONLINE
AUTODOC MOBILE APP: GREAT DEALS AND CONVENIENTSHOPPING
A GREAT SELECTION OF SPARE PARTS FOR YOUR CAR
WWW.AUTODOC.CO.UK 16–19

BUY SPARE PARTS FOR BMW
FUEL FILTER: A WIDE SELECTION
WWW.AUTODOC.CO.UK 17–19

CHOOSE CAR PARTS FOR BMW E60
FUEL FILTER FOR BMW: BUY NOW
WWW.AUTODOC.CO.UK 18–19
FUEL FILTER FOR BMW E60: THE BEST DEALS & OFFERS
The document contains only general recommendations that may be useful for you when you perform repair or replacement work. AutoDoc shallnot be liable for any loss, injury, damage of property occurring in the repair or replacement process due to incorrect use or misinterpretation ofthe provided information.
AutoDoc shall not be liable for any possible mistakes and uncertainties in this guide. The information provided is for information purposes onlyand cannot replace advice from specialists.
AutoDoc shall not be liable for incorrect or hazardous usage of equipment, tools and car parts. AutoDoc strongly recommends to be carefuland observe the safety rules when performing repair or replacement works. Remember: usage of low quality auto parts does not guaranteeyou the appropriate level of road safety.
© Copyright 2018 – All the contents of this website, in particular texts, photographs and graphics, are protected by copyright. All rights,including reproduction, publication, editing and translation rights, are reserved by Autodoc GmbH.
WWW.AUTODOC.CO.UK 19–19
Disclaimer:
Copyright © 2022 FDOKUMEN