Android Vehicle Tracking System - Theseus
60
Peter Kiplagat Android Vehicle Tracking System Metropolia University of Applied Sciences Bachelor of Engineering Degree Programme in Information Technology Bachelor’s Thesis 7 May 2019
-
Upload
khangminh22 -
Category
Documents
-
view
2 -
download
0
Transcript of Android Vehicle Tracking System - Theseus

Peter Kiplagat
Android Vehicle Tracking System
Metropolia University of Applied Sciences
Bachelor of Engineering
Degree Programme in Information Technology
Bachelor’s Thesis
7 May 2019

Abstract
Author Title Number of Pages Date
Peter Kiplagat Android Vehicle Tracking System 43 pages + 12 appendices 7 May 2019
Degree Bachelor of Engineering
Degree Programme Information Technology
Professional Major Software Engineering
Instructors Jarkko Vuori, Principal Lecturer
This project was conducted for a small logistic company co-owned by the author and part-
ners, and the purpose was to build an Android vehicle tracking system to be used as a tool
for tracking of the company’s vehicles. The initial implementation as outline in this report
was only limited to real-time tracking as a foundation to adding more features in the future.
The mobile application was developed in Android Studio IDE using the Java programming
language, while the tracking device was built from the Arduino Uno and SIM808
GSM/GPS/BT shield. Firebase Realtime database was used as a database server, and PHP
was used as a script language to setup the proxy server in the Metropolia school server.
The implementation results were satisfactory with a functioning vehicle tracking system. The
tracking device was capable of tracking the vehicle’s speed and location and successfully
sending it to a database server while the Android mobile application was capable of com-
municating with the server and displaying the GPS data on the device’s google maps.
The developed tracking system can be used effectively to track the company’s vehicles.
However, it still needs more optimization and additional features to get excellent tracking
information. The product is yet to receive feedback from the other partners, but notable fu-
ture development would be to study how to improve the map representation on the mobile
application.
Keywords Android, Arduino, Firebase Realtime Database

Contents
List of Abbreviations
1 Introduction 1
2 Current State 2
3 Existing Tracking Technologies 4
4 Development Tools 6
4.1 Android Studio 6 4.2 Firebase 7 4.3 Arduino 8
5 Android Application Development 13
5.1 Android Overview and Software Stack 13 5.2 Android Application Framework and Components 16
6 Design, Implementation and Testing 22
6.1 Phase One: Design 22 6.2 Phase Two: Implementation First Cycle 22
6.2.1 Hardware Installation 23 6.2.2 Software Installation and Programming 24 6.2.3 Phase Two Testing 25
6.3 Phase Three: Implementation Second Cycle 27 6.3.1 Firebase Realtime Database 27 6.3.2 Proxy Server 28 6.3.3 Phase Three Testing 30
6.4 Phase Four: Implementation Third Cycle 31 6.5 Phase Five: Implementation Fourth Cycle 33
6.5.1 Setting up Development Environment 33 6.5.2 Login Activity 33 6.5.3 Maps Activity 35 6.5.4 Phase Five Testing 36
6.6 Phase Six: Practical Testing 37

7 Summary and Conclusions 40
References 41
Appendices
Appendix 1. Activity, Service, Broadcast Receiver and Content Provider
Appendix 2. Arduino Software Code
Appendix 3. Proxy Server PHP File
Appendix 4. Android Login Activity
Appendix 5. Android Map Activity

Glossary
API Application Programming Interface. A set of tools for building software
APK Android Package. A package file format used by Android operating system
for distribution and installation of mobile applications
AT ATtension. AT Commands are instructions used to control a modem
BT Bluetooth
GPRS General Packet Radio Service
GPS Global Positioning System
GSM Global System for Mobile communications
HTTP Hypertext Transfer Protocol
IDE Integrated Development Environment
iOS iPhone Operating System
JDK Java Development Kit. A software development environment used for de-
veloping Java applications and applets.
JSON JavaScript Object Notation
NDK Native Development Kit. A toolset used for implementing applications in
native code using C and C++
SDK Software Development Kit
UART Universal Asynchronous Receiver- Transmitter
UI User Interface

1
1 Introduction
The world has evolved and continues to evolve with technology. And this has led to tre-
mendous growth in businesses in all aspects. Particularly the mobile phone industries.
The invention of smart mobile phones has seen many companies compete to develop
and consistently improve their devices to match the new technology.
More important is the focus on the software development. All mobile devices ran on dif-
ferent software platforms i.e. Android, iOS and Windows. This has in turn led to phenom-
enal development of mobile applications especially by service providers who wish to pro-
vide their services through the mobile phone.
The goal of this project was to build a vehicle tracking system for a small logistic company
registered abroad and co-owned by the author and family. From a commercial perspec-
tive, GPS tracking continues to gain demand as businesses especially trucking compa-
nies continue to recognize its benefits. This has led to, for example, improved delivery
time and better fleet management and hence reduced inefficiencies and operation cost.
The case company currently subscribes to tracking services from Goome GPS trackers
[1]. Hence, the motivation for choosing this subject for the thesis. Although, the service
fees seem negligible at the moment, a foreseeable company’s growth in the future will
definitely be felt. Additionally, there is a flexibility to add more features to this product in
the future, but currently the product only provides GPS tracking.
This thesis has been divided into seven chapters. Chapter one introduces the purpose
of the thesis while chapters two and three gives the background of the case company
and the current technology being utilized along with other existing tracking technologies.
Chapter four introduces the development tools that were utilized in the implementation
and chapter five gives the theory on Android operating system. The step by step imple-
mentation and test results are detailed in chapter six and the report is concluded with
chapter seven.

2
2 Current State
As mentioned in the introduction, this project was proposed as a solution to try and pro-
vide a better and optimized solution to the current technology deployed by the company
associated with the author. This chapter gives a brief overview of this case company
under which the project was undertaken, the current technology and the proposed solu-
tion .
The case company is a small scale logistic company registered in the year 2015 in
Kenya. It is co-owned by the author and family members. And as such, the idea of the
project was born by the author with the intention of using the acquired technical skills to
try and provide an alternative solution to what is currently being utilized. The idea was
brought to the attention of the team members with the objective of reducing the com-
pany’s cost and providing more optimization.
Currently the company subscribes to tracking solutions from Goome GPS trackers, i.e.
a Chinese tech company that develops and manufactures GPS tracking devices for ve-
hicles, people and assets [1]. Like many other tracking solutions, their service includes
an installation of a GPS tracking device on a vehicle and a mobile application for tracking.
This comes with a one-time installation charge and yearly fee that may differ with coun-
tries.
Since the idea behind the project was to provide a cheaper and optimized alternative, a
brainstorming session was raised in one of the meetings to get an insight of the team
members opinions. The following were concluded:
- A cheaper solution was viable especially with the feasible growth of the company
- A flexible solution was needed because the current technology only provided
GPS tracking with no modification possibilities.
- There was considerable inconvenience as it relates to maintenance from the company representatives.
For this reasons, a flexible solution was suggested with the initial aim of providing a
similar GPS tracking with the possibilities of adding more features to the application in
the future such as maintenance and drivers records. With a majority of the members

3
owning an Android phone, it was concluded that the project would begin with an Android
mobile application with the possibility of developing an iOS application in the future.

4
3 Existing Tracking Technologies
In order to successfully complete the project, a general understanding of how GPS track-
ing works needed to be studied. And since the company already had a working solution,
i.e. from Goome GPS trackers, there was already a vague idea on how the project
needed to be conducted. Basically the three obvious requirements needed were: a track-
ing hardware, a server and a mobile application. This chapter gives the theory on the
existing tracking technologies that were studied.
Goome GPS Trackers
The studies began with Goome GPS Trackers since it was a known working technology
that the company was already using. When this service was ordered back in the year
2015, the company sent there field technicians who came to install the tracking hard-
ware’s on the trucks. It was followed by an office meeting where the usage training was
offered including the software downloads.
A number of vehicle tracking devices are available for sale on Goome’s website. At the
time of studying, the G19s model was their hot product. Figure 1 displays the G19s track-
ing device with its features.

5
Figure 1. G19s tracker [2].
Figure 1 displays the G19S tracking device with its tracking features which include, for
example, real-time tracking, geo-fence, trace playback, movement etc. A quick online
chat with their customer service confirmed their prices to be very reasonable and afford-
able. This comes with a free mobile application for both Android and iOS.
Auto Leaders/ Sino Track
Like Goome trackers, Sino track is a Chinese company offering similar tracking solutions.
At the time of studying, the ST-908 model was their latest tracking device. A general
comparison of the features listed on their website found their products to be similar to
Goome’s with competitive prices.
In conclusion from this and other tracking providers not documented here, it was found
that most of the available tracking solutions were very much similar and within the same
price ranges. Most of them offer a one-time payment for their tracking devices in addition
to free software applications for both the mobile and the computer. They come with user
manuals and can be posted to almost any part of the continent. Most of their hardware
is open source but not programmable. Their software is also customized and without the
possibilities of adding more features.

6
4 Development Tools
4.1 Android Studio
Android application development begins with setting up the development environment.
Although Android operating system is based on Linux, Android SDK and tools are avail-
able for all the major operating systems i.e. Mac OS, Windows and Linux. Android Studio
is the official Integrated Development Environment (IDE) for Android application devel-
opment based on IntelliJ IDEA, which offers a powerful code editor and developer tools
with enhancing features such as:
- A flexible Gradle-based build system
- A fast and feature-rich emulator
- A unified environment for developing for all Android devices
- Instant Run for pushing changes to a running application without building
a new APK
- Code templates and GitHub integration to assist in building common ap-
plication features and importing sample code
- Extensive testing tools and frameworks
- Lint tools to catch performance, usability, version compatibility, and other
problems
- C++ and NDK support
- Built-in support for Google Cloud Platform. [3]
Android Studio is freely available for download from the official Android developer home
page. It comes with installation instructions, which include a setup wizard for download-
ing the recommended Android SDK and lists the minimum system requirements for any
of the chosen operating system. Android Studio version 2.2 and higher comes bundled
with the latest OpenJDK, which is the recommended JDK version for Android projects
[4].

7
4.2 Firebase
Firebase is a backend platform for building web and mobile applications. It was launched
in April, 2012 by Tamplin and Andrew Lee, initially providing API’s for integrating online
chats to websites and now as a Baas (Backend as a Service) platform for continuously
improving the cloud experience with new features and functionalities [5].
Firebase Realtime Database
Firebase Realtime Database is a NoSQL cloud hosted database that provides storage
of data in JSON format and real-time synchronization to all connected users. Its key
capabilities include data syncing to provide live updates to connected devices unlike the
use of HTTP requests, offline response through SDK persistence of data to disk, scala-
bility across multiple databases and direct connection from either a mobile device or web
browser as it does not need an application server. In addition, it provides an expression-
based rules language i.e. Firebase Realtime Database Security Rules for defining the
data structure and read and write permissions. [6] Firebase Cloud Firestore Cloud Firestore is a NoSQL cloud-hosted document database that provides direct access
to mobile and web applications through native SDK’s. Data is stored in documents which
are organized into collections hence providing flexible, hierarchical data structures,
which in turn offers fast and simplified querying of data and automatic scaling. Additional
capabilities include; real-time listeners for syncing data across connected applications,
offline response, serverless connection and integration with other Firebase and Google
Cloud Platform (GCP). [7]
Firebase Authentication
Most applications require the identity of their users in order to securely save their data to
the cloud and avail them on any of their devices. This is achieved using FirebaseUI as a
complete drop-in auth solution or by using the Firebase Authentication SDK to manually
integrate one or more sign-in methods into the app. Firebase supports authentication of

8
users on applications using passwords, phone numbers and popular federated identities
such as Google and Facebook. [8]
Firebase Cloud Storage Cloud Storage enables application developers to store and serve user-generated con-
tent, such as photos or videos. Firebase SDKs for Cloud Storage provides robust up-
loads and downloads irrespective of network quality i.e. ensuring the client can retry the
operation right where it left off, saving the users time and bandwidth. Other capabilities
include integration with Firebase Authentication and automatic scaling. [9]
4.3 Arduino
Arduino is an open source electronic platform based on simple hardware and software.
It came into existence at the Ivrea Interaction Design Institute as a simple tool for fast
prototyping and aimed at students lacking electronic and programming backgrounds. All
Arduino boards and software are entirely open-source and can be adapted by the users
as they see fit. [10]
There currently exists many boards in the Arduino family with the most popular including
but not limited to Arduino Uno, Arduino Nano, Arduino Mega and Arduino Due. Arduino
boards use Arduino programming language as a set of instructions to read inputs and
turn them into outputs. The Arduino programming language follows the C++ code struc-
ture and is made up of Functions for controlling the Arduino board and performing com-
putations and variables for defining the Arduino data types and constants. [11]
Arduino software is available for all the major operating systems i.e. Mac, Windows and
Linux. Their boards are relatively cheaper compared to other available microcontrollers.
For this reasons among others and their simplicity, it was chosen for this project.
Arduino IDE

9
The Arduino IDE is a development platform that allows users to write different kinds of
embedded programs and upload them on to the many available Arduino boards. Arduino
IDE is available in two options:
- Online IDE: With the Arduino Web Editor, the sketches can be saved in the cloud making them available from any device. It requires a reliable internet connection
to function and the updates are automatic.
- Offline IDE: The offline IDE requires installation on to the development system.
The sketches are saved on to the local machines, and they do not require an
internet connection other than when uploading the codes to the boards. Updates
are initiated by the user. [12]
Figure 2 shows a screen shot of the Online IDE.
Figure 2. Screen shot of Arduino Web Editor.
Figure 2 displays a screenshot of the Arduino Web Editor. As observed, the IDE contains
a section of different folders which includes, for instance, libraries and examples meant

10
to guide and help in the writing of the Arduino program. Also noticeable, are the two
default functions needed for a working Arduino program:
- Setup() function: It is called once when the program is started i.e. powerup or reset of the board for initialization purposes.
- Loop() function: It is called after the Setup() function for looping purposes.
Uploading of the code to the board is quiet streamlined. One just needs to connect an
USB cable to the USB port of the Arduino from the computer, select the board/port, com-
pile the code and just save it to the board.
Arduino Shields Arduino Shields are boards that can be stacked on top of the Arduino board to further
extend its features [13]. Different kinds of shields are available on the market, both official
and unofficial and a quick search on the net yields multiple results. They provide many
features such as wireless communication in the form of GPRS or Bluetooth, additional
sensors such as GPS and much more.
SIM808 module
SIM808 module is one of the latest Arduino shields used in this project that supports
GSM/GPRS Quad-Band network and uses GPS technology to achieve satellite naviga-
tion. The key features include 850/900/1800/1900 MHz Quad-band, support for Blue-
tooth 4.0, high GPS receive sensitivity and support for A-GPS for indoor localization. [14]
Figure 3 displays a snapshot of the SIM808 module with the integrated GSM, GPS and
BT chips.

11
Figure 3. Snapshot of SIM808 module
As illustrated in Figure 3, the SIM808 module is integrated with the GSM, GPS and BT
chips and their functionalities can be achieved by connecting them to their respective
antennas.
SIM808 is controlled by AT (ATtension) commands through UART protocol to communi-
cate with an Arduino as seen in Figure 4.

12
Figure 4. SIM808 shield communication port [14].
In Figure 4, hardware and software serial communication is enabled either through pins
D0 and D1 or pins D7 and D8 of the Arduino, respectively. SIM808 shield was chosen
for this particular project as it provided the needed capabilities of GSM and GPS com-
munication. They are also relatively cheap and available and have a wealth of libraries.
Arduino Uno Arduino Uno is one of the Arduino’s microcontroller boards that is based on ATmega328,
and consisting of 14 digital input/output pins, 6 analog inputs, USB connection, power
jack and a reset button among other features. It is the reference model of the Arduino
platform having been the first in a series of USB Arduino boards. [15]
It is the most robust and the most documented board of the Arduino family [15]. For this
reason and the cost, it was chosen for this particular project. It is powered through an
USB connection or an external battery and like the other boards, uses serial communi-
cation with the computer or other devices.

13
5 Android Application Development
A vast amount of free online information is available for Android application development
from various web sites and forums including but not limited to Google’s detailed devel-
oper guide. This section details the background of Android operating systems history
and core topics.
5.1 Android Overview and Software Stack
Android is a Linux based mobile operating system originally developed by a startup with
the same name. In 2005 Android Inc was acquired by Google along with its development
team. Most of its code was released under the open source Apache License as it was
Google’s intention to make it open and free. This together with the ability to customize
through addition of one’s own proprietary extensions made it attractive to hardware man-
ufacturers. [16, p. 2]
T-Mobile G1 was the first Android mobile handset with the first version of Android oper-
ating system released in the United States in October 2008. It has since undergone major
transformation with the current version as of October 2018 being the Android 9 Pie. The
initial version Android 1.0 included the common features like pull-down notifications, con-
tent sharing across applications and multitasking between applications but lacking ad-
vanced features such as voice search and turn-by-turn navigation which are now fea-
tured in the Android 9 Pie. The earlier versions included Cupcake (Android 1.5), Donut
(Android 1.6), Éclair (Android 2.0), Froyo (Android 2.2), Gingerbread (Android 2.3), Hon-
eycomb (Android 3.0), Ice Cream Sandwich (Android 4.0), Jelly Bean (Android 4.1), Kit-
Kat (Android 4.4), Lollipop (Android 5.0), Marshmallow (Android 6.0), Nougat (Android
7.0), Oreo (Android 8.0). [17, p. 11 ; 18].
Figure 5 displays the earliest and most recent Android handsets as of 2019.

14
Figure 5. T-Mobile G1 with the first Android version 1.0 (left) and Samsung S10 with the
latest version Android 9 Pie (right) [19; 20].
Figure 5 shows the contrast between the first and the latest android handsets with their
respective versions. The device on the left is the T-Mobile G1 earlier released in 2008
adopting the very first Android operating system – Android 1.0 while the device on the
right is the latest Samsung S10 recently released and running on the Android 9 Pie. The
Pie emphasizes the power of Artificial Intelligence (AI) with noticeable changes being the
removal of the three-button navigation setup from its predecessors. There are currently
many Android devices in Market including but not limited to Smartphones, Tablets, E-
readers, Internet TV’S, Automobiles and Smartwatches.
The Android operating system is simplified as a Linux kernel and a collection of C/C++
libraries exposed through an application framework that provides services for, and man-
agement of, the run time and applications. Its elements of composition are discussed
below: [17, p. 15]
- Linux kernel: Linux 2.6 kernel handles the core services such as hardware
drivers, process and memory management, security, network, and power man-
agement in addition to providing an abstraction layer between the hardware and
the remainder of the stack.

15
- Libraries: This layer runs on top of the kernel and includes C/C++ core libraries
such as libc and SSL. In addition is a media library for audio and video media
playback, a surface manager for display management, graphic libraries for 2D
and 3D graphics, SQLite for native database support and SSL and WebKit for
integrated web browser and Internet security.
- Android run time: The Android run time, along with the core libraries and the
Dalvik VM forms the basis for the application framework by powering the appli-
cations. The core libraries provide most of the functionality available in the core
Java libraries in addition to Android specific libraries. While Dalvik is a register-
based Virtual Machine optimized to ensure that a device can run multiple in-
stances efficiently by relying on the Linux kernel for threading and low-level
memory management.
- Application framework: The application framework provides the classes for
creating Android applications in addition to generic abstraction for hardware ac-
cess and managing the user interface and application resources. [17, p. 15]
Figure 6 displays all of these components stack together to form the complete frame-
work.

16
Figure 6. Android Software Stack [17, p. 16].
Figure 6 illustrates the different components discussed above as they are stacked on
one another to form the complete Android Software architecture.
5.2 Android Application Framework and Components
The Application Framework layer provides Java classes to be used by the developer in
designing and building applications. Component reuse being a key feature in Android’s
architecture enables a developer to publish and share activities, services, and data be-
tween applications. The Android framework is consists of the following key application
services: [17, p. 17 ; 21]
- Activity Manager controls the lifecycle of applications and manages the activity
stack.
- Content Providers allows sharing of data between applications.

17
- Resource Manager provides access to non-code resources such as strings,
graphics and user interface layouts.
- Notification Manager enables applications to send alerts and notifications to
the user
- View System contains a set of views to be used for creating user interfaces for
applications.
- Intents provides a mechanism for transferring data between applications and their components. [17, p. 17 ; 21]
Application components are loosely linked by the application manifest file AndroidMan-ifest.xml which gives a description of each component and how they interact. All Android
applications have the manifest file which declares essential information to the Android
platform it needs to know to successfully run the application. Among others, the decla-
ration include the minimum API level, hardware/software features and permissions re-
quired by the application. [22 ; 23, p. 12]
Activities An activity represents a single screen with a user interface through which a user can
interact with the application. A single application can be composed of many activities in
which one should be marked as the activity that is presented when the application is
launched. For instance, an email application might have one activity showing a list of
new emails, another activity for composing an email, and another activity for reading
emails. An activity is implemented as a subclass of Activity class as shown in Appendix
1. [22 ; 23, p. 12]
The life cycle of an activity
The Activity instances in the application transition through different states of their lifecycle
as the user flips through the application. The Activity class provides a number of call
backs that allows the activity to be aware of their state transitions i.e. that the system is
creating, stopping, or resuming an activity, or destroying the process in which the activity
resides. The behaviour of an activity when the user leaves and re-enters the activity can
be declared within the lifecycle call back methods. For instance, when building a

18
streaming video player, the video can be paused and the network connection terminated
when the user switches to another application, which will then be reconnected when the
user returns allowing the video to resume from the same spot. [24]
Figure 7 provides a graphical view of an activity lifecycle.
Figure 7. Activity lifecycle [24].

19
Figure 7 illustrates a set of core call back methods used by an activity to transition be-
tween the different stages of its lifecycle. Although they all do not have to be always
implemented, they provide developers a platform to achieve the desired user expecta-
tions through various processes as discussed below:
- onCreate() is a call back method that should always be implemented. It is called when an activity is first created i.e. from a user choosing to start an appli-
cation. Basic application start up logic that should only happen once for its en-
tire life are performed here. For instance, creating views, initializing variables
and binding data to lists. After its execution, the system calls the onStart() and
onResume() methods in quick succession to enter the Started state as an activ-
ity does not reside in Created state. Any lifecycle-aware component tied to the
activity’s lifecycle in the Created state also receives the ON_CREATE event.
- onStart() is invoked after the onCreate and just before an activity is visible to the user [23,14]. Through this call, the application prepares the activity to be
visible and interactive to the user for instance by initializing the code that main-
tain the UI. Any lifecycle-aware component tied to the activity’s lifecycle in the
Started state also receives the ON_START event. Once completed, the activity
enters the Resumed state has it neither resides in the Started state, and the
system invokes the onResume() method.
- onResume() is invoked once the activity enters the Resumed state and be-comes visible to the user. The application remains in this state until otherwise
something happens e.g. receiving a phone call. An interruptive event moves the
activity to the Paused state and the system invokes the onPause() method. Any
lifecycle-aware component tied to the activity’s lifecycle in this state receives
the ON_RESUME event.
- onPause() is invoked when an activity’s view becomes partially blocked and is no longer the focus of input [23,14] . The activity remains in this state until it ei-
ther resumes by invoking the onResume() method or becomes completely invis-
ible by invoking the onStop() callback. Any lifecycle-aware component tied to
the activity’s lifecycle in this state receives the ON_PAUSE event.
- onStop() is called once the activity moves to the Stopped state and becomes invisible to the user. From this state, the activity either reappears and the sys-
tem invokes onRestart or is finished and the system invokes onDestroy() . Any

20
lifecycle-aware component tied to the activity’s lifecycle in this state receives
the ON_STOP event.
- onRestart() is called after the onStop() when the current activity is being re-dis-played i.e. the user navigating back. It is followed by onStart() and onResume()
successively [25].
- onDestroy() is the final call before the activity is destroyed. The system invokes
this callback either because the activity is finishing (the user completely ending
the activity) or the system is temporarily destroying the activity due to a configu-
ration change (e.g. device rotation). Any lifecycle-aware component tied to the
activity’s lifecycle in this state also receives the ON_DESTROY event. [24]
Services
Services are application components lacking the user interface and running in the back-
ground. They can perform the same actions as activities but without the user interface
and are useful for long-running operations. For example, a service might play music in
the background while the user flips through different applications. A service is imple-
mented as a subclass of Service class as shown in Appendix 1. [22 ; 26, p. 31-32]
Broadcast Receivers
Broadcast Receivers are application components without the user interface that simply
respond to broadcast messages from either other applications or from the system, for
example, a system initiated broadcast due to low battery or an incoming call. A broadcast
receiver is implemented as a subclass of Broadcast Receiver class and each message
is broadcaster as an Intent object as shown on Appendix 1. [22 ; 23, p. 18]
Content Providers
Content Providers are application components that provide interfaces for sharing data
between applications. For example, the Contact application uses Contacts Provider to
retrieve data about user’s contacts. The Contacts application itself does not have any
contacts data, and the Contacts Provider does not have any user interface. It is imple-
mented as a subclass of Content Provider as shown in Appendix 1. [22 ; 26, p. 32-33]

21
Intents Intents are messaging objects used to communicate between application components.
The fundamental use cases are starting an activity, starting a service and delivering a
broadcast. They can either be Explicit intents, i.e. they specify the application that will
perform the action, or Implicit intents, i.e. they declare a general action to perform
without specifying any component. [27]

22
6 Design, Implementation and Testing
This chapter describes the step by step development cycle of the software and hardware,
from the design stages up until completion of the entire project.
6.1 Phase One: Design
The initial stage of the implementation began with the design of the visual layout of the
desired end product. This was used as the basis of determining the hardware and soft-
ware requirements and the visual logic needed for the implementation. The design chart
in Figure 8 illustrates the process flow of the project.
Figure 8. Project design as a process flow chart.
Figure 8 illustrates the logic and process flow of the desired end product. The tracking
device would be responsible for tracking the location and speed of the vehicle and send-
ing it to a server. The server would then store the data and avail them on request to the
mobile application. Finally the mobile application would provide an interface for viewing
the tracking information of the vehicle.
Before beginning to implement the design, certain requirements were set. The mobile
application needed to be user friendly and easy to use and the cost needed to be kept
as low as possible. For this reasons, two variables were chosen to be tracked: vehicle
speed and location (latitude and longitude).
6.2 Phase Two: Implementation First Cycle
The first cycle of the implementation began with the design and building of the tracking
device. The hardware and software tools needed to achieve this, as discussed on
Mobile Ap-
plication Server Tracking
Device

23
chapter 4 were chosen on the basis of the minimum variables set in Phase One of the
implementation i.e. vehicle speed and location.
6.2.1 Hardware Installation
The hardware tools needed are listed below:
- Arduino Uno,
- SIM808 shield with GSM and GPS antennas and 3 V lithium battery
- 9 V battery
- USB cable
- SIM card
Figure 9 displays the complete hardware installation of Arduino Uno stacked with SIM808
shield.
Figure 9. Arduino Uno with SIM808 shield.
The installation as shown in Figure 9 was pretty straightforward with the help of the user
guide. The SIM card was unlocked and inserted on to the SIM card holder, the GSM and
24
GPS antennas were connected, the 3V lithium battery was inserted on the battery holder,
then finally stacked on top of the Arduino Uno. The 9V battery was left for the final instal-
lation as the USB cable used for programming provided power supply needed for the
initial set up and testing.
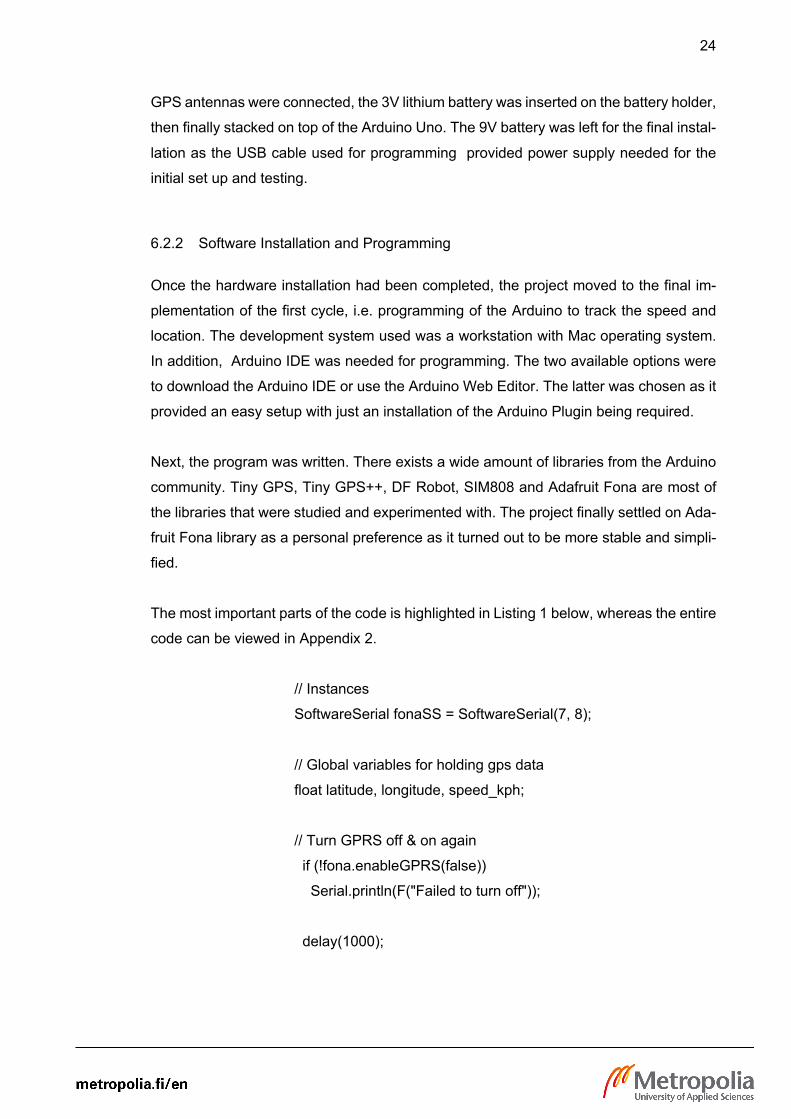
6.2.2 Software Installation and Programming
Once the hardware installation had been completed, the project moved to the final im-
plementation of the first cycle, i.e. programming of the Arduino to track the speed and
location. The development system used was a workstation with Mac operating system.
In addition, Arduino IDE was needed for programming. The two available options were
to download the Arduino IDE or use the Arduino Web Editor. The latter was chosen as it
provided an easy setup with just an installation of the Arduino Plugin being required.
Next, the program was written. There exists a wide amount of libraries from the Arduino
community. Tiny GPS, Tiny GPS++, DF Robot, SIM808 and Adafruit Fona are most of
the libraries that were studied and experimented with. The project finally settled on Ada-
fruit Fona library as a personal preference as it turned out to be more stable and simpli-
fied.
The most important parts of the code is highlighted in Listing 1 below, whereas the entire
code can be viewed in Appendix 2.
// Instances
SoftwareSerial fonaSS = SoftwareSerial(7, 8);
// Global variables for holding gps data
float latitude, longitude, speed_kph;
// Turn GPRS off & on again
if (!fona.enableGPRS(false))
Serial.println(F("Failed to turn off"));
delay(1000);

25
if (!fona.enableGPRS(true))
Serial.println(F("Failed to turn on"));
delay(1000);
boolean gps_success = fona.getGPS(&latitude, &longitude,
&speed_kph);
Listing 1. Section of the code for initializing and enabling GPRS.
As it can been observed from Listing 1, Software serial communication was enabled with
pins 7 and 8 as RX and TX respectively. Global variables for holding the GPS data were
declared as floating values, and finally the GPRS was enabled. The last line of code
was used inside the getGPS() function to retrieve the GPS data i.e. latitude, longitude
and speed.
6.2.3 Phase Two Testing
The first cycle was concluded with testing of the code on the serial monitor of the Arduino
IDE. This was achieved by connecting the Arduino to the computer with an USB cable
and switched ON with the ON/OFF button. The baud rate on the monitor was selected
to match the baud rate in the code i.e. the recommended 19200 bps. The code was then
compiled and after fixing of the errors was uploaded to the board. Figure 10 displays a
section of the results on the serial monitor.
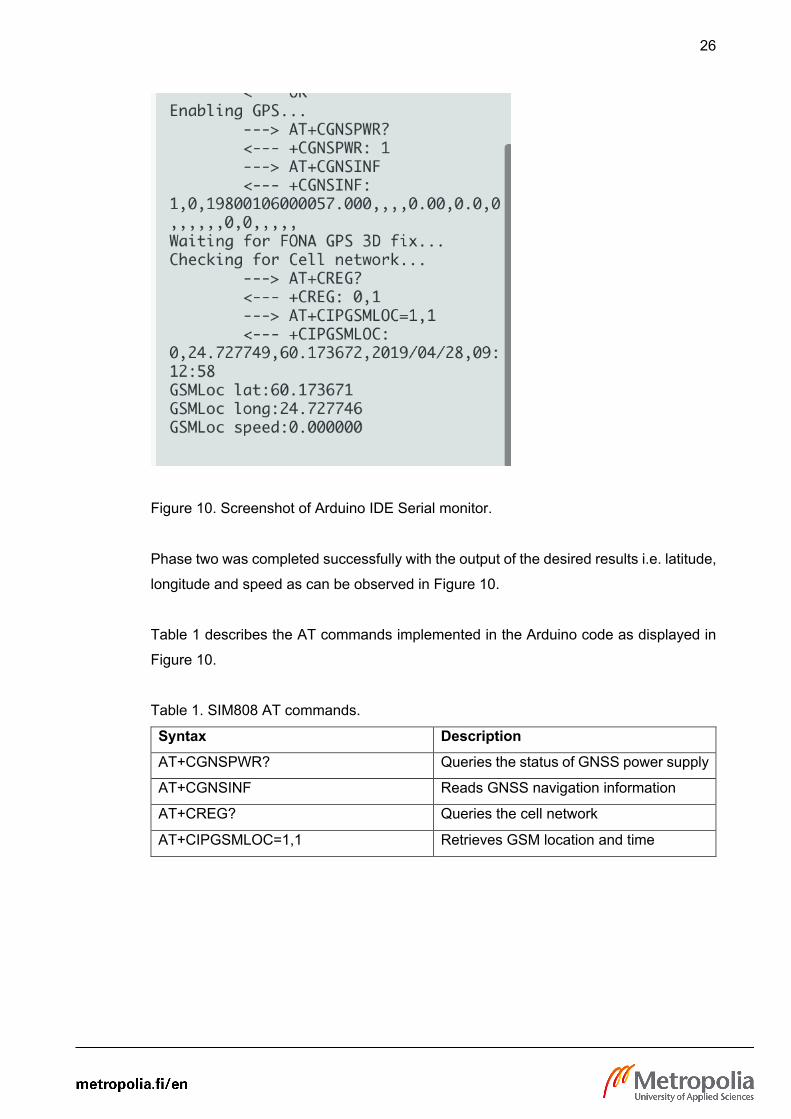
26
Figure 10. Screenshot of Arduino IDE Serial monitor.
Phase two was completed successfully with the output of the desired results i.e. latitude,
longitude and speed as can be observed in Figure 10.
Table 1 describes the AT commands implemented in the Arduino code as displayed in
Figure 10.
Table 1. SIM808 AT commands.
Syntax Description AT+CGNSPWR? Queries the status of GNSS power supply
AT+CGNSINF Reads GNSS navigation information
AT+CREG? Queries the cell network
AT+CIPGSMLOC=1,1 Retrieves GSM location and time

27
The Arduino software implemented AT commands as described in Table 1 to enable the
GPS and used the Serial.println() function to output the results to the serial monitor
mainly for debugging purposes.
6.3 Phase Three: Implementation Second Cycle
The implementation of the second Cycle was to setup the Server, which in this case was
the Firebase database so that it could receive GPS data from the Arduino tracking de-
vice.
6.3.1 Firebase Realtime Database
The two available options discussed in chapter 4.2 were Firebase Realtime database
and Cloud Firestore. The project opted to use the Realtime database as the latter was
still in beta stage.
The sign up and configuration follows the user guide and is not detailed in this report.
Figure 11 displays an overview of the Firebase Realtime Database.

28
Figure 11. Screenshot of Firebase Realtime Database.
The read and write permissions are set in the Rules section and data is accessed in the
Data section as seen in Figure 11. Noticeable, is also the URL link for accessing the
database. Firebase Authentication, also briefly discussed in chapter 4.2 was used to
authenticate the database using the email and password.
6.3.2 Proxy Server
The next task was to establish the HTTPS connection between the database and the
Arduino tracking device in order to transmit the GPS data. However, it was realised that
Arduino only supported HTTP communication while the Firebase accepted only HTTPS
requests. This necessitated building of a proxy server to provide the linkage.
The design chart in Figure 12 illustrates the updated process flow of the project with the
proxy server included.
Figure 12. Project design as a process flow chart with the proxy server included.
As illustrated in Figure 12, the Arduino sends the GPS data using HTTP to the proxy
server. The proxy server in turn forwards the data using HTTPS to the Firebase Realtime
Database. And finally it is accessed via the Android application on the mobile phone.
Firebase has third party libraries in different programming languages for creating an in-
terface to interact with the Firebase REST API (Representational State Transfer Appli-
cation program interface that uses HTTP requests to modify data). Listing 2 shows a part
of the PHP file implemented using the Firebase PHP library to create an interface for
Mobile Ap-
plication
Firebase
Realtime Proxy Ser-
ver
Arduino +
SIM808

29
linking the Firebase to the Arduino. The entire PHP library file can be viewed from Ap-
pendix 3.
//Connect to firebase / secret contains the credentials $acc = ServiceAccount::fromJsonFile( '../../secret/trackme.json'); // Write data to firebase using Push method public function insert(array $data) { if (empty($data) || !isset($data)) { return FALSE; } $ref = $this->database->getReference()->getChild($this->dbname)->push($data); return $ref->getKey(); }
Listing 2. Section code of the PHP file for connecting to Firebase database
As observed from Listing 2, HTTPS request was achieved by appending .json at the end
of the Firebase Realtime Database URL. Data was then written using the PUSH method.
Notice that ‘secret’ folder contained the firebase credentials.
The setup of the proxy server was concluded by hosting the created PHP file in the
personal home drive of Metropolia’s school server. This was uploaded into the pub-lic_html folder as seen in Figure 13.
Figure 13. Screenshot of school personal home drive.

30
Figure 13 shows the Firebase PHP file named ‘firebaselib.php’ in addition to the vendor
directory hosted in the personal home drive. The vendor directory not discussed in the
report contained the Composer and the PHP autoload used in creating the Firebase li-
brary file.
6.3.3 Phase Three Testing
The second cycle of the implementation was concluded by testing the communication
between the proxy server and the Firebase Realtime database. This was achieved by
manually entering random values for the GPS data within the URL link: http://us-
ers.metropolia.fi/~peterkip/v2/firebaselib.php?deviceid=ABC-
123&lat=56.045326&lon=48.33487&speed=85 and checking the database if it was reg-
istering the same values.
Figure 14 shows the expected updates on the Firebase Realtime database.
Figure 14. Firebase Realtime Database update.
The random values entered in the URL link above i.e. latitude (lat = 56.045326), longi-
tude (lon= 48.33487) and speed (speed= 85) were updated on real time on the database
as seen in Figure 13. This concluded phase three with success.

31
6.4 Phase Four: Implementation Third Cycle
Having setup and configured the connection between the Firebase Realtime database
and the proxy server, the third cycle implemented a connection between the proxy server
and the Arduino tracking device. This was achieved with additional programming of the
Arduino using the Fona library code as seen in Appendix 2. Notice, that the Fona library
code has example implementations for SMS response and incoming call response in
addition to GPS tracking. Further capabilities can be achieved through modifications by
the programmer.
Listing 3 highlights part of the code used inside the sendToFirebase() function in Ap-
pendix 2.
//build the URL to the proxy
String url = "http://users.metropolia.fi/~peterkip/v2/firebaselib.php?/";
url += "&deviceid=";
url += String(deviceid);
url += "&lat=";
url += String(latitude);
url += "&lon=";
url += String(longitude);
url += "&speed=";
url += String(speed_kph);
Listing 3. URL link to proxy server.
Listing 3 illustrates how the URL link was built. Device id which can also be the vehicle
registration was appended to the base URL together with the GPS data. This was then
used by the Fona library to implement AT commands earlier introduced in phase two, to
establish HTTP connection between the tracking device and the proxy server and send
the GET request.
Phase Four Testing

32
The third cycle was concluded by testing the Arduino code and checking the database
for data updates. This was achieved using an USB cable and the setup procedure dis-
cussed in phase two testing.
Figure 15 displays a section of the results printed on the Arduino serial monitor.
Figure 15. Arduino output.
Phase four was completed successfully with the output of the expected results as dis-
played in Figure 15. The status code of 200 confirmed a successful GET request which
was also double checked against the data in the database. The serial monitor also dis-
plays the AT commands implemented in the Fona library.

33
6.5 Phase Five: Implementation Fourth Cycle
So far, the system had been tested to function up to the server. Next, was the fourth
cycle implementation which was also the final implementation of the project. The focus
here was to design and build the Android application and connect it to the Firebase.
Taking into consideration, the tracking information stored in the database and what was
expected to be displayed to the user, the application settled on two Activities: Login Ac-
tivity for authentication and Map Activity for displaying the GPS data (location and
speed).
6.5.1 Setting up Development Environment
Android Studio earlier introduced in chapter 4.1 was used as the development environ-
ment for the Android application. The Mac OS also earlier mentioned in phase two of
the implementation was used as the development system. It is worth noting that the An-
droid Studio was already pre-installed in the development system from a previous An-
droid course and as such it was only updated to the newest version i.e. version 3.4.
The Android studio also had an emulator already pre-configured i.e. Nexus 5. However,
the author already owned an Android phone i.e. Huawei P smart and as such it was
preferred for this project. Connecting this phone to the Android studio was pretty straight-
forward with just an installation of the USB drivers in the development system and ena-
bling of USB debugging from the phone’s settings.
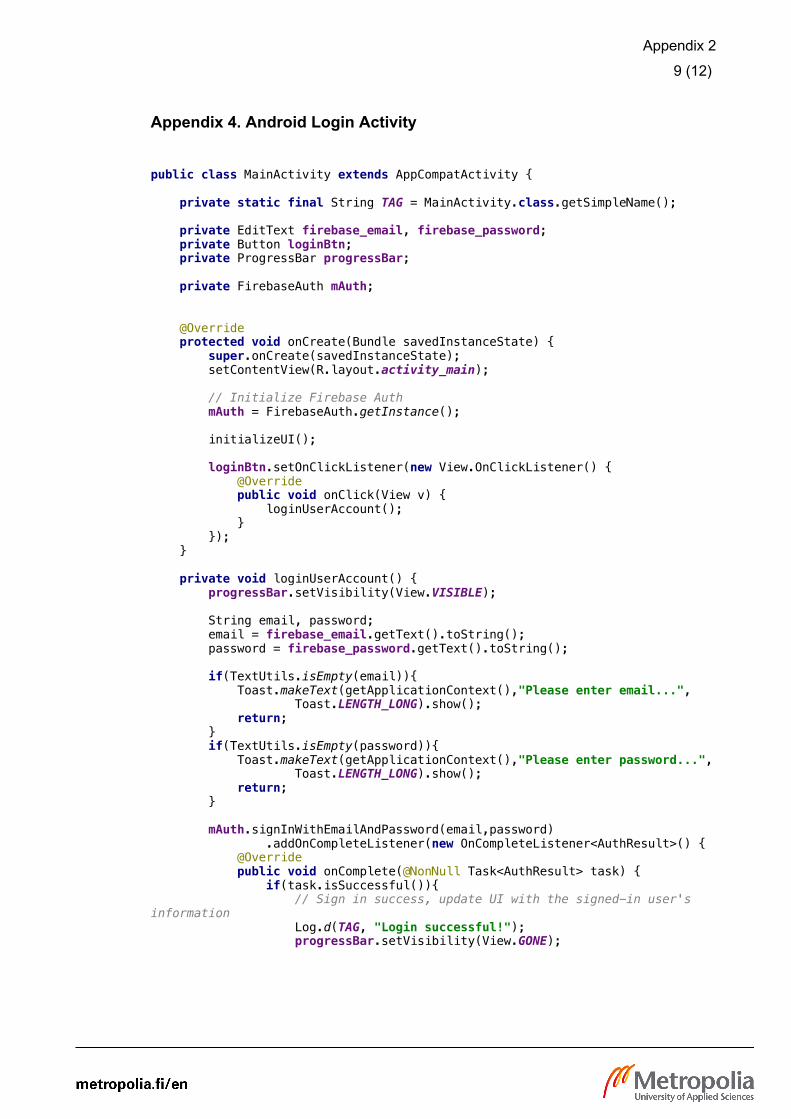
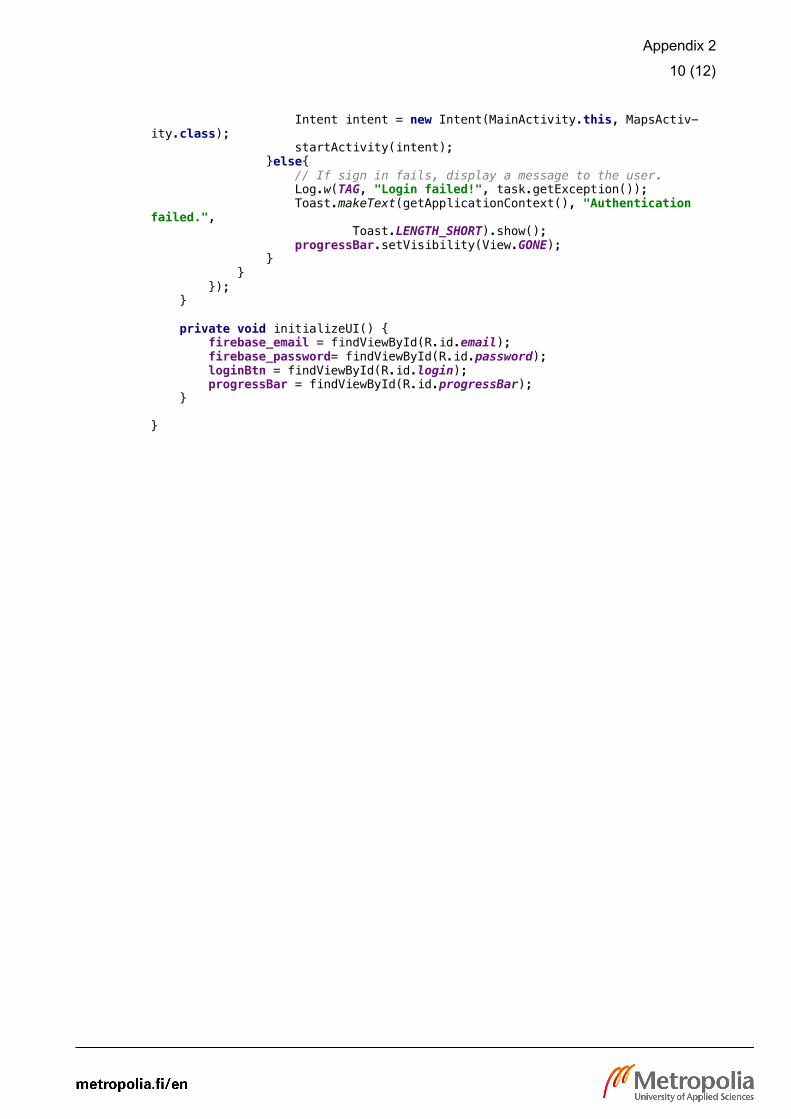
6.5.2 Login Activity
Login Activity was implemented as the user interface of the application i.e. the main ac-
tivity of the application. This was responsible for the following:
- Taking the user credentials for authentication
- Calling the Map activity on successful authentication.
This was achieved by implementing Firebase Authentication as discussed in chapter 4.2
using “email” and “password”.

34
Android Studio comes with Firebase assistant window under the ‘Tools’ section. This
provided an easy setup wizard. Although not detailed in this report, the email and pass-
word authentication was selected from the Authentication feature, together with Realtime
database then connected to Firebase.
Figure 16 displays the Login page of the application on Huawei P smart mobile phone.
Figure 16. Login page
Figure 16 displays the login page of the application requiring email and password. This
was implemented using Edit Text fields and a button with onClick listener. The entire
Java code is detailed in Appendix 4 excluding the XML file.

35
6.5.3 Maps Activity
Maps Acivity was the second activity of the application responsible for displaying the
Map with the GPS location and speed. The activity used markers to display the location
on Google map and Text View to display the speed.
The activity implemented OnMapReadyCallback library among other libraries and func-
tions as detailed in Appendix 5. Listing 4 highlights part of the java code as implemented
on Android Studio.
@Override //calls the Google maps when ready public void onMapReady(GoogleMap googleMap) { mMap = googleMap; mMap.setMaxZoomPreference(20); onLocationChange(); } //Listens to Firebase for updates and displays the data upon updates private void onLocationChange() { DatabaseReference reference = FirebaseDatabase.getInstance().getRefer-ence("gps"); reference.addChildEventListener(new ChildEventListener() { @Override public void onChildAdded(DataSnapshot dataSnapshot, String previ-ousChildName) { //Clear previous markers mMap.clear(); //Set marker to currentLocation setmMarkers(dataSnapshot); } @Override public void onChildChanged(DataSnapshot dataSnapshot, String previ-ousChildName) { //Set marker on the updated location setmMarkers(dataSnapshot); } Listing 4. Functions for calling google map.
Listing 4 illustrates the main functions implemented on Android Studio to successfully
call the google map with the GPS data. The OnMapReady() function displays the google
map when it is ready and available and calls the onLocationChange function. The on-
LocationChange() function is tasked with listening to Firebase for updates, upon which it
calls the setMarker() function to insert the markers on the Map and display the speed on
the Text View field.

36
6.5.4 Phase Five Testing
Like all the other implementation cycles, Phase Five was concluded with testing of the
Android application. This was done using a Huawei mobile phone that was already con-
figured to the Android Studio. Running the application on Android Studio while the phone
is connected to the computer with an USB cable installs the application on the phone.
Figure 17 illustrates the testing of the application.
Figure 17. GPS tracking application

37
Figure 17 illustrates how the application was tested and the results. This was verified
from the data stored in the Firebase Realtime database. To achieve this, the database
was first populated with random GPS data and a random user was registered using a
random email and password. Entering the correct credentials and clicking the login but-
ton would then display the map with the latest GPS data as stored in the database while
wrong credentials would toast a failed login message.
6.6 Phase Six: Practical Testing
The project had now reached the final milestone and was ready to be deployed for prac-
tical use. As mentioned before, the intention so far had been to track the location and
speed of the vehicle, and all the preceding test results had proven that the system was
functioning as expected. However, so far all the tests had been done with the device
connected to the computer and with random generated data. The final phase, therefore,
was to confirm this results with a practical test of the product.
Unlike the previous tests, this time the Arduino tracking device was disconnected from
the computer and powered with the 9V lithium battery. The pre-requisites were the sim
card had to have some active data, and the Huawei mobile phone needed to have access
to the internet. With the help of a friend, the system was placed inside a car and a small
test drive was done while the application was open.
Figure 18 displays the GPS location and speed as viewed on the Map activity of the
application and the phone’s location on google map.

38
Figure 18. Map page of the application (left) vs google map location (right).
The images displayed in Figure 18 captures the same instances as viewed from the
same phone on both the map activity of the application and the google map current lo-
cation.
The Map activity of the application uses red markers and text to display the current GPS
location and speed respectively. This data was then compared to the google map current
location and driving speed of the car. Notice that the images displayed above were cap-
tured while the car was stationary i.e. speed reading of 0.0 km/hr.
The results displayed in Figure 18 confirms that the system is working as designed. How-
ever, the GPS accuracy has not been achieved. Also worth noting is that the speed

39
reading were mostly inaccurate especially when the car was in motion. In some instances
a speed of over 50km/h was recorded, and yet the car had been stopped.
It is also worth noting that the Arduino tracker had been set to a 10 second delay and
SIM808 automatically selected the position sampling frequency from the four available
frequency bands as mentioned in chapter 4.3 (850/900/1800/1900 MHz). These were
some the factors attributed to the inaccurate GPS readings.

40
7 Summary and Conclusions
The overall outcome of the project was successful. The tracking device built from the
Arduino and SIM808 shield is capable of tracking the vehicle’s speed and location, and
sending it to the database, while the Android application developed is capable of display-
ing this data as initially intended.
However, the accuracy of the GPS results is still not met. From the final results noted in
chapter 6, there was a big variation in the GPS data especially the speed. It is assumed
that this inaccuracy might be attributed to the sensitivity of the GSM module and the
position sampling frequency. Additionally, the location variables (latitude and longitude)
were retrieved as double variables in the Android application. For this reason, it is as-
sumed that floating variables might provide more location precision in the future.
The objective of the project was to build an Android vehicle tracking system to be used
as a monitoring tool for the company’s vehicles. Judging by the results, it can be con-
cluded that this goal has been successfully achieved upon completion of this project. The
Android application is very easy to use and the tracking device can easily be installed on
the vehicle.
The whole experience has been positive with many lessons learnt concerning time man-
agement and expectations. If this was to be repeated, then definitely better planning and
more research on the topic would have to be undertaken before embarking on the pro-
ject.
In conclusion, the project has achieved its purpose by providing a functional Arduino
vehicle tracking device and an Android mobile application as a final product. This can
already be utilized by the company. However, this application is not fully developed to its
potential, and due to the deadline of this report, the assumptions noted above are left to
be studied and implemented later. In addition, further studies are needed for better rep-
resentation of the GPS data on the map.

41
References
1. Shangai Gumi Industrial Co. Ltd [Internet]. Goomegpstracker.com. 2019 [cited 27 March 2019]. Available from: http://www.goomegpstracker.com/COM-PANY/About-Us/About-Us.html
2. G19S GPS Tracker [Internet]. Goomegpstracker.com. 2019 [cited 28 March 2019]. Available from: http://www.goomegpstracker.com/PRODUCT/Vehicle-GPS-Tracker/car-gps-tracker/33.html
3. Meet Android Studio [Internet]. Developer.android.com. 2019 [cited 15 March 2019]. Available from: https://developer.android.com/studio/intro
4. Configure Android Studio [Internet]. Developer.android.com. 2019 [cited 15
March 2019]. Available from: https://developer.android.com/studio/intro/studio-config
5. Kumar A. Mastering Firebase For Android Development [Internet]. Chaudhari K, Raman R, Carneiro F, Sunilkumar S, Editing S. Birmingham: Packt Publishing Ltd; June 2018 [cited 20 March 2019]. Available from: https://books.google.fi/books?id=RMNiDwAAQBAJ&printsec=frontcover&dq=in-title:Mastering+Firebase+for+Android+Development+:+Build+Real-Time,+Scal-able,+and+Cloud-enabled+Android+Apps+with+Fire-base&hl=en&sa=X&ved=0ahUKEwiziJbG-ZDhAhWE16YKHduYB34Q6AEIK-TAA#v=onepage&q=intitle%3AMastering%20Firebase%20for%20An-droid%20Development%20%3A%20Build%20Real-Time%2C%20Scala-ble%2C%20and%20Cloud-enabled%20Android%20Apps%20with%20Fire-base&f=false
6. Firebase Realtime Database [Internet]. Firebase.google.com. 2019 [cited 20
March 2019]. Available from: https://firebase.google.com/docs/database/
7. Cloud Firestore [Internet]. Firebase.google.com. 2019 [cited 20 March 2019]. Available from: https://firebase.google.com/docs/firestore/
8. Firebase Authentication [Internet]. Firebase.google.com. 2019 [cited 15 March
2019]. Available from: https://firebase.google.com/docs/auth/
9. Cloud Storage [Internet]. Firebase.google.com. 2019 [cited 15 March 2019]. Available from: https://firebase.google.com/docs/storage/
10. What is Arduino? [Internet]. Arduino.cc. 2019 [cited 23 April 2019]. Available from: https://www.arduino.cc/en/Guide/Introduction

42
11. Language Reference [Internet]. Arduino.cc. 2019 [cited 23 April 2019]. Available from: https://www.arduino.cc/reference/en/
12. Getting Started with Arduino and Genuino Products [Internet]. Arduino.cc. 2019 [cited 23 April 2019]. Available from: https://www.arduino.cc/en/Guide/HomeP-age
13. Shields [Internet]. Arduino.cc. 2019 [cited 24 April 2019]. Available from: https://www.arduino.cc/en/Main/arduinoShields
14. SIM808 GPRS/GSM+GPS Shield v2.0 [Internet]. Elecrow.com. 2019 [cited 25 April 2019]. Available from: https://www.elecrow.com/wiki/index.php?ti-tle=SIM808_GPRS/GSM%2BGPS_Shield_v2.0#Resources
15. Arduino Uno Rev3 [Internet]. Arduino.cc. 2019 [cited 24 March 2019]. Available
from: https://store.arduino.cc/arduino-uno-rev3
16. Lee W-M, DiMarzio J.F. Beginning Android Programming with Android Studio [Internet]. 4th ed. John Wiley & Sons, Incorporated; October 2016 [cited 7 March 2019]. Available from: https://ebookcentral.proquest.com/lib/metropolia-ebooks/reader.action?docID=4714030
17. Meier R. Professional Android 4 Application Development [Internet]. 3rd ed. John Wiley & Sons, Incorporated; April 2012 [cited 9 March 2019]. Available from: https://ebookcentral.proquest.com/lib/metropolia-ebooks/detail.action?do-cID=818033
18. Celebrating a Sweet Decade of Android [Internet]. Blog.google.com. 2019 [cited 9 March 2019]. Available from: https://blog.google/products/android/celebrating-sweet-decade-android/
19. Android: A 10-Year Visual History [Internet]. Theverge.com 2019 [cited 9 March 2019]. Available from: https://www.theverge.com/2011/12/7/2585779/an-droid-10th-anniversary-google-history-pie-oreo-nougat-cupcake
20. Galaxy S10e|S10|S10+ [Internet]. Samsung.com. 2019 [cited 9 March 2019]. Available from: https://www.samsung.com/fi/smartphones/galaxy-s10/buy/
21. Android – Architecture [Internet]. Tutorialspoint.com. 2019 [cited 11 March
2019]. Available from: https://www.tutorialspoint.com/android/android_architec-ture.htm
22. Android – Application Components [Internet]. Tutorialspoint.com. 2019 [cited 13 March 2019]. Available from: https://www.tutorialspoint.com/android/an-droid_application_components.htm

43
23. Panigrahy N. Xamarin Mobile Application Development for Android [Internet]. 2nd ed. Birmingham: Packt Publishing Ltd; August 2015 [cited 13 March 2019]. Available from: https://books.google.fi/books?id=3bVrCgAAQBAJ&printsec=frontcover&dq=inti-tle:Xamarin+Mobile+Application+Development+for+Android+-+Second+Edi-tion&hl=en&sa=X&ved=0ahUKEwiUs6DavfTgAhWd6KYKHS9sDMQQ6AEIK-TAA#v=onepage&q&f=false
24. Understand The Activity Lifecycle [Internet]. Developer.android.com. 2019 [cited 13 March 2019]. Available from: https://developer.android.com/guide/compo-nents/activities/activity-lifecycle
25. OnRestart [Internet]. Developer.android.com. 2019 [cited 14 March 2019].
Available from: https://developer.android.com/reference/android/app/Activ-ity.html#onRestart()
26. Gargenta M. Learning Android [Internet]. 1st ed. Oram A, Jepson B. Sebastopol:
O’Reilly Media, Inc; 2011 [cited 14 March 2019]. Available from: https://books.google.fi/books?id=oMYQz4_BW48C&printsec=frontcover&dq=Learning+An-droid&hl=en&sa=X&ved=0ahUKEwjl4ZbBq_rgAhVlwcQBHbhvA98Q6AEIM-DAB#v=onepage&q&f=false
27. Intents and Intent Filters [Internet]. Developer.android.com. 2019 [cited 14 March 2019]. Available from: https://developer.android.com/guide/compo-nents/intents-filters

Appendix 2
1 (12)
Appendix 1. Activity, Service, Broadcast Receiver and Content provider
public class MainActivity extends Activity {
}
public class MyService extends Service {
}
public class MyReceiver extends BroadcastReceiver {
public void onReceive(context,intent){}
}
public class MyContentProvider extends ContentProvider {
public void onCreate(){}
}

Appendix 2
2 (12)
Appendix 2. Arduino Software Code
//Libraries
#include "Adafruit_FONA.h"
#include <SoftwareSerial.h>
// Instances
SoftwareSerial fonaSS = SoftwareSerial(7, 8);
SoftwareSerial *fonaSerial = &fonaSS;
// Fona instance
Adafruit_FONA fona = Adafruit_FONA(4);
//Global variables for holding gps data
float latitude, longitude, speed_kph;
void setup() {
// Initialize serial
while (!Serial);
Serial.begin(19200);
Serial.println(F("Initializing...."));
fonaSerial->begin(19200);
if (! fona.begin(*fonaSerial)) {
Serial.println(F("Initialization failed"));
while (1);
}
// Setup GPRS settings => APN
fona.setGPRSNetworkSettings(F("internet"));
// Wait
delay(1000);

Appendix 2
3 (12)
// Turn GPRS off & on again
if (!fona.enableGPRS(false))
Serial.println(F("Failed to turn off"));
delay(1000);
if (!fona.enableGPRS(true))
Serial.println(F("Failed to turn on"));
delay(1000);
Serial.println(F("Enabling GPS..."));
fona.enableGPS(true);
//getGPS();
//sendToFirebase();
}
void loop() {
getGPS();
sendToFirebase();
}
//Sending data to Server
void sendToFirebase() {
// Setting the device ID/ In this case the Vehicle Reg
String deviceid = "ABC-123";
// Log
Serial.print("DeviceID: ");
Serial.println(deviceid);

Appendix 2
4 (12)
Serial.print("latitude: ");
Serial.println(latitude);
Serial.print("longitude: ");
Serial.println(longitude);
Serial.print("speed: ");
Serial.println(speed_kph);
// Prepare HTTP request
uint16_t statuscode;
int16_t length;
//http://users.metropolia.fi/~peterkip/v2/firebaselib.php?de-
viceid=123&lat=56.045326&lon=48.33487&speed=82
//build the URL to the proxy
String url = "http://users.metropolia.fi/~peterkip/v2/firebaselib.php?/";
url += "&deviceid=";
url += String(deviceid);
url += "&lat=";
url += String(latitude);
url += "&lon=";
url += String(longitude);
url += "&speed=";
url += String(speed_kph);
char buf[80];
url.toCharArray(buf, url.length());
Serial.print("Sending GET request to server ");
Serial.println(buf);
// Send GPS data to Firebase
if (!fona.HTTP_GET_start(buf, &statuscode, (uint16_t *)&length)) {
Serial.println("Failed!");

Appendix 2
5 (12)
}
while (length > 0) {
while (fona.available()) {
char c = fona.read();
Serial.write(c);
length--;
}
}
fona.HTTP_GET_end();
// Wait
delay(10000);
}
//Getting the GPS data
void getGPS()
{
delay(2000);
// if you ask for an altitude reading, getGPS will return false if there isn't a 3D fix
boolean gps_success = fona.getGPS(&latitude, &longitude, &speed_kph);
if (gps_success) {
Serial.print("GPS lat:");
Serial.println(latitude, 6);
Serial.print("GPS long:");
Serial.println(longitude, 6);
Serial.print("GPS speed KPH:");
Serial.println(speed_kph);
} else {

Appendix 2
6 (12)
Serial.println("Waiting for FONA GPS 3D fix...");
}
// Fona 3G doesnt have GPRSlocation :/
if ((fona.type() == FONA3G_A) || (fona.type() == FONA3G_E))
return;
// Check for network, then GPRS
Serial.println(F("Checking for Cell network..."));
if (fona.getNetworkStatus() == 1) {
// network & GPRS? Great! Print out the GSM location to compare
boolean gsmloc_success = fona.getGSMLoc(&latitude, &longitude);
if (gsmloc_success) {
Serial.print("GSMLoc lat:");
Serial.println(latitude, 6);
Serial.print("GSMLoc long:");
Serial.println(longitude, 6);
Serial.print("GSMLoc speed:");
Serial.println(speed_kph, 6);
} else {
Serial.println("GSM location failed...");
Serial.println(F("Disabling GPRS"));
fona.enableGPRS(false);
Serial.println(F("Enabling GPRS"));
if (!fona.enableGPRS(true)) {
Serial.println(F("Failed to turn GPRS on"));
}
}
}
}

Appendix 2
7 (12)
Appendix 3. Proxy Sever PHP File
<?php require_once './vendor/autoload.php'; use Kreait\Firebase\Factory; use Kreait\Firebase\ServiceAccount; class firebaselib { protected $database; protected $dbname = 'gps'; public function __construct(){ //Connect to firebase / secret contains the credentials $acc = ServiceAccount::fromJsonFile( '../../se-cret/trackme.json');//__DIR__ . $firebase = (new Factory)->withServiceAccount($acc)->create(); $this->database = $firebase->getDatabase(); } // Write data to firebase using Push method public function insert(array $data) { if (empty($data) || !isset($data)) { return FALSE; } $ref = $this->database->getReference()->getChild($this->dbname)->push($data); return $ref->getKey(); } } $gps = new firebaselib(); var_dump($_GET); $id = htmlentities($_GET["deviceid"]); $lat = htmlentities($_GET["lat"]); $lon = htmlentities($_GET["lon"]); $speed = htmlentities($_GET["speed"]);

Appendix 2
8 (12)
$time = date('c'); var_dump($gps->insert([ //'track' => [ 'id'=> $id, 'lat' => $lat, 'lon' => $lon, 'speed' => $speed, 'time' => $time // ] ]));
Appendix 2
9 (12)
Appendix 4. Android Login Activity public class MainActivity extends AppCompatActivity { private static final String TAG = MainActivity.class.getSimpleName(); private EditText firebase_email, firebase_password; private Button loginBtn; private ProgressBar progressBar; private FirebaseAuth mAuth; @Override protected void onCreate(Bundle savedInstanceState) { super.onCreate(savedInstanceState); setContentView(R.layout.activity_main); // Initialize Firebase Auth mAuth = FirebaseAuth.getInstance(); initializeUI(); loginBtn.setOnClickListener(new View.OnClickListener() { @Override public void onClick(View v) { loginUserAccount(); } }); } private void loginUserAccount() { progressBar.setVisibility(View.VISIBLE); String email, password; email = firebase_email.getText().toString(); password = firebase_password.getText().toString(); if(TextUtils.isEmpty(email)){ Toast.makeText(getApplicationContext(),"Please enter email...", Toast.LENGTH_LONG).show(); return; } if(TextUtils.isEmpty(password)){ Toast.makeText(getApplicationContext(),"Please enter password...", Toast.LENGTH_LONG).show(); return; } mAuth.signInWithEmailAndPassword(email,password) .addOnCompleteListener(new OnCompleteListener<AuthResult>() { @Override public void onComplete(@NonNull Task<AuthResult> task) { if(task.isSuccessful()){ // Sign in success, update UI with the signed-in user's information Log.d(TAG, "Login successful!"); progressBar.setVisibility(View.GONE);
Appendix 2
10 (12)
Intent intent = new Intent(MainActivity.this, MapsActiv-ity.class); startActivity(intent); }else{ // If sign in fails, display a message to the user. Log.w(TAG, "Login failed!", task.getException()); Toast.makeText(getApplicationContext(), "Authentication failed.", Toast.LENGTH_SHORT).show(); progressBar.setVisibility(View.GONE); } } }); } private void initializeUI() { firebase_email = findViewById(R.id.email); firebase_password= findViewById(R.id.password); loginBtn = findViewById(R.id.login); progressBar = findViewById(R.id.progressBar); } }

Appendix 2
11 (12)
Appendix 5. Android Map Activity public class MapsActivity extends FragmentActivity implements OnMapReadyCallback { private static final String TAG = MapsActivity.class.getSimpleName(); private HashMap<String, Marker> mMarkers = new HashMap<>(); private GoogleMap mMap; LatLng currentLocation; TextView speedMeter; @Override protected void onCreate(Bundle savedInstanceState) { super.onCreate(savedInstanceState); setContentView(R.layout.activity_maps); speedMeter = (TextView) findViewById(R.id.textView); SupportMapFragment mapFragment = (SupportMapFragment) getSupportFrag-mentManager() .findFragmentById(R.id.map); mapFragment.getMapAsync(this); } @Override //calls the Google maps when ready public void onMapReady(GoogleMap googleMap) { mMap = googleMap; mMap.setMaxZoomPreference(20); onLocationChange(); } //Listens to Firebase for updates and displays the data upon updates private void onLocationChange() { DatabaseReference reference = FirebaseDatabase.getInstance().getRefer-ence("gps"); reference.addChildEventListener(new ChildEventListener() { @Override public void onChildAdded(DataSnapshot dataSnapshot, String previ-ousChildName) { //Clear previous markers mMap.clear(); //Set marker to currentLocation setmMarkers(dataSnapshot); } @Override public void onChildChanged(DataSnapshot dataSnapshot, String pre-viousChildName) { //Set marker on the updated location setmMarkers(dataSnapshot); } @Override public void onChildMoved(DataSnapshot dataSnapshot, String previ-ousChildName) {

Appendix 2
12 (12)
} @Override public void onChildRemoved(DataSnapshot dataSnapshot) { } @Override public void onCancelled(DatabaseError error) { Log.d(TAG, "Database Error", error.toException()); } }); } private void setmMarkers(DataSnapshot dataSnapshot) { //Set the updated location with a marker on the map String key = dataSnapshot.getKey(); HashMap<String, Object> value = (HashMap<String, Object>) dataSnap-shot.getValue(); double lat = Double.parseDouble(value.get("lat").toString()); double lon = Double.parseDouble(value.get("lon").toString()); String speed = value.get("speed").toString(); String vehicle_id = value.get("id").toString(); currentLocation = new LatLng(lat,lon); if (!mMarkers.containsKey(key)) { mMarkers.put(key, mMap.addMarker(new MarkerOptions().title(vehi-cle_id).position(currentLocation))); } else { mMarkers.get(key).setPosition(currentLocation); } LatLngBounds.Builder builder = new LatLngBounds.Builder(); for (Marker m : mMarkers.values()) { builder.include(m.getPosition()); } mMap.moveCamera(CameraUpdateFactory.new-LatLngBounds(builder.build(),300)); speedMeter.setText(speed + " Km/h"); } }