Pasos Para Crear Health Bits
136
Microsoft Office 2007 Microsoft Word Chapter 6 Creating a Professional Newsletter
-
Upload
jolivares930368 -
Category
Documents
-
view
14 -
download
2
description
Práctica Health Bits para la creación y aprendizaje del uso de Microsoft word 2007
Transcript of Pasos Para Crear Health Bits
Microsoft Office 2007Microsoft Word Chapter 6Creating a Professional Newsletter
Objectives• Create and format WordArt• Insert a symbol in a document• Insert and format a floating graphic• Format a document in multiple columns• Format a character as a drop cap• Insert a column break• Modify a style
Microsoft Office 2007: Complete Concepts and Techniques - Windows Vista Edition 2
Objectives• Place a vertical rule between columns• Insert and format a text box• Copy and paste using a split window• Balance columns• Modify and format a SmartArt graphic• Add a page border
Microsoft Office 2007: Complete Concepts and Techniques - Windows Vista Edition 3
Starting Word• Start Microsoft Word 2007 as directed on page
WD 389
Microsoft Office 2007: Complete Concepts and Techniques - Windows Vista Edition 4
Setting Custom Margins• Display the Page Layout tab.• Click the Margins button on the Page Layout tab to
display the Margins gallery• Click Custom Margins in the Margins gallery to
display the Page Setup dialog box. If necessary, click the Margins tab in the dialog box
• Type .75 in the Top text box to change the top margin setting and then press the TAB key to position the insertion point in the Bottom text box
Microsoft Office 2007: Complete Concepts and Techniques - Windows Vista Edition 5
Setting Custom Margins• Type .75 in the Bottom text box to change the
bottom margin setting and then press the TAB key
• Type .75 in the Left text box to change the left margin setting and then press the TAB key.
• Type .75 in the Right box to change the right margin setting
• Click the OK button to set the custom margins for this document
Microsoft Office 2007: Complete Concepts and Techniques - Windows Vista Edition 6
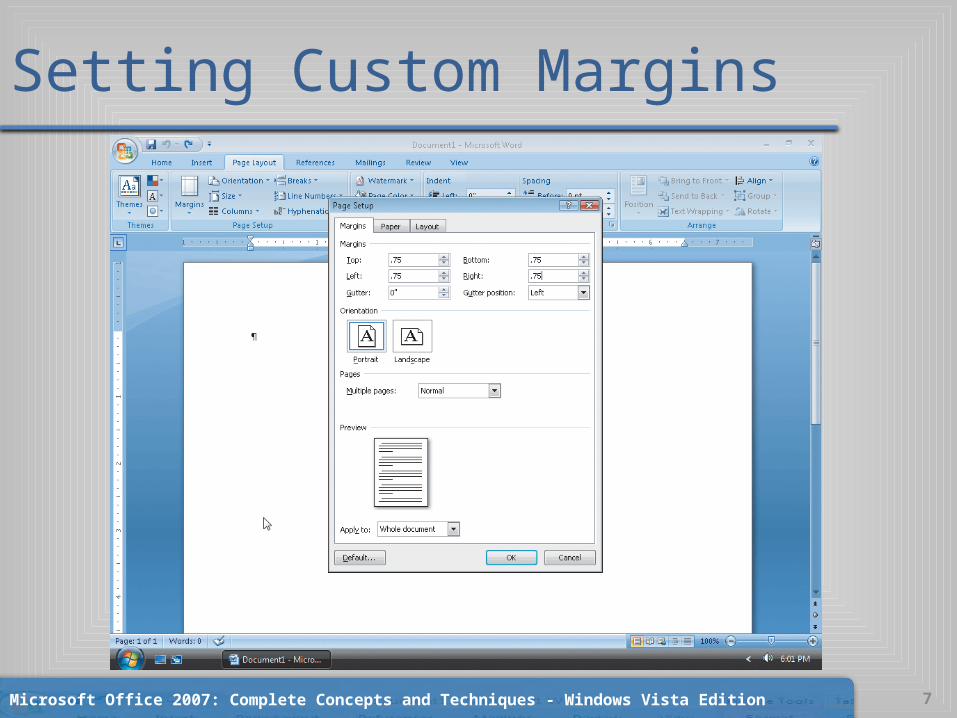
Setting Custom Margins
Microsoft Office 2007: Complete Concepts and Techniques - Windows Vista Edition 7
Changing Theme Colors and Fonts• Display the Home tab. Click the Change Styles
button on the Home tab, point to Colors on the Change Styles menu, and then click Metro in the Colors gallery to change the document theme colors to Metro
• Click the Change Styles button on the Home tab, point to Fonts on the Change Styles menu, and then click Aspect in the Fonts gallery to change the document theme fonts to Aspect
Microsoft Office 2007: Complete Concepts and Techniques - Windows Vista Edition 8
Inserting WordArt• Display the Insert tab• Click the WordArt button on the Insert tab to
display the WordArt gallery• Click WordArt style 1, the style in the upper-left
corner of the WordArt gallery, to display the Edit WordArt Text dialog box
• Type Health Bits in the Text text box, as the WordArt text.
Microsoft Office 2007: Complete Concepts and Techniques - Windows Vista Edition 9
Inserting WordArt• Click the Font box arrow in the dialog box; scroll
to and then click Brush Script MT, or a similar font, to change the font of the WordArt text
• Click the Size box arrow in the dialog box; scroll to and then click 72 to change the font size of the WordArt text
• Click the OK button to display the WordArt text in the document window
Microsoft Office 2007: Complete Concepts and Techniques - Windows Vista Edition 10
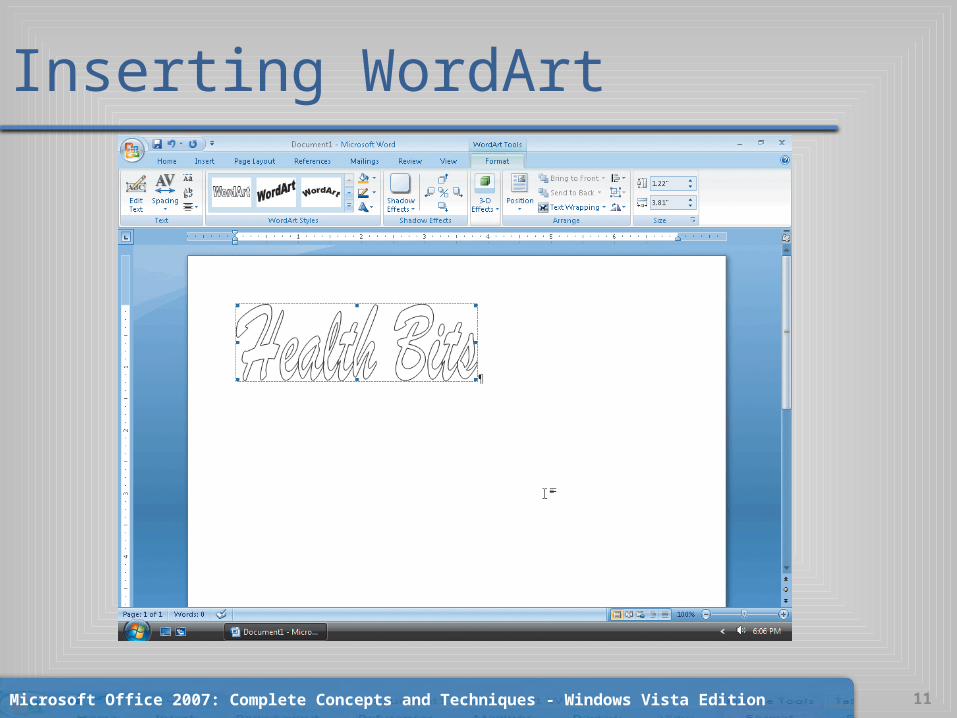
Inserting WordArt
Microsoft Office 2007: Complete Concepts and Techniques - Windows Vista Edition 11
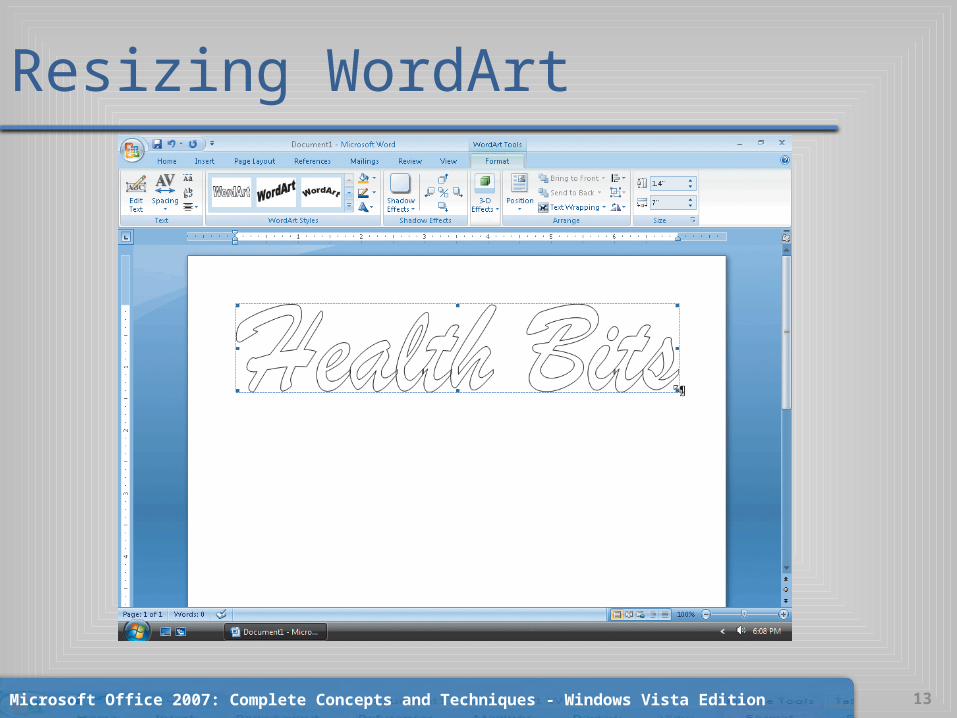
Resizing WordArt• Drag the bottom-right sizing handle to the right
and slightly downward until the WordArt size is similar to Figure 6–7
• If the values in the Shape Height and Shape Width text boxes are not approximately equal to 1.4" and 7", respectively, change their values so that the WordArt is similar in size to Figure 6–7
Microsoft Office 2007: Complete Concepts and Techniques - Windows Vista Edition 12
Resizing WordArt
Microsoft Office 2007: Complete Concepts and Techniques - Windows Vista Edition 13
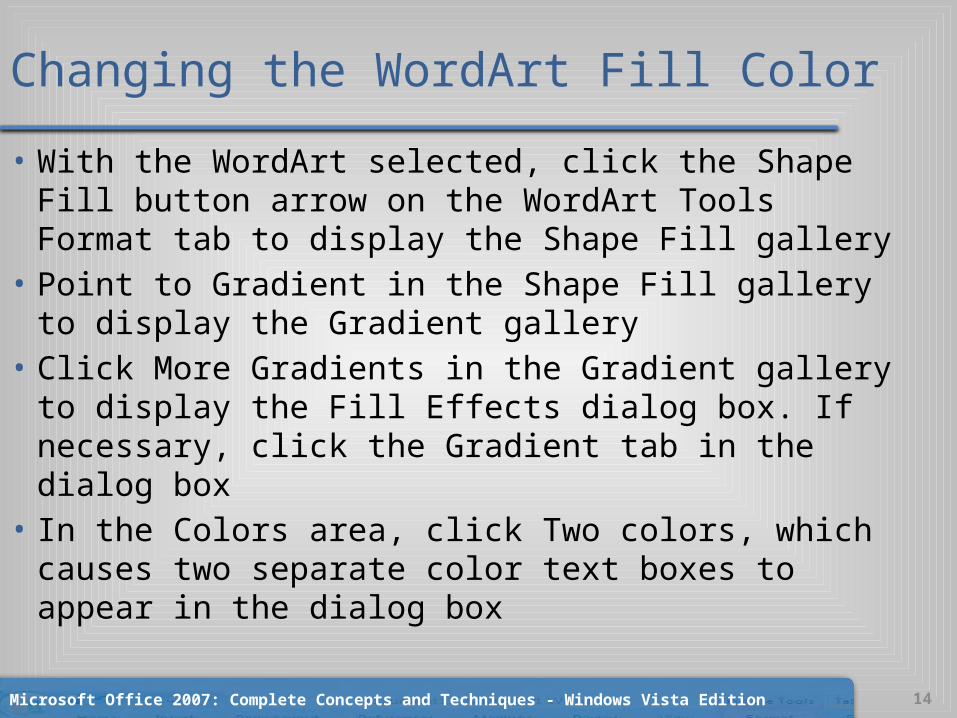
Changing the WordArt Fill Color• With the WordArt selected, click the Shape Fill button
arrow on the WordArt Tools Format tab to display the Shape Fill gallery
• Point to Gradient in the Shape Fill gallery to display the Gradient gallery
• Click More Gradients in the Gradient gallery to display the Fill Effects dialog box. If necessary, click the Gradient tab in the dialog box
• In the Colors area, click Two colors, which causes two separate color text boxes to appear in the dialog box
Microsoft Office 2007: Complete Concepts and Techniques - Windows Vista Edition 14
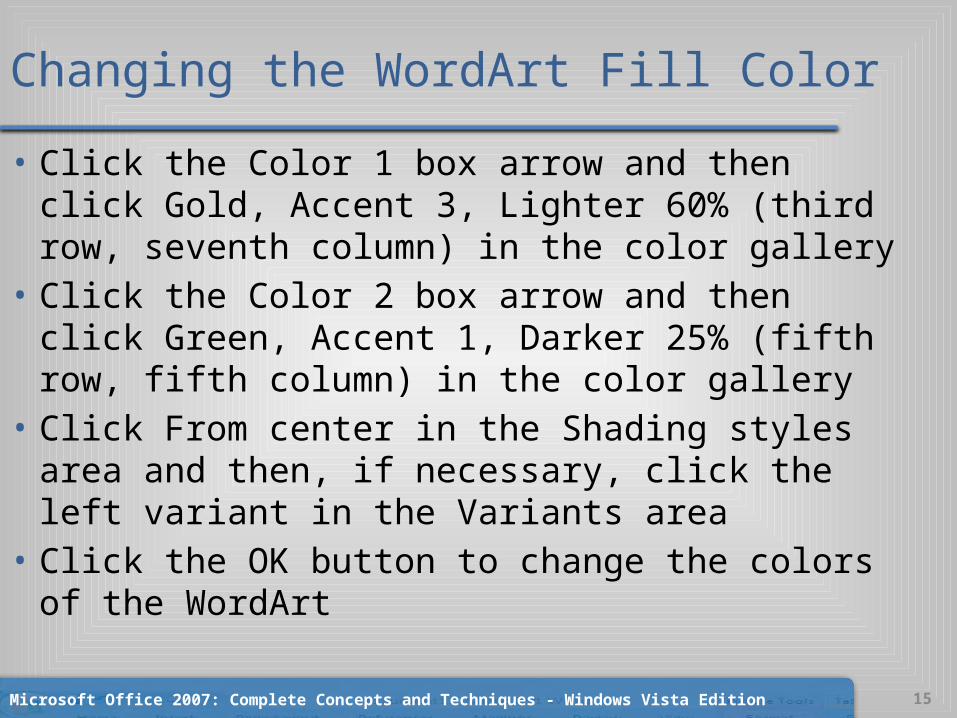
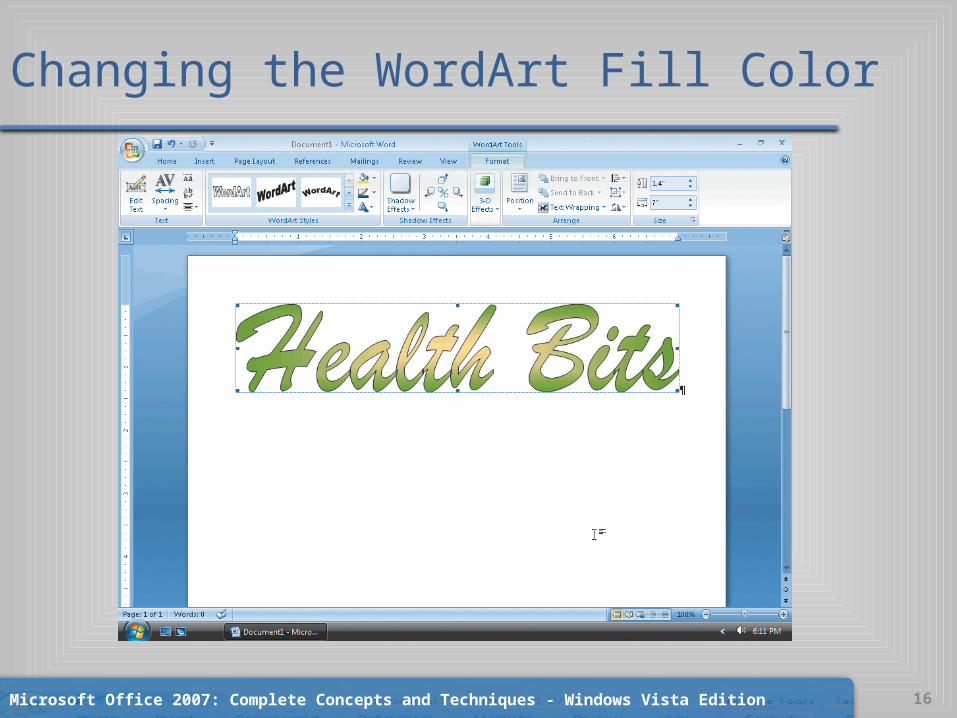
Changing the WordArt Fill Color• Click the Color 1 box arrow and then click Gold,
Accent 3, Lighter 60% (third row, seventh column) in the color gallery
• Click the Color 2 box arrow and then click Green, Accent 1, Darker 25% (fifth row, fifth column) in the color gallery
• Click From center in the Shading styles area and then, if necessary, click the left variant in the Variants area
• Click the OK button to change the colors of the WordArt
Microsoft Office 2007: Complete Concepts and Techniques - Windows Vista Edition 15
Changing the WordArt Fill Color
Microsoft Office 2007: Complete Concepts and Techniques - Windows Vista Edition 16
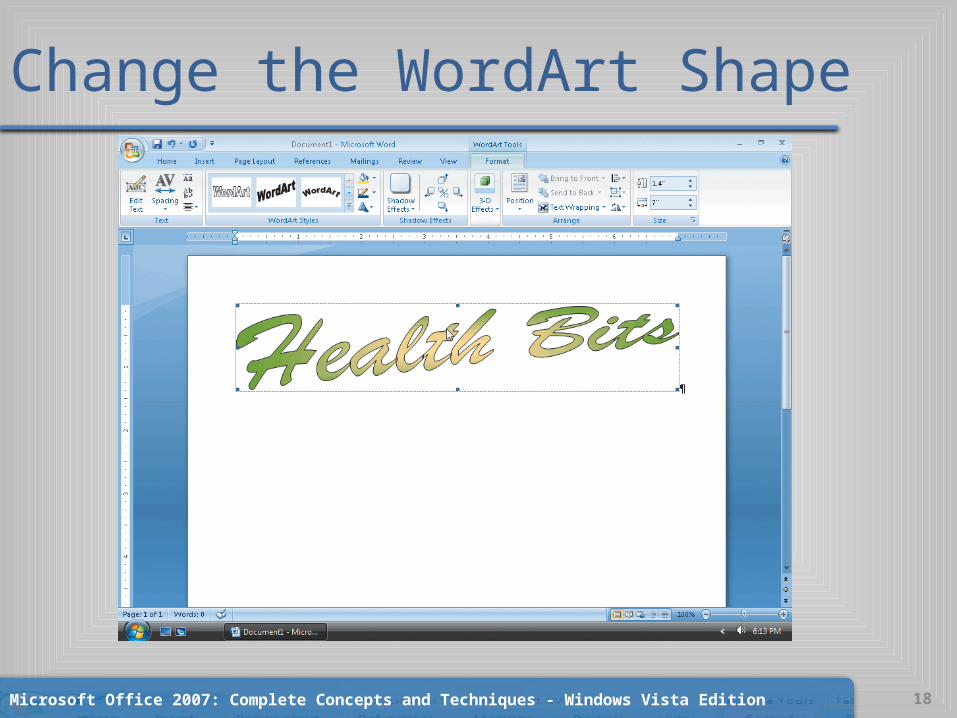
Change the WordArt Shape• Click the Change WordArt Shape button on the
Format tab to display the WordArt Shape gallery• Click the Cascade Up shape in the WordArt Shape
gallery to instruct Word to form itself into the Cascade Up shape
Microsoft Office 2007: Complete Concepts and Techniques - Windows Vista Edition 17
Change the WordArt Shape
Microsoft Office 2007: Complete Concepts and Techniques - Windows Vista Edition 18
Centering the Newsletter Title• Click the paragraph mark to the right of the
WordArt text to deselect the WordArt and position the insertion point in the paragraph containing the WordArt
• If necessary, display the Home tab, and then click the Center button on the Home tab to center the paragraph containing the WordArt
Microsoft Office 2007: Complete Concepts and Techniques - Windows Vista Edition 19

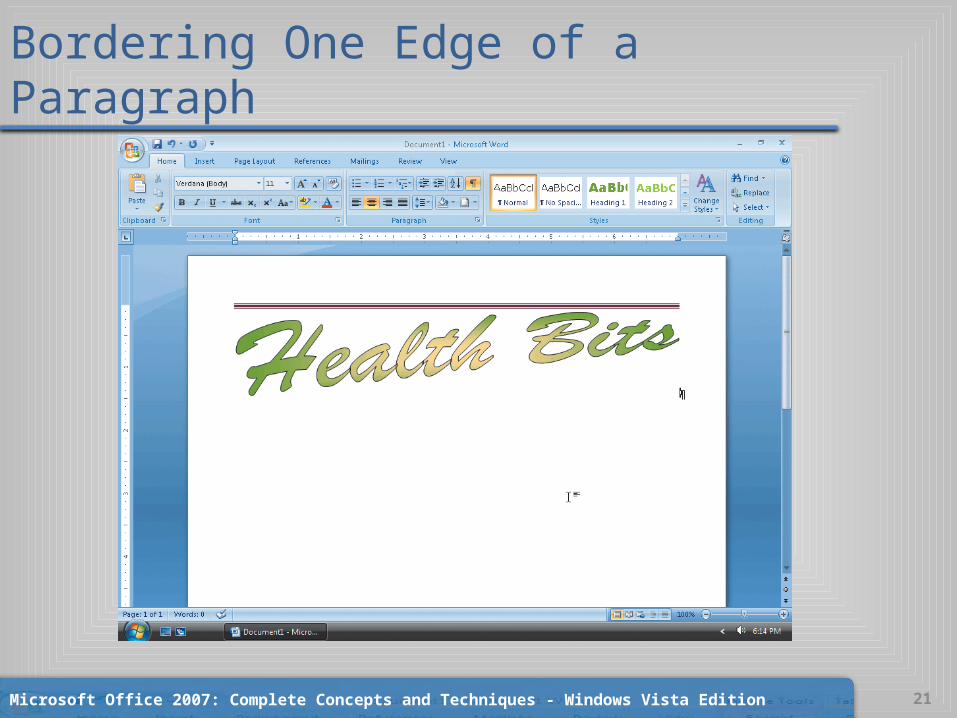
Bordering One Edge of a Paragraph• Click the Border button arrow on the Home tab and then click Borders
and Shading in the Border gallery to display the Borders and Shading dialog box
• Click Custom in the Setting area because you are setting just a top border
• Scroll through the style list and click the style which has a thick middle line between two thin lines
• Click the Color button arrow and then click Pink, Accent 2, Darker 50% (sixth column in the last row of Theme Colors) in the Color gallery
• Click the Top Border button in the Preview area of the dialog box to show a preview of the selected border style
• Click the OK button to place the defined border above the newsletter title
Microsoft Office 2007: Complete Concepts and Techniques - Windows Vista Edition 20
Bordering One Edge of a Paragraph
Microsoft Office 2007: Complete Concepts and Techniques - Windows Vista Edition 21
Clearing Format• With the insertion point positioned at the end of
line 1 press the ENTER key• Click the Clear Formatting button on the Home
tab to remove any existing formatting
Microsoft Office 2007: Complete Concepts and Techniques - Windows Vista Edition 22
Setting a Right-Aligned Tab Stop• Click the Bold button on the Home tab. Click the Font Color
button arrow on the Home tab and change the font color to Pink, Accent 2, Darker 50%. Type Monthly Newsletter on line 2 of the newsletter
• Click the Paragraph Dialog Box Launcher to display the Paragraph dialog box and then click the Tabs button in the Paragraph dialog box to display the Tabs dialog box
• Type 7 in the Tab stop position text box, which is the location of the right margin
• Click Right in the Alignment area to specify alignment for text at the tab stop
Microsoft Office 2007: Complete Concepts and Techniques - Windows Vista Edition 23
Setting a Right-Aligned Tab Stop• Click the Set button in the Tabs dialog box to set
a right-aligned custom tab stop, which places the entered tab stop position, the number 7 in this case, in the Tab stop position list box
• Click the OK button to place a right tab marker at the 7" mark on the ruler
Microsoft Office 2007: Complete Concepts and Techniques - Windows Vista Edition 24
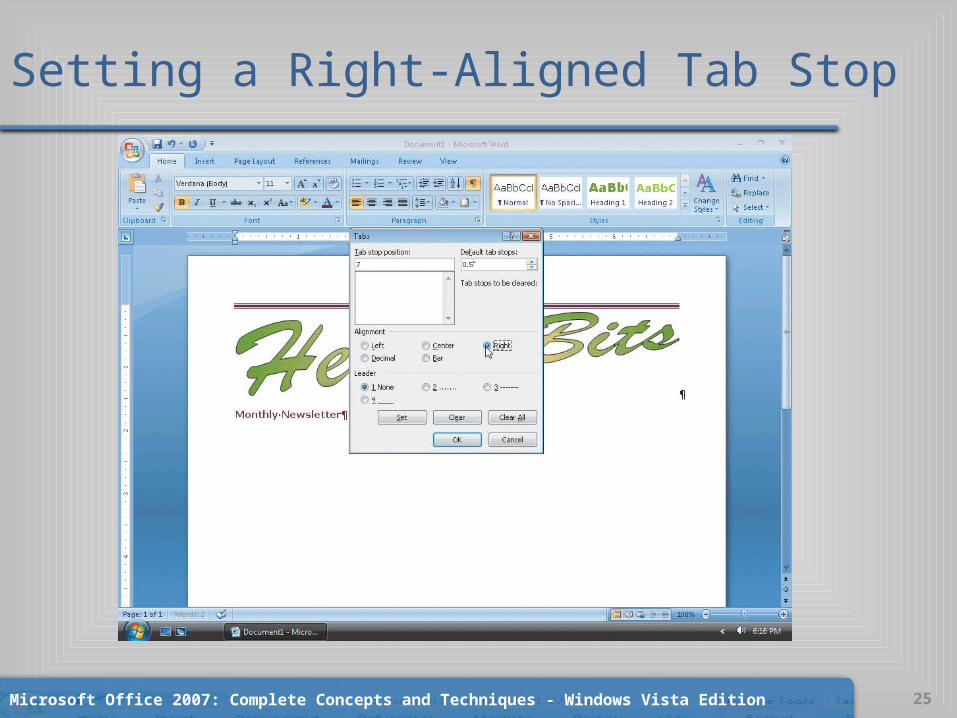
Setting a Right-Aligned Tab Stop
Microsoft Office 2007: Complete Concepts and Techniques - Windows Vista Edition 25
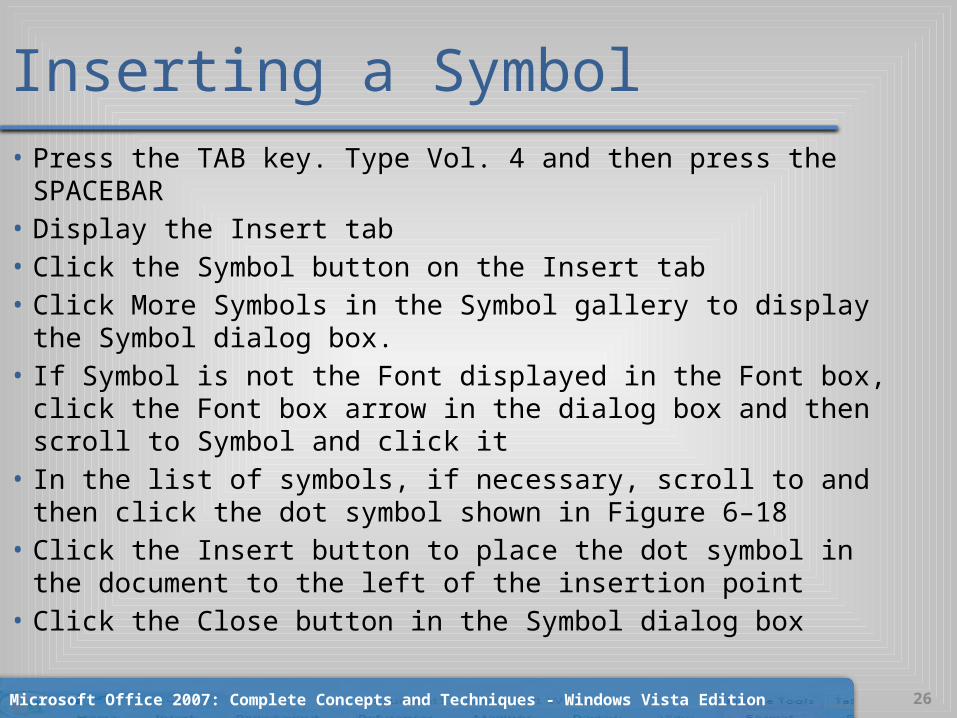
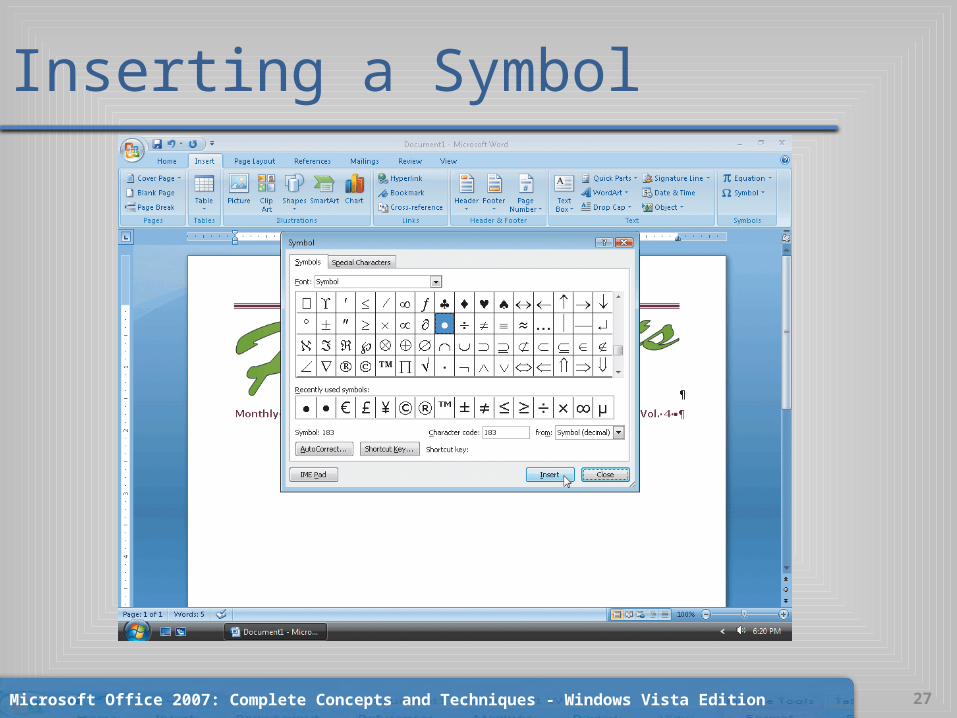
Inserting a Symbol• Press the TAB key. Type Vol. 4 and then press the SPACEBAR• Display the Insert tab• Click the Symbol button on the Insert tab• Click More Symbols in the Symbol gallery to display the Symbol
dialog box.• If Symbol is not the Font displayed in the Font box, click the Font
box arrow in the dialog box and then scroll to Symbol and click it• In the list of symbols, if necessary, scroll to and then click the dot
symbol shown in Figure 6–18• Click the Insert button to place the dot symbol in the document to
the left of the insertion point• Click the Close button in the Symbol dialog box
Microsoft Office 2007: Complete Concepts and Techniques - Windows Vista Edition 26
Inserting a Symbol
Microsoft Office 2007: Complete Concepts and Techniques - Windows Vista Edition 27
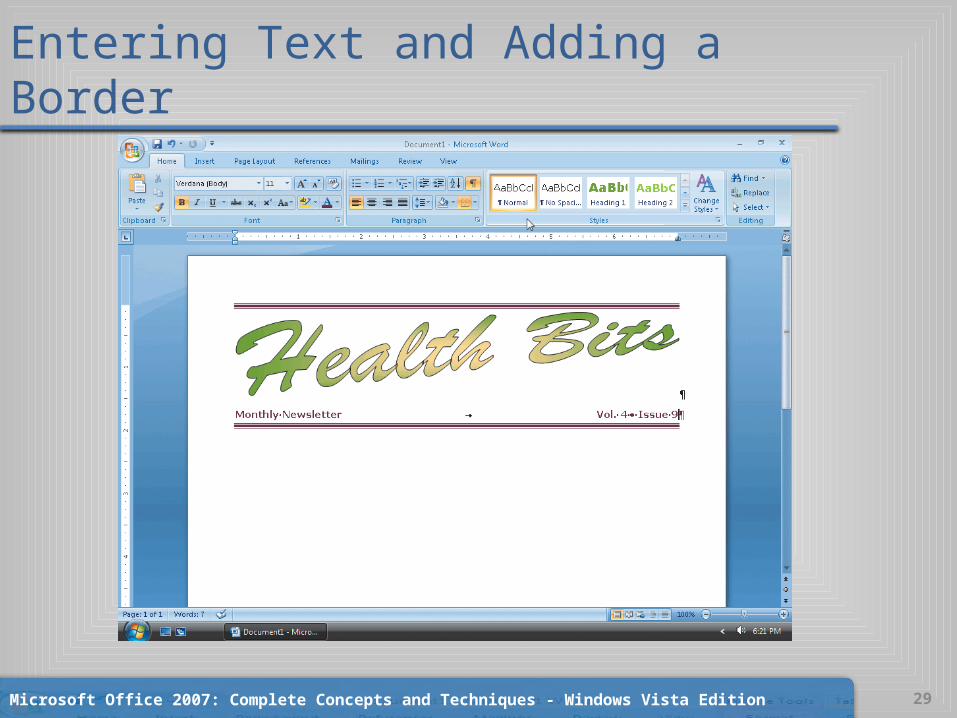
Entering Text and Adding a Border• Press the SPACEBAR. Type Issue 9 at the end
of the issue information line• Display the Home tab. Click the Border button
arrow on the Home tab and then click Bottom Border in the Border gallery to place a bottom border on the current paragraph using the same formats as the previously defined border
Microsoft Office 2007: Complete Concepts and Techniques - Windows Vista Edition 28
Entering Text and Adding a Border
Microsoft Office 2007: Complete Concepts and Techniques - Windows Vista Edition 29
Saving a Document• With a USB flash drive connected to one of the
computer’s USB ports, click the Save button on the Quick Access Toolbar to display the Save As dialog box
• Save the document on a USB flash drive with the file name, Health Bits Newsletter
Microsoft Office 2007: Complete Concepts and Techniques - Windows Vista Edition 30
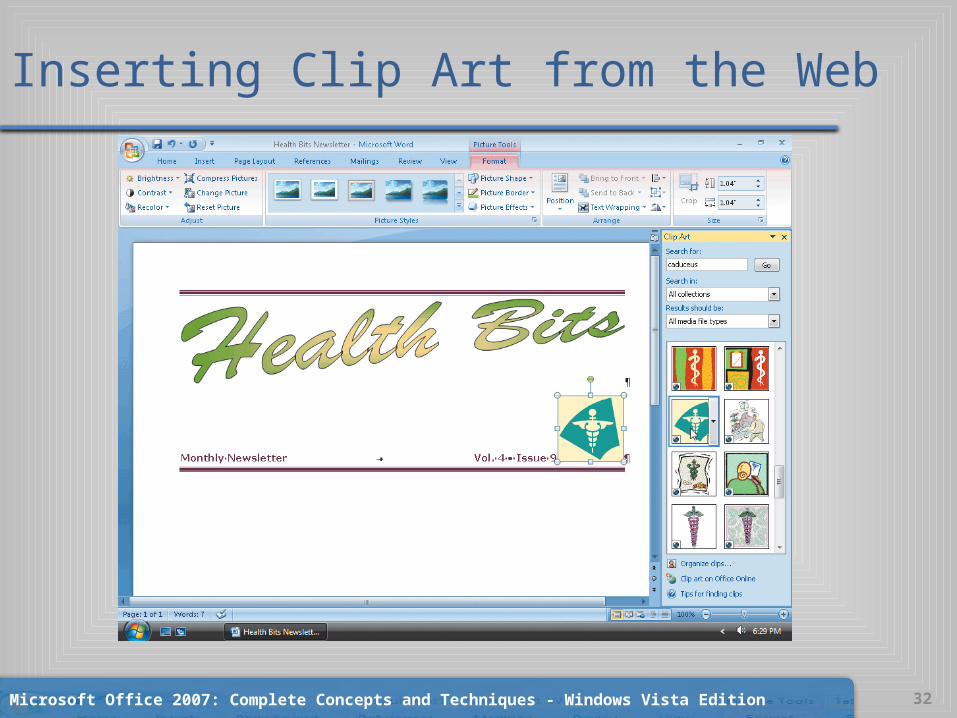
Inserting Clip Art from the Web• Display the Insert tab. Click the Clip Art button on the Insert tab to
display the Clip Art task pane.• In the Clip Art task pane, type caduceus in the Search for text
box• Click the Go button to display a list of clips that match the
description, caduceus• Scroll to and then click the clip art of the caduceus that matches
the one in Figure 6–20. (If the clip art image does not appear in the task pane, click the Close button on the Clip Art task pane and then proceed to the shaded steps on the next page)
• Click the Close button on the Clip Art task pane title bar to close the task pane
Microsoft Office 2007: Complete Concepts and Techniques - Windows Vista Edition 31
Inserting Clip Art from the Web
Microsoft Office 2007: Complete Concepts and Techniques - Windows Vista Edition 32
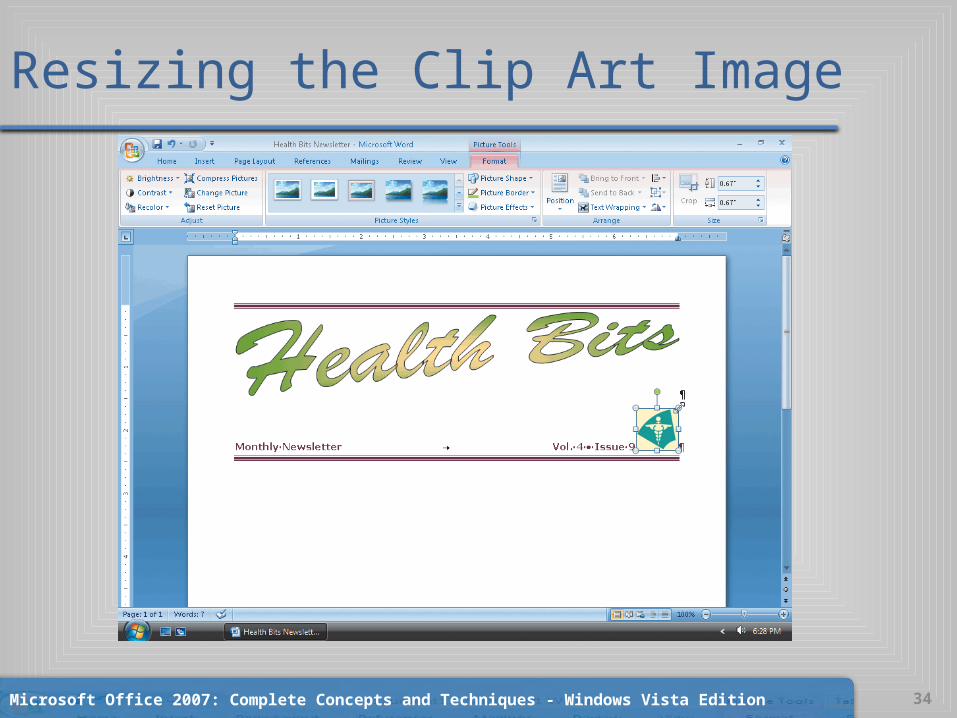
Resizing the Clip Art Image• Drag the top-right sizing handle inward until the
size of the clip art image is similar to Figure 6–21• If necessary, double-click the clip art image to
display the Picture Tools Format tab. If the values in the Shape Height and Shape Width text boxes are not approximately equal to .67 each, change their values so that the clip art image size is similar to Figure 6–21
Microsoft Office 2007: Complete Concepts and Techniques - Windows Vista Edition 33
Resizing the Clip Art Image
Microsoft Office 2007: Complete Concepts and Techniques - Windows Vista Edition 34
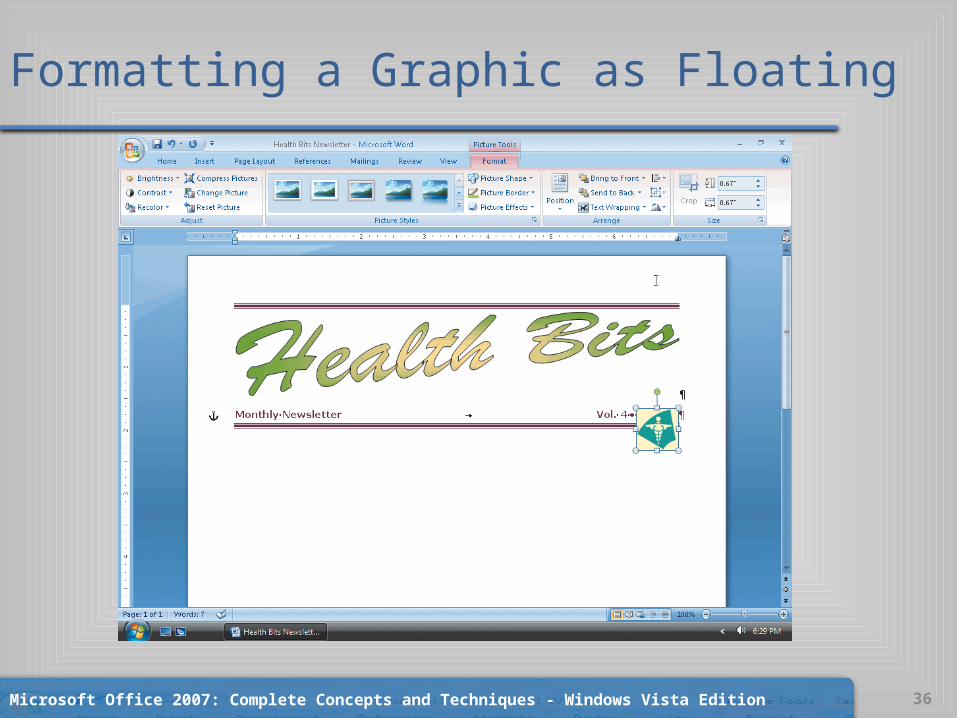
Formatting a Graphic as Floating• If necessary, double-click the clip art image to
display the Picture Tools Format tab• Click the Text Wrapping button on the Format tab
to display the Text Wrapping menu• In the Text Wrapping menu, click In Front of Text
so that the image changes to a floating object that can be positioned in front of text on the page
Microsoft Office 2007: Complete Concepts and Techniques - Windows Vista Edition 35
Formatting a Graphic as Floating
Microsoft Office 2007: Complete Concepts and Techniques - Windows Vista Edition 36
Moving a Graphic• Point to the middle of the graphic, and when the
mouse pointer has a four-headed arrow attached to it, drag the graphic to the location
Microsoft Office 2007: Complete Concepts and Techniques - Windows Vista Edition 37

Moving a Graphic
Microsoft Office 2007: Complete Concepts and Techniques - Windows Vista Edition 38
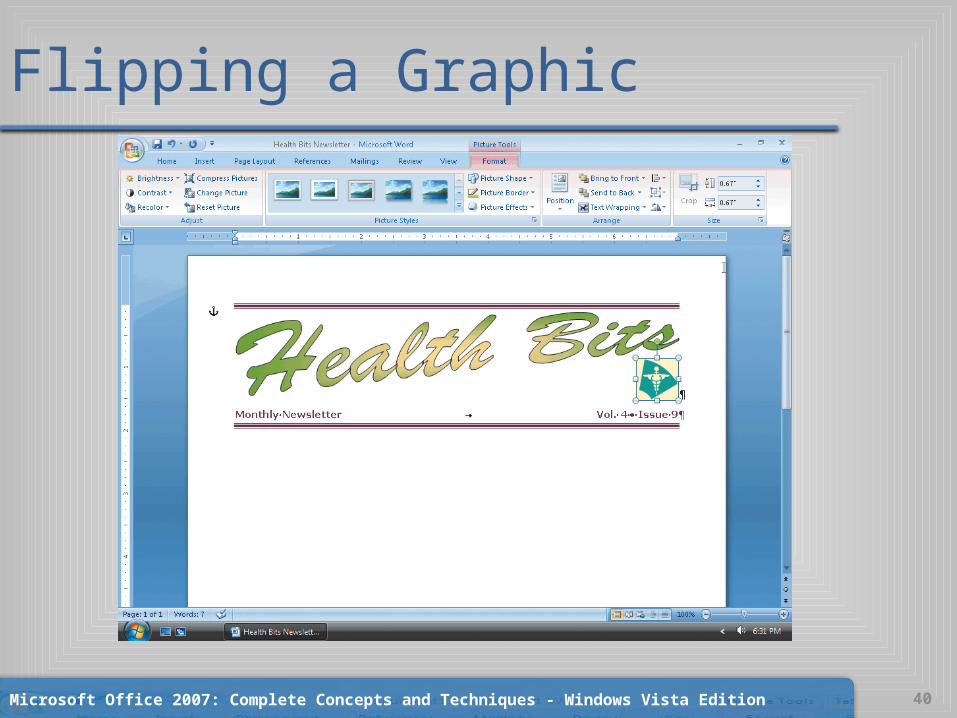
Flipping a Graphic• With the graphic still selected, click the Rotate
button on the Format tab to display the Rotate gallery
• Click Flip Horizontal on the Rotate gallery, so that Word flips the graphic to display its mirror image
Microsoft Office 2007: Complete Concepts and Techniques - Windows Vista Edition 39
Flipping a Graphic
Microsoft Office 2007: Complete Concepts and Techniques - Windows Vista Edition 40
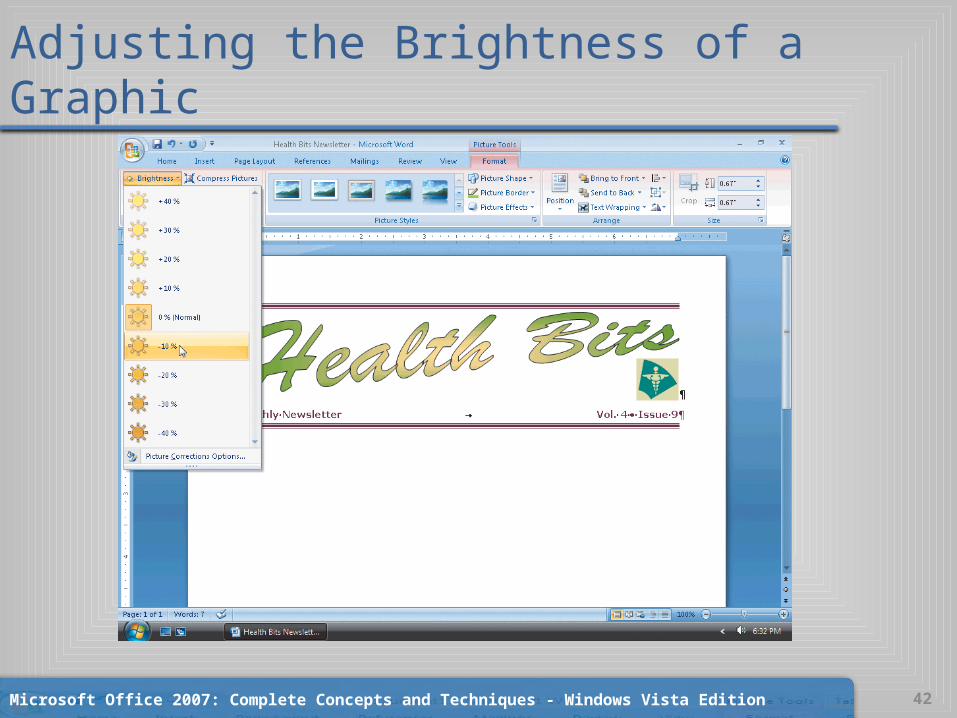
Adjusting the Brightness of a Graphic• Click the Brightness button on the Format tab to
display the Brightness gallery• Point to -10 % in the Brightness gallery to display
a live preview of that decrease in brightness applied to the selected clip art image
• Click -10 % in the Brightness gallery to darken the clip art image
Microsoft Office 2007: Complete Concepts and Techniques - Windows Vista Edition 41
Adjusting the Brightness of a Graphic
Microsoft Office 2007: Complete Concepts and Techniques - Windows Vista Edition 42
Clearing Format• Click at the end of line 2 (the issue information
line) so that the insertion point is immediately after the 9 in Issue 9. Press the ENTER key
• Display the Home tab. Click the Clear Formatting button on the Home tab to apply the Normal style to the location of the insertion point
Microsoft Office 2007: Complete Concepts and Techniques - Windows Vista Edition 43
Entering Text as a Heading Style• Click Heading 2 on the Home tab• Type Health Concerns Related to Computer Use to enter the feature title in the Heading 2 style
Microsoft Office 2007: Complete Concepts and Techniques - Windows Vista Edition 44
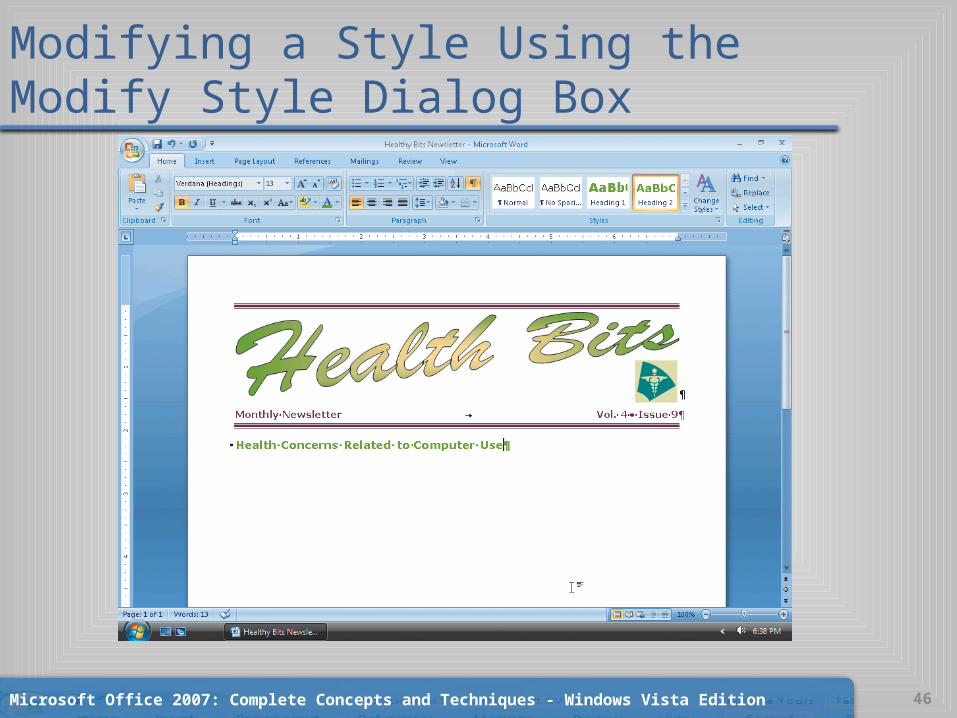
Modifying a Style Using the Modify Style Dialog Box• Right-click Heading 2 on the Home tab to display a
shortcut menu• Click Modify on the shortcut menu to display the Modify
Style dialog box• Click the Color box arrow and then click Green, Accent 1,
Darker 25% to change the color to a darker shade of green• Place a check mark in the Automatically update check box
so that any additional changes you make to the Heading 2 style will automatically modify the style
• Click the OK button to update the Heading 2 style
Microsoft Office 2007: Complete Concepts and Techniques - Windows Vista Edition 45
Modifying a Style Using the Modify Style Dialog Box
Microsoft Office 2007: Complete Concepts and Techniques - Windows Vista Edition 46
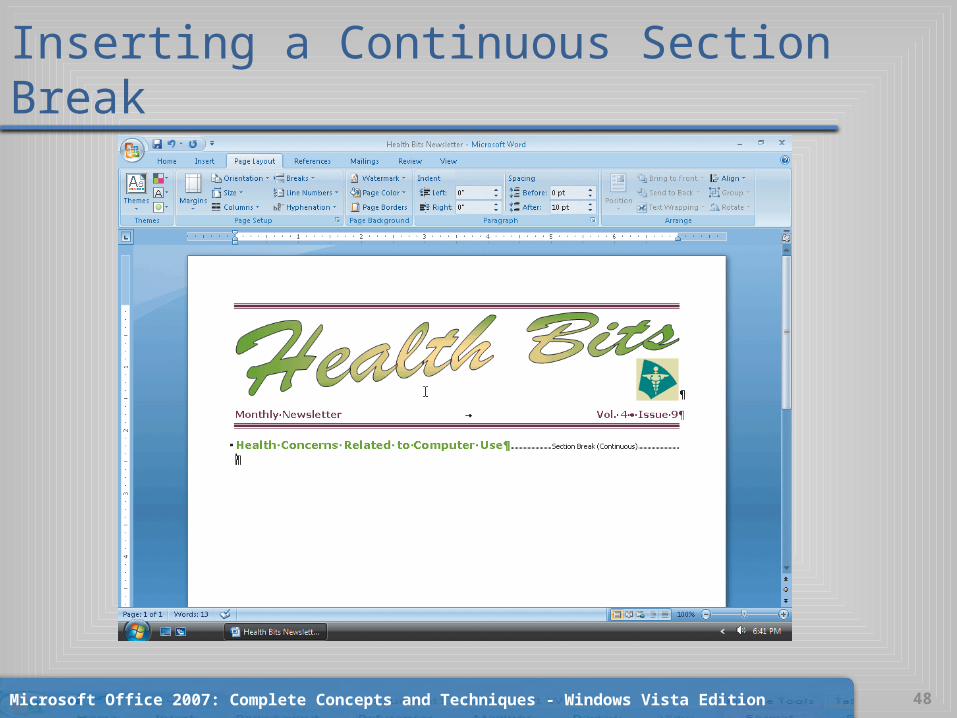
Inserting a Continuous Section Break• With the insertion point at the end of the feature
article press the ENTER key to position the insertion point below the article title
• Display the Page Layout tab• Click the Insert Page and Section Breaks button on
the Page Layout tab to display the Insert Page and Section Breaks gallery
• Click Continuous in the Insert Page and Section Breaks gallery to insert a continuous section break above the insertion point
Microsoft Office 2007: Complete Concepts and Techniques - Windows Vista Edition 47
Inserting a Continuous Section Break
Microsoft Office 2007: Complete Concepts and Techniques - Windows Vista Edition 48
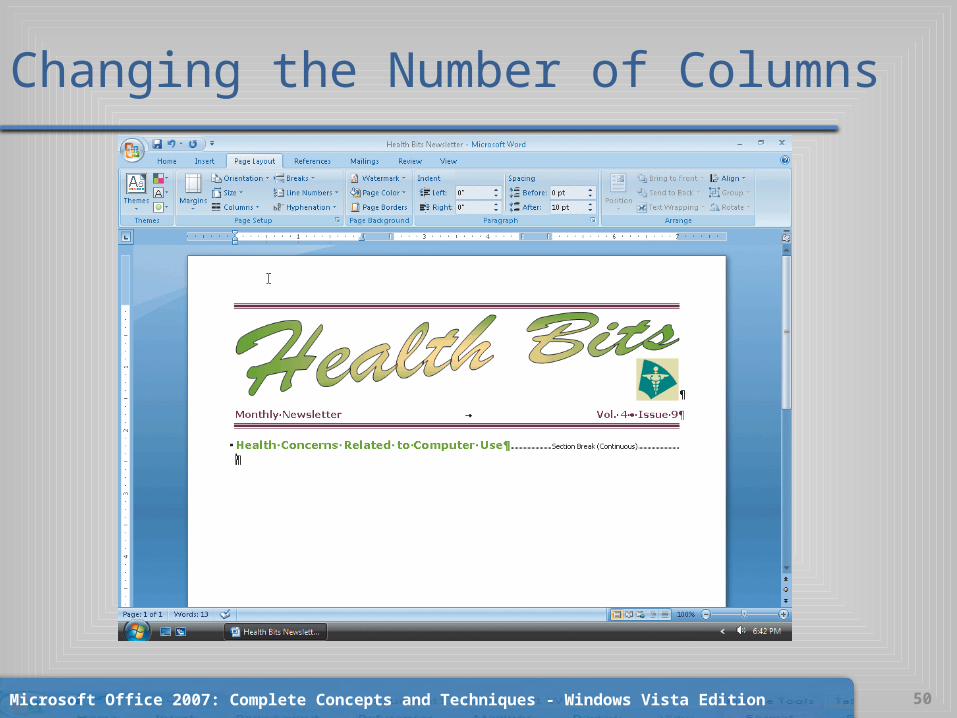
Changing the Number of Columns• Click the Columns button on the Page Layout tab
to display the Columns gallery• Click Three in the Columns gallery to divide the
section containing the insertion point in three evenly sized and spaced columns
Microsoft Office 2007: Complete Concepts and Techniques - Windows Vista Edition 49
Changing the Number of Columns
Microsoft Office 2007: Complete Concepts and Techniques - Windows Vista Edition 50

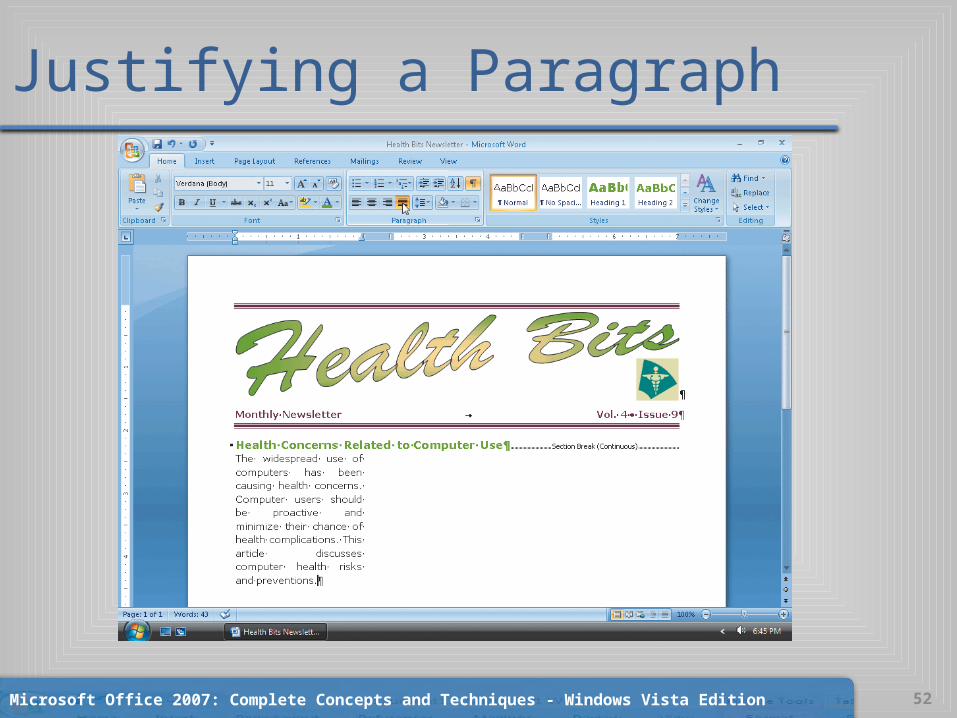
Justifying a Paragraph• Display the Home tab• Click the Justify button on the Home tab so that Word
aligns both the left and right margins of typed text• Type the first paragraph of the feature article: The widespread use of computers has been causing health concerns. Computer users should be proactive and minimize their chance of health complications. This article discusses computer health risks and preventions
Microsoft Office 2007: Complete Concepts and Techniques - Windows Vista Edition 51
Justifying a Paragraph
Microsoft Office 2007: Complete Concepts and Techniques - Windows Vista Edition 52
Inserting a File in a Column of the Newsletter
• Press the ENTER key• Display the Insert tab• Click the Insert Object button arrow on the Insert
tab to display the Object menu• Click Text from File on the Object menu to display
the Insert File dialog box
Microsoft Office 2007: Complete Concepts and Techniques - Windows Vista Edition 53
Inserting a File in a Column of the Newsletter
• With your USB flash drive connected to one of the computer’s USB ports, locate and then click the file called Health Bits Main Article on the USB flash drive to select the file
• Click the Insert button to insert the file, Health Bits Main Article, in the file Health Bits Newsletter at the location of the insertion point
• Scroll so that the bottom of the first page appears in the document window so that you can see how the article fills the three columns on the first and second pages
Microsoft Office 2007: Complete Concepts and Techniques - Windows Vista Edition 54

Inserting a File in a Column of the Newsletter
Microsoft Office 2007: Complete Concepts and Techniques - Windows Vista Edition 55
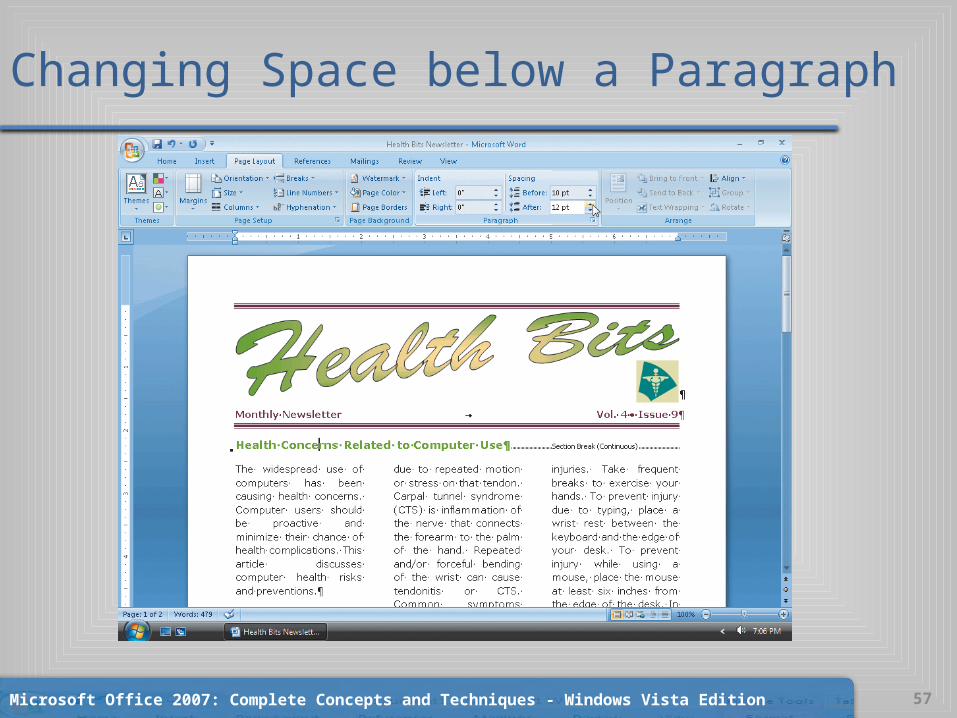
Changing Space below a Paragraph• Scroll to the top of the document and then
position the insertion point in the paragraph to be adjusted, in this case, the paragraph containing the article title.
• Display the Page Layout tab.• Click the Spacing After box up arrow on the Page
Layout tab as many times as necessary until 12 pt is displayed in the Spacing After text box
Microsoft Office 2007: Complete Concepts and Techniques - Windows Vista Edition 56
Changing Space below a Paragraph
Microsoft Office 2007: Complete Concepts and Techniques - Windows Vista Edition 57
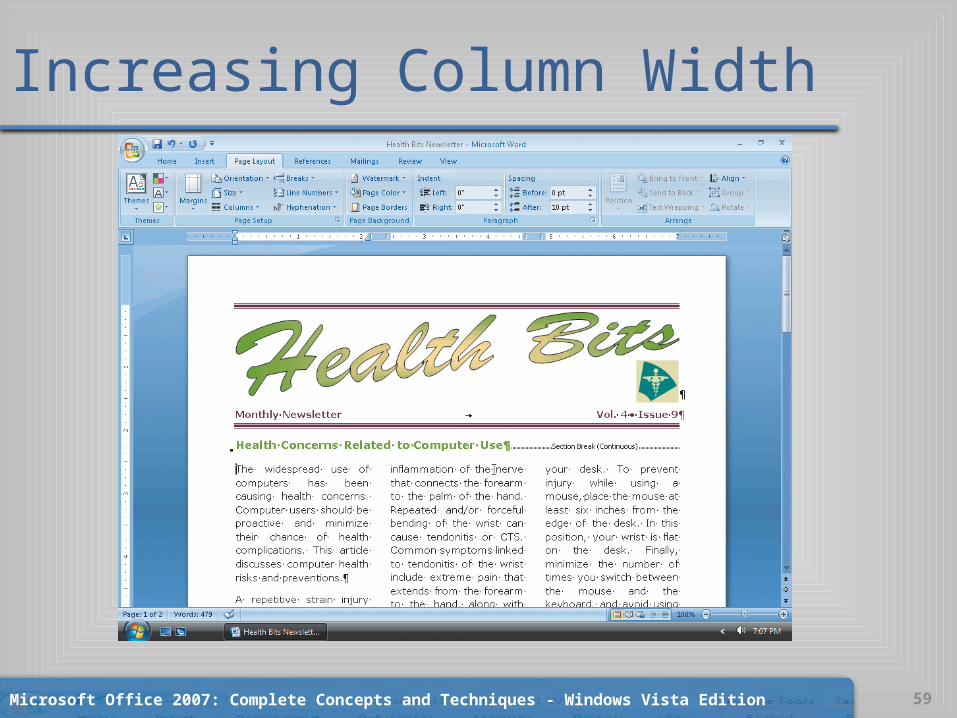
Increasing Column Width• Position the insertion point somewhere in the feature
article text• Click the Columns button on the Page Layout tab to
display the Columns gallery• Click More Columns in the Columns gallery to display
the Columns dialog box• In the ‘Width and spacing’ area, click the Width box up
arrow as many times as necessary until the Width box reads 2.1“
• Click the OK button to make the columns slightly wider
Microsoft Office 2007: Complete Concepts and Techniques - Windows Vista Edition 58
Increasing Column Width
Microsoft Office 2007: Complete Concepts and Techniques - Windows Vista Edition 59
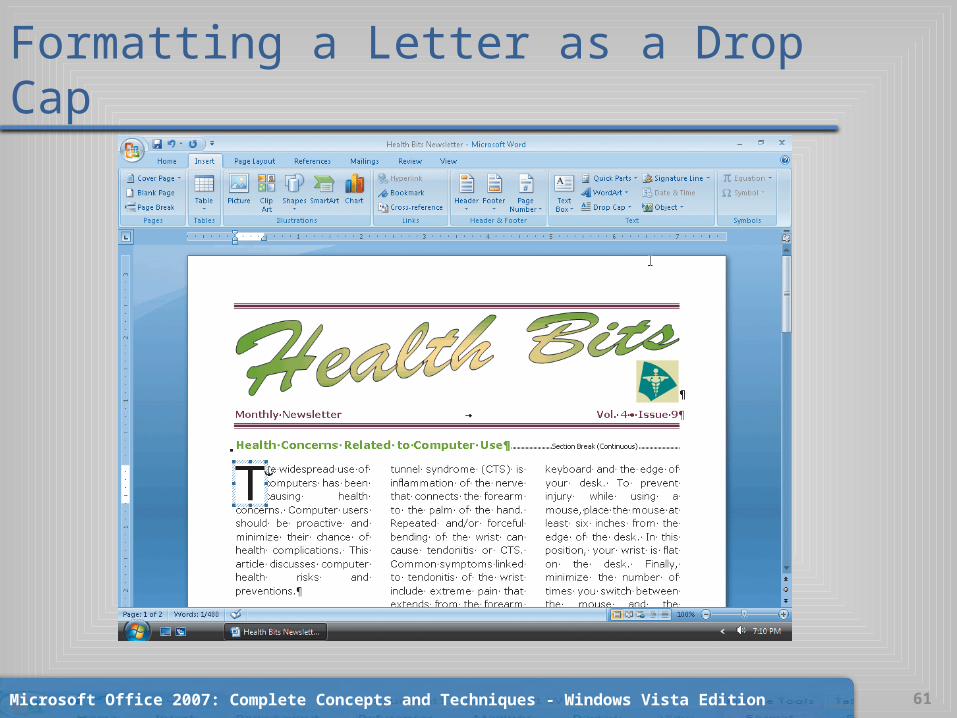
Formatting a Letter as a Drop Cap• Position the insertion point somewhere in the
first paragraph of the feature article.• Display the Insert tab.• Click the Drop Cap button on the Insert tab to
display the Drop Cap gallery• Click Dropped in the Drop Cap gallery to format
the T in the word, The, as a drop cap and wrap subsequent text in the paragraph around the drop cap
Microsoft Office 2007: Complete Concepts and Techniques - Windows Vista Edition 60
Formatting a Letter as a Drop Cap
Microsoft Office 2007: Complete Concepts and Techniques - Windows Vista Edition 61
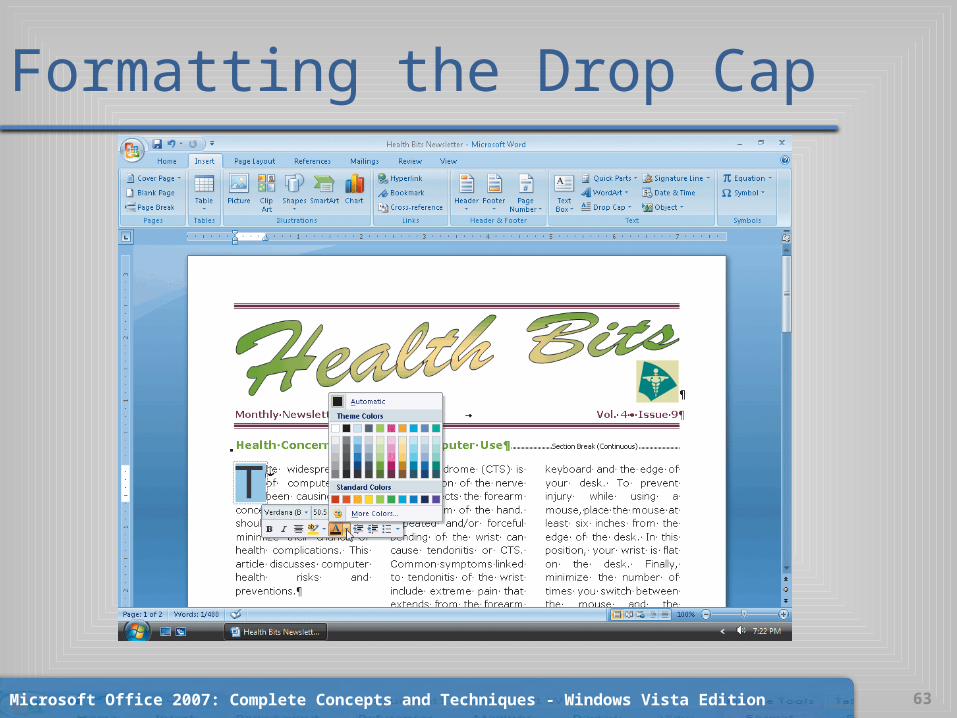
Formatting the Drop Cap• Drag the right-middle sizing handle on the frame slightly
rightward• Triple-click inside the frame to select the drop cap• Right-click the selected drop cap to display the Mini
toolbar. Click the Font Color button arrow on the Mini toolbar to display the Font Color gallery
• Click Gold, Accent 3, Darker 50% (seventh color in the last row of Theme Colors) to change the color of the drop cap
Microsoft Office 2007: Complete Concepts and Techniques - Windows Vista Edition 62
Formatting the Drop Cap
Microsoft Office 2007: Complete Concepts and Techniques - Windows Vista Edition 63
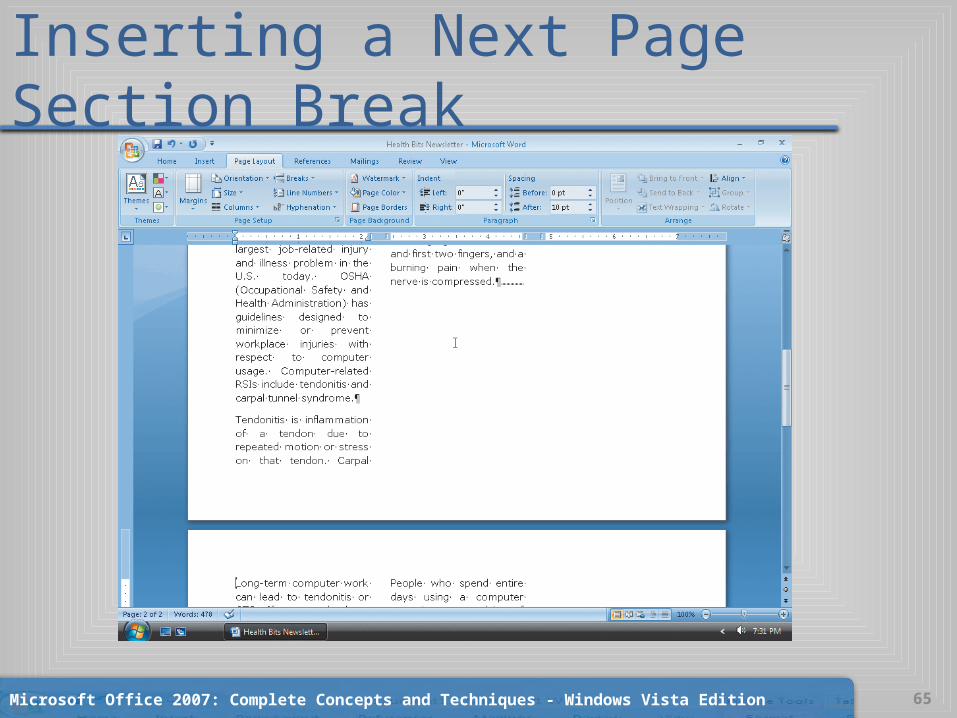
Inserting a Next Page Section Break• Scroll to display the bottom of the second column of the
first page of the newsletter in the document window. Position the insertion point to the left of the L in the paragraph beginning with the word, Long-term
• Display the Page Layout tab• Click the Insert Page and Section Breaks button on the
Page Layout tab to display the Insert Page and Section Breaks gallery
• In the Section Breaks area in the gallery, click Next Page to insert a section break and position the insertion point on the next page
Microsoft Office 2007: Complete Concepts and Techniques - Windows Vista Edition 64
Inserting a Next Page Section Break
Microsoft Office 2007: Complete Concepts and Techniques - Windows Vista Edition 65
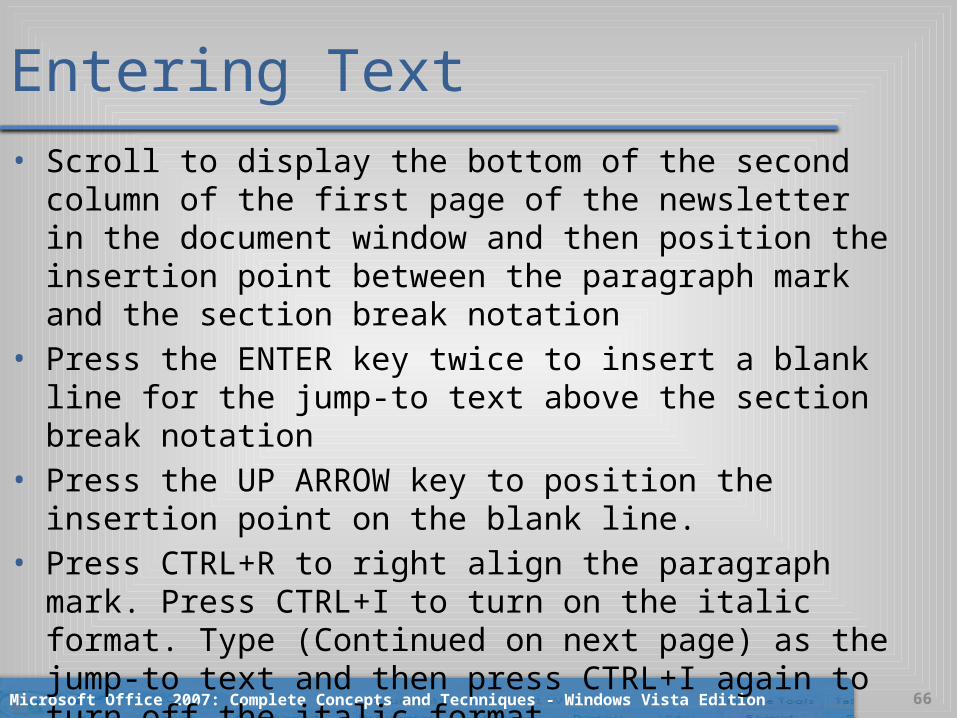
Entering Text
Microsoft Office 2007: Complete Concepts and Techniques - Windows Vista Edition 66
• Scroll to display the bottom of the second column of the first page of the newsletter in the document window and then position the insertion point between the paragraph mark and the section break notation
• Press the ENTER key twice to insert a blank line for the jump-to text above the section break notation
• Press the UP ARROW key to position the insertion point on the blank line.
• Press CTRL+R to right align the paragraph mark. Press CTRL+I to turn on the italic format. Type (Continued on next page) as the jump-to text and then press CTRL+I again to turn off the italic format
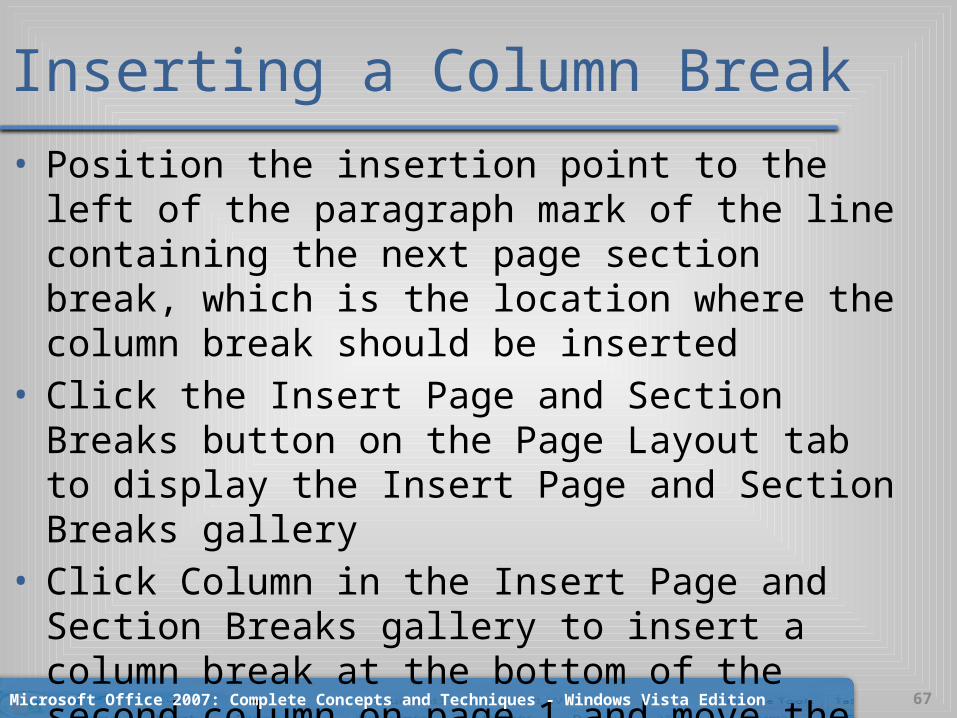
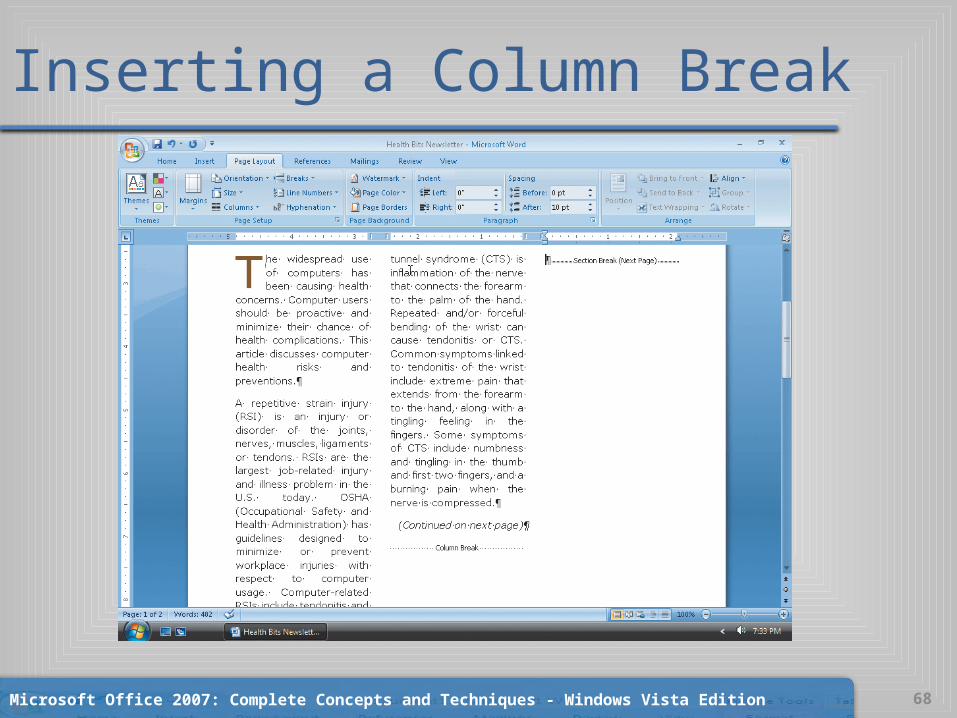
Inserting a Column Break• Position the insertion point to the left of the paragraph
mark of the line containing the next page section break, which is the location where the column break should be inserted
• Click the Insert Page and Section Breaks button on the Page Layout tab to display the Insert Page and Section Breaks gallery
• Click Column in the Insert Page and Section Breaks gallery to insert a column break at the bottom of the second column on page 1 and move the insertion point to the top of the third column
Microsoft Office 2007: Complete Concepts and Techniques - Windows Vista Edition 67
Inserting a Column Break
Microsoft Office 2007: Complete Concepts and Techniques - Windows Vista Edition 68

Saving a Document Again• Save the newsletter again with the same fi le
name, Health Bits Newsletter
Microsoft Office 2007: Complete Concepts and Techniques - Windows Vista Edition 69
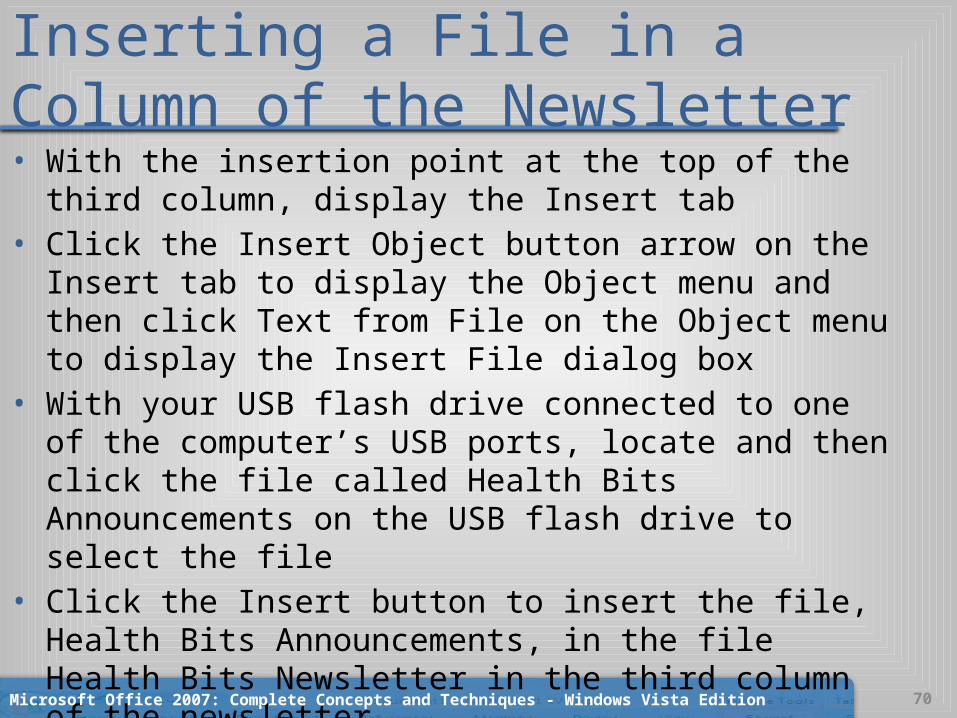
Inserting a File in a Column of the Newsletter• With the insertion point at the top of the third column, display
the Insert tab• Click the Insert Object button arrow on the Insert tab to display
the Object menu and then click Text from File on the Object menu to display the Insert File dialog box
• With your USB flash drive connected to one of the computer’s USB ports, locate and then click the file called Health Bits Announcements on the USB flash drive to select the file
• Click the Insert button to insert the file, Health Bits Announcements, in the file Health Bits Newsletter in the third column of the newsletter
Microsoft Office 2007: Complete Concepts and Techniques - Windows Vista Edition 70
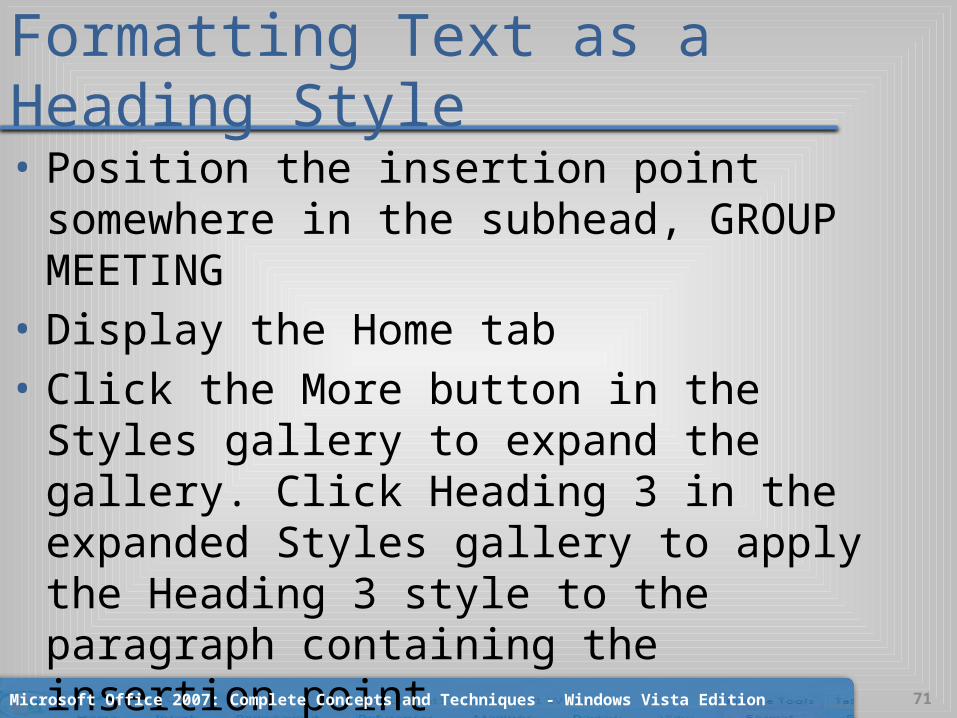
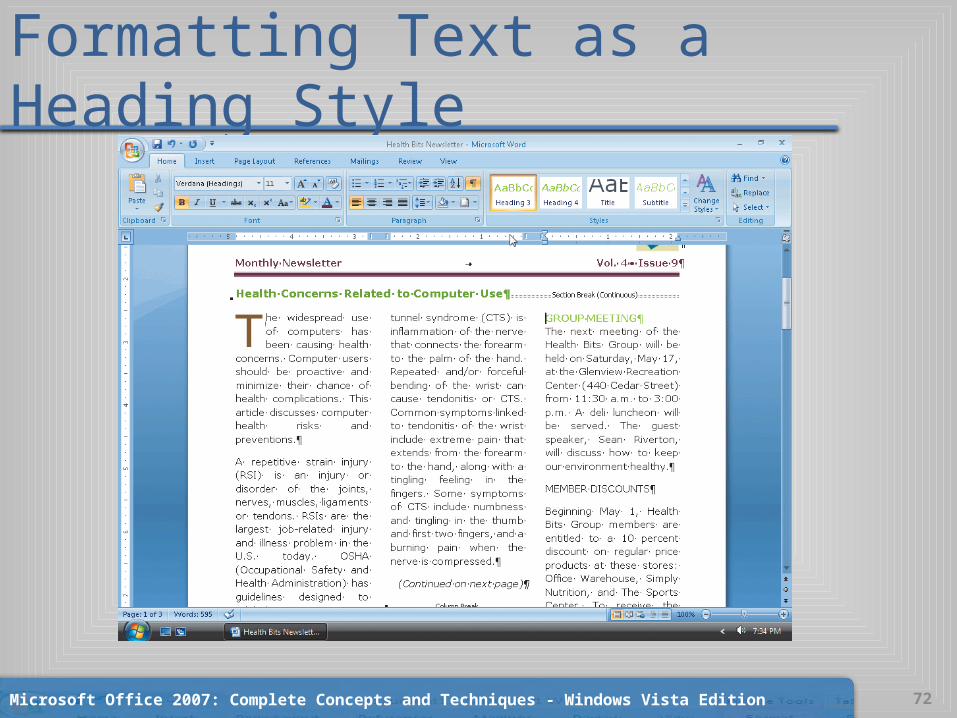
Formatting Text as a Heading Style• Position the insertion point somewhere in the
subhead, GROUP MEETING• Display the Home tab• Click the More button in the Styles gallery to
expand the gallery. Click Heading 3 in the expanded Styles gallery to apply the Heading 3 style to the paragraph containing the insertion point
Microsoft Office 2007: Complete Concepts and Techniques - Windows Vista Edition 71
Formatting Text as a Heading Style
Microsoft Office 2007: Complete Concepts and Techniques - Windows Vista Edition 72
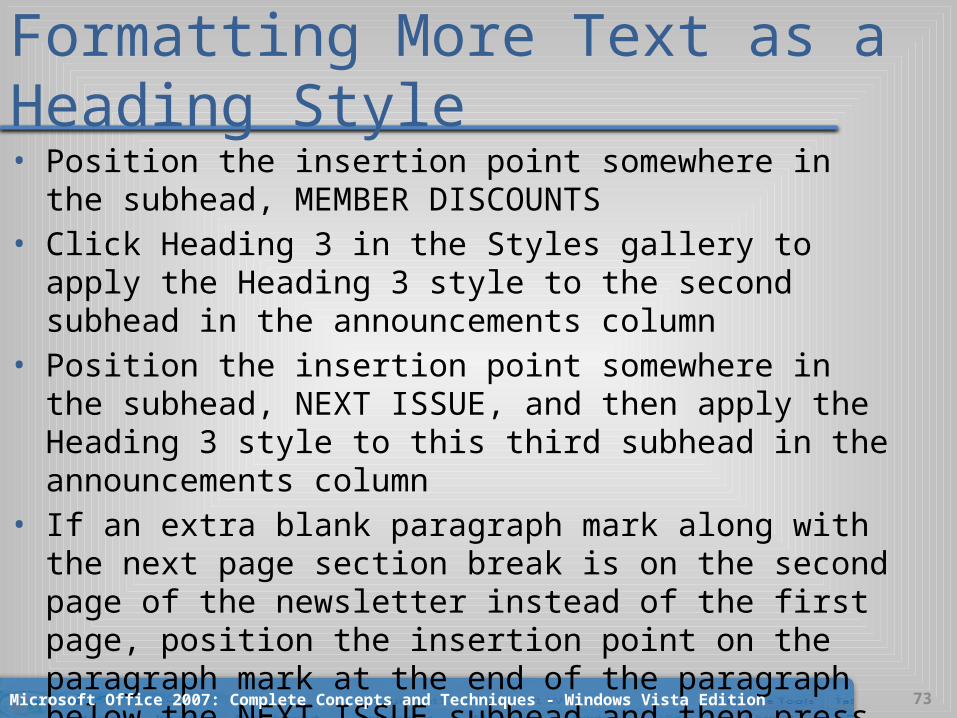
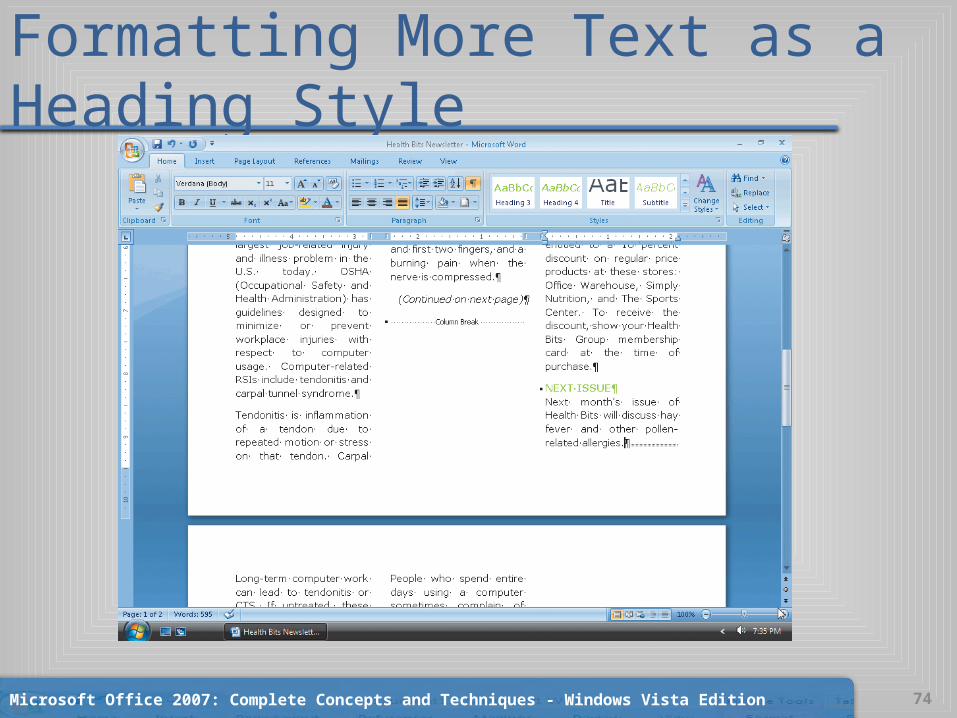
Formatting More Text as a Heading Style• Position the insertion point somewhere in the subhead, MEMBER
DISCOUNTS• Click Heading 3 in the Styles gallery to apply the Heading 3 style
to the second subhead in the announcements column• Position the insertion point somewhere in the subhead, NEXT
ISSUE, and then apply the Heading 3 style to this third subhead in the announcements column
• If an extra blank paragraph mark along with the next page section break is on the second page of the newsletter instead of the first page, position the insertion point on the paragraph mark at the end of the paragraph below the NEXT ISSUE subhead and then press the DELETE key so that the second page of the newsletter contains the remainder of the feature article
Microsoft Office 2007: Complete Concepts and Techniques - Windows Vista Edition 73
Formatting More Text as a Heading Style
Microsoft Office 2007: Complete Concepts and Techniques - Windows Vista Edition 74
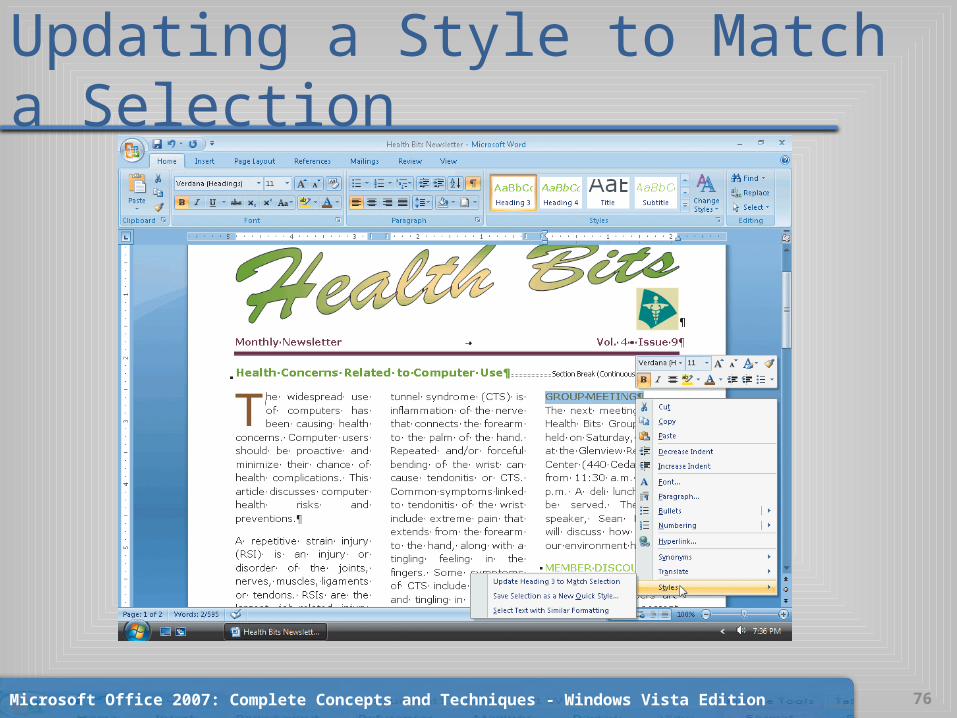
Updating a Style to Match a Selection• Scroll to and then select the line containing the subhead, GROUP
MEETING• Right-click the selected subhead text to display the Mini toolbar
and shortcut menu.• Click the Font Color button on the Mini toolbar to change the
color of the selected subhead to Gold, Accent 3, Darker 50%• Right-click the selected subhead text again and then point to
Styles on the shortcut menu to display the Styles menu• On the Styles menu, click Update Heading 3 to Match Selection,
which modifies the Heading 3 style to match the formats of the selected text and changes all other Heading 3 text in the document to the updated style
Microsoft Office 2007: Complete Concepts and Techniques - Windows Vista Edition 75
Updating a Style to Match a Selection
Microsoft Office 2007: Complete Concepts and Techniques - Windows Vista Edition 76
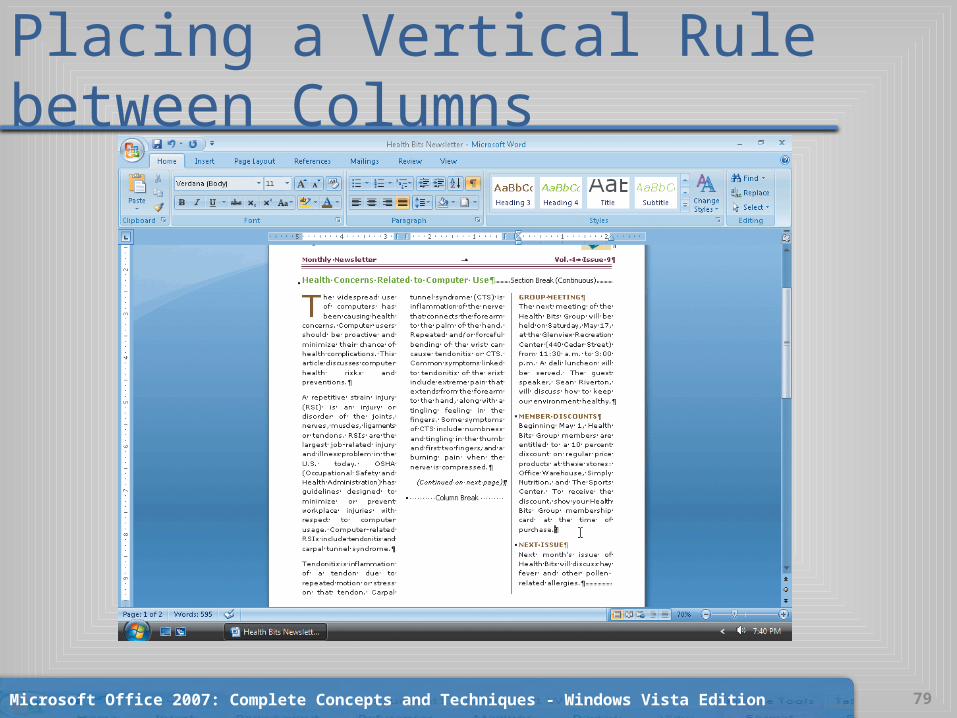
Placing a Vertical Rule between Columns• Change the zoom level to 70% and then scroll through the
document so that the entire third column is displayed in the document window
• Drag through all of the text in the third column of the newsletter to select it
• With the third column of page 1 in the newsletter still selected, click the Borders button arrow on the Home tab and then click Borders and Shading in the Borders gallery to display the Borders and Shading dialog box
• If necessary, click the Borders tab in the dialog box• Click the Left Border button in the Preview area
Microsoft Office 2007: Complete Concepts and Techniques - Windows Vista Edition 77
Placing a Vertical Rule between Columns• Click the Options button to display the Border and Shading
Options dialog box• In the dialog box, change the Left text box to 10 pt, which
instructs Word to move the left border 10 points from the edge of the paragraph
• Click the OK button in each open dialog box to draw a left border that is positioned 10 points from the edge of the text
• Click in the document to remove the selection from the third column
• Change the zoom level to 100% so that the newsletter text is easier to read
Microsoft Office 2007: Complete Concepts and Techniques - Windows Vista Edition 78
Placing a Vertical Rule between Columns
Microsoft Office 2007: Complete Concepts and Techniques - Windows Vista Edition 79
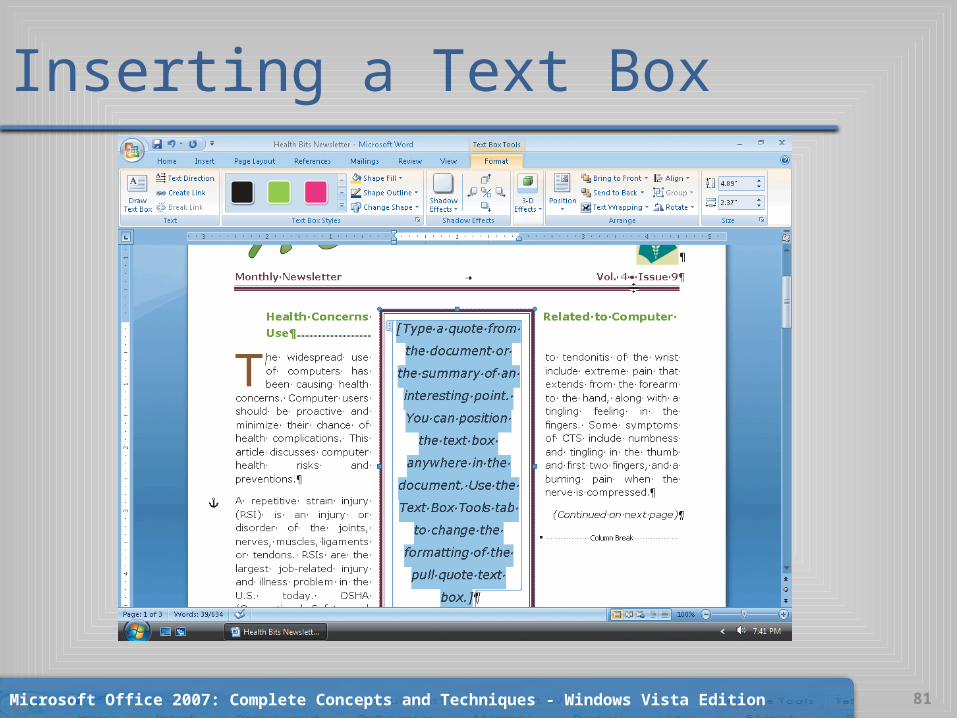
Inserting a Text Box• Scroll to display the top portion of the newsletter in the
document window and position the insertion point at an approximate location for the pull-quote (you will position the pull-quote at the exact location in a later step)
• Display the Insert tab• Click the Text Box button on the Insert tab to display the
Text Box gallery• Click Alphabet Quote in the Text Box gallery to insert
that text box style in the document
Microsoft Office 2007: Complete Concepts and Techniques - Windows Vista Edition 80
Inserting a Text Box
Microsoft Office 2007: Complete Concepts and Techniques - Windows Vista Edition 81
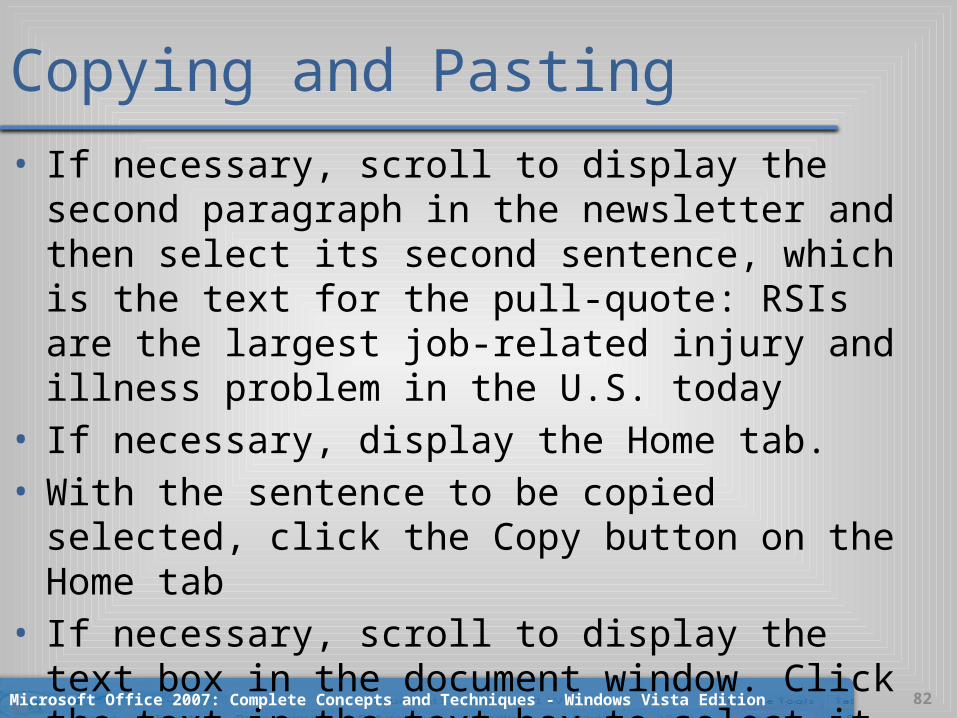
Copying and Pasting• If necessary, scroll to display the second paragraph in
the newsletter and then select its second sentence, which is the text for the pull-quote: RSIs are the largest job-related injury and illness problem in the U.S. today
• If necessary, display the Home tab.• With the sentence to be copied selected, click the Copy
button on the Home tab• If necessary, scroll to display the text box in the
document window. Click the text in the text box to select it
Microsoft Office 2007: Complete Concepts and Techniques - Windows Vista Edition 82
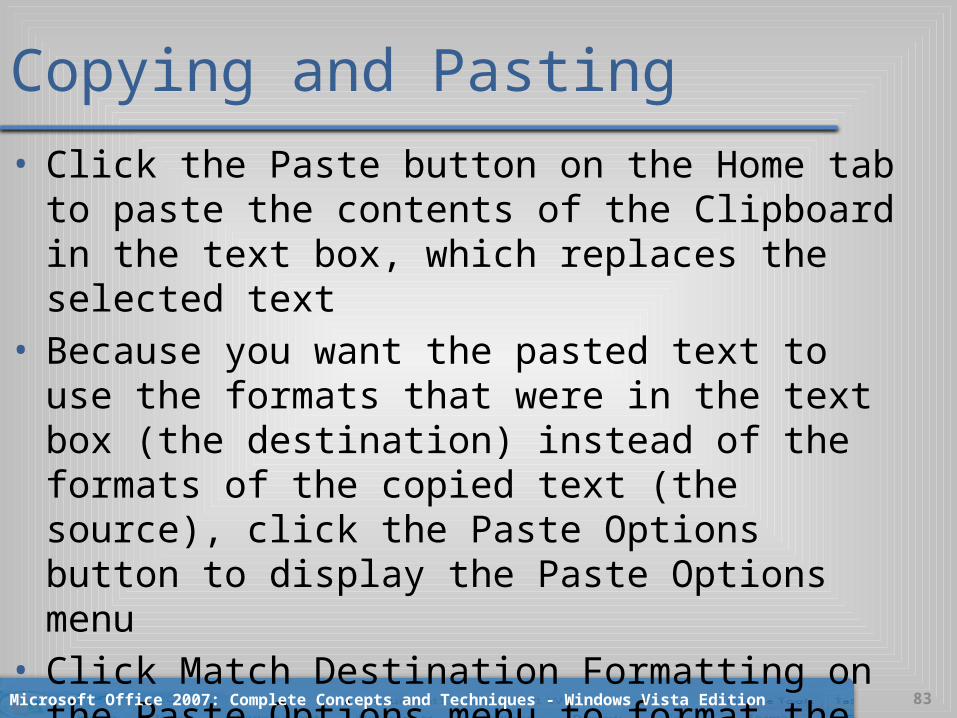
Copying and Pasting• Click the Paste button on the Home tab to paste the
contents of the Clipboard in the text box, which replaces the selected text
• Because you want the pasted text to use the formats that were in the text box (the destination) instead of the formats of the copied text (the source), click the Paste Options button to display the Paste Options menu
• Click Match Destination Formatting on the Paste Options menu to format the pasted text the same as the destination, which in this case, is the text box contents
Microsoft Office 2007: Complete Concepts and Techniques - Windows Vista Edition 83
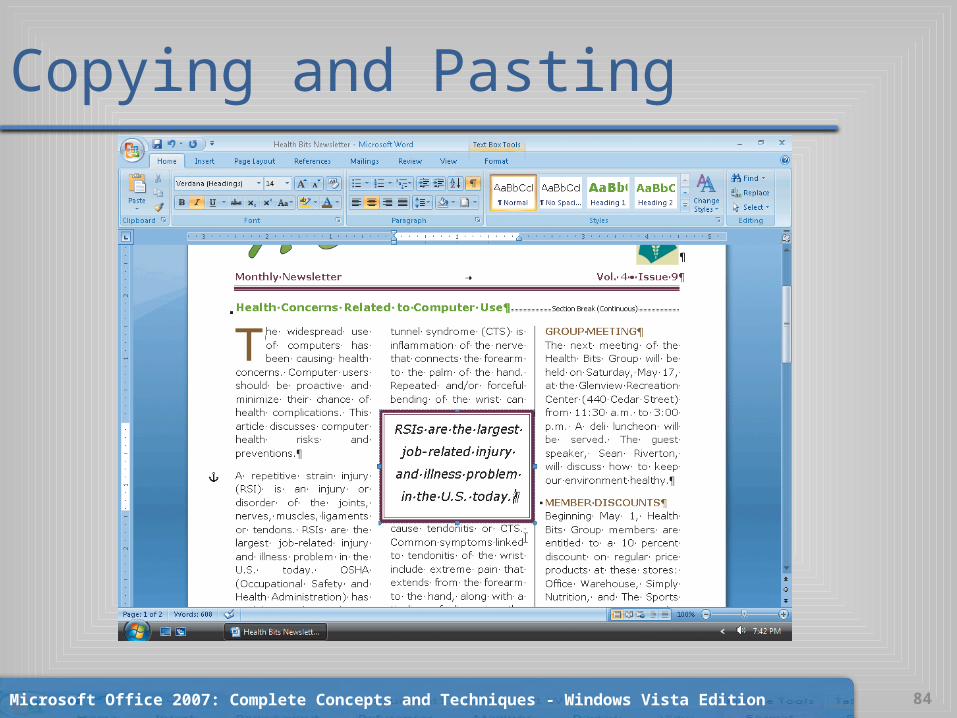
Copying and Pasting
Microsoft Office 2007: Complete Concepts and Techniques - Windows Vista Edition 84
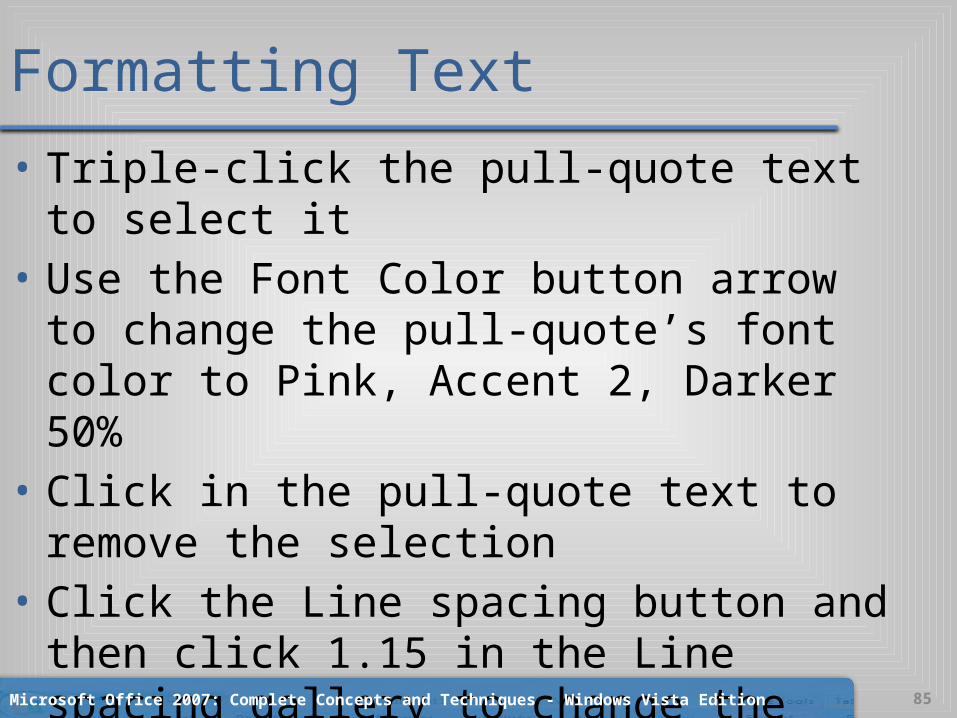
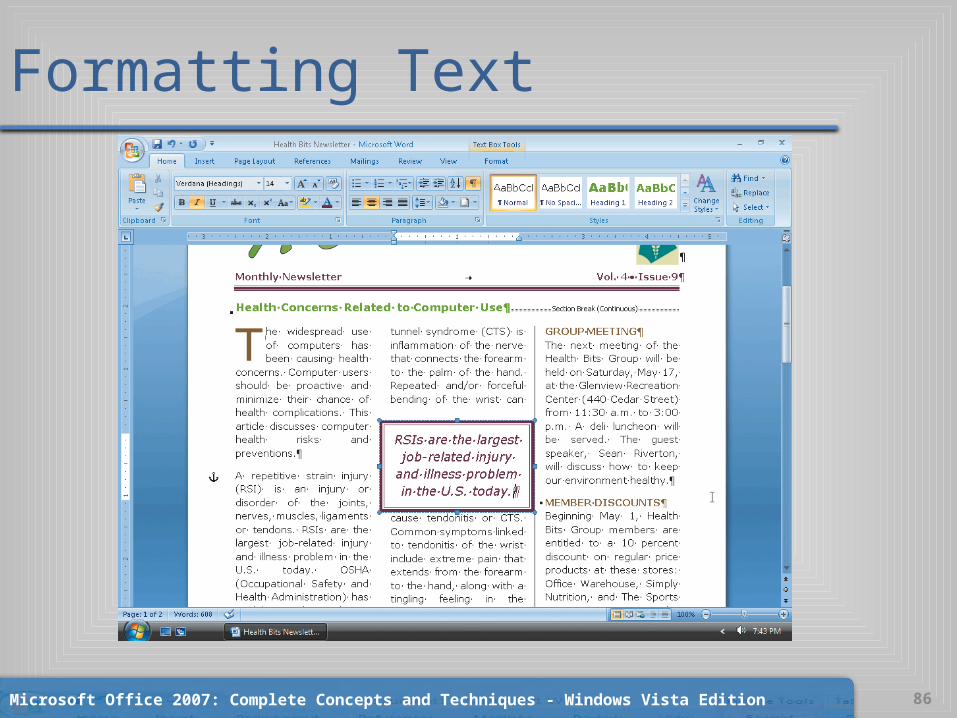
Formatting Text• Triple-click the pull-quote text to select it• Use the Font Color button arrow to change the
pull-quote’s font color to Pink, Accent 2, Darker 50%
• Click in the pull-quote text to remove the selection
• Click the Line spacing button and then click 1.15 in the Line spacing gallery to change the line spacing of the pull-quote
Microsoft Office 2007: Complete Concepts and Techniques - Windows Vista Edition 85
Formatting Text
Microsoft Office 2007: Complete Concepts and Techniques - Windows Vista Edition 86
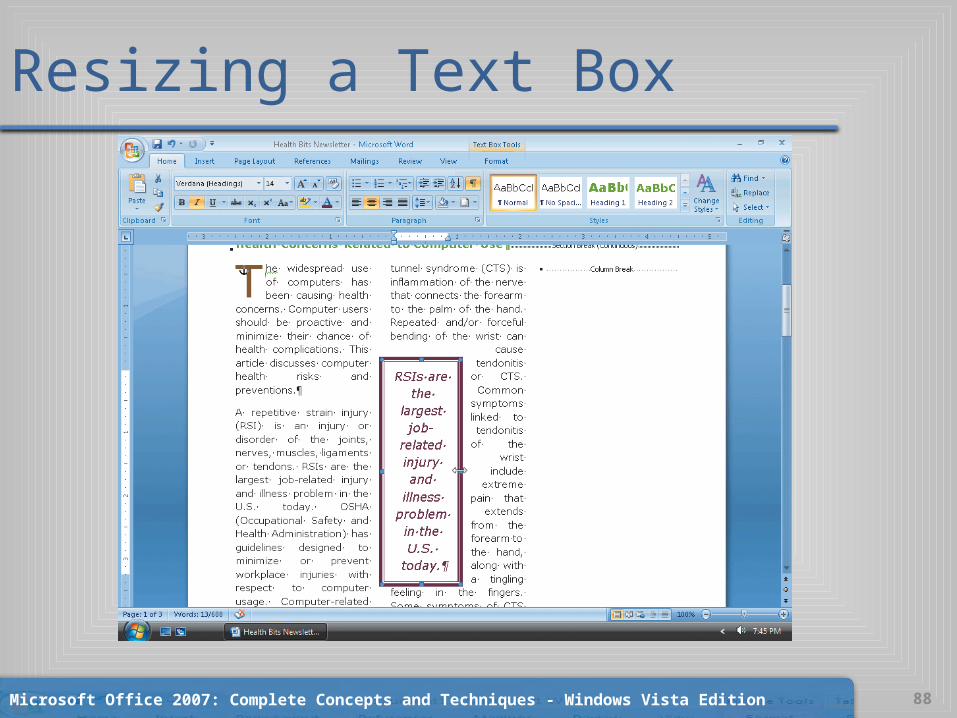
Resizing a Text Box• If necessary, click the edge of the text box to
select it• Drag the right-middle sizing handle inward about
one inch to make the pull-quote narrower
Microsoft Office 2007: Complete Concepts and Techniques - Windows Vista Edition 87
Resizing a Text Box
Microsoft Office 2007: Complete Concepts and Techniques - Windows Vista Edition 88
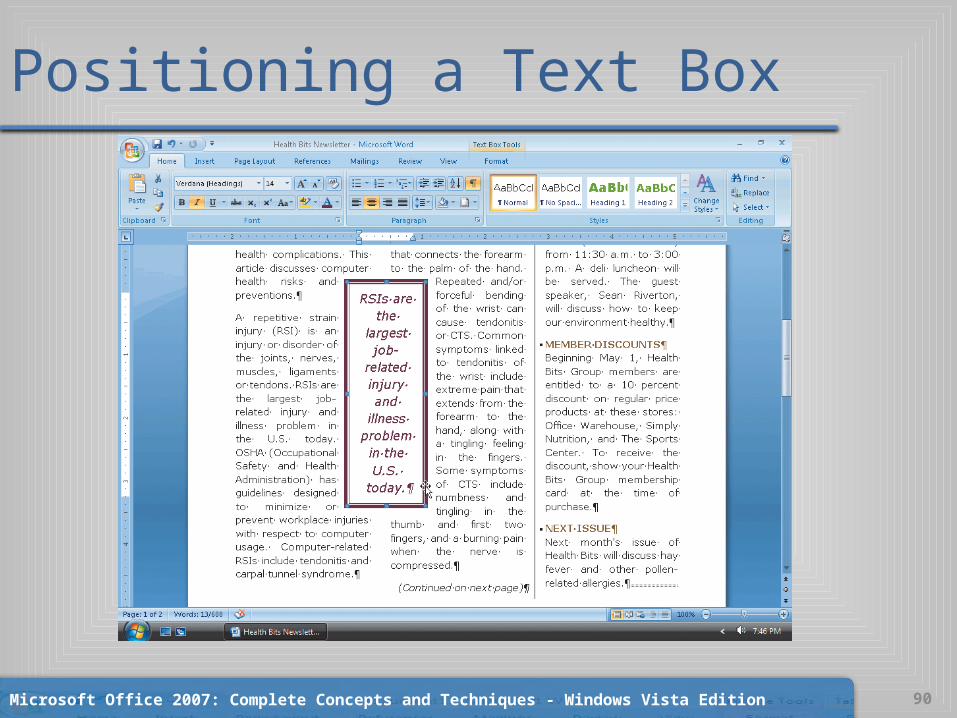
Positioning a Text Box• With the text box still selected, drag the text box
to its new location. You may need to drag and/or resize the text box a couple of times so that it looks similar to this figure
• Click outside the text box to remove the selection
Microsoft Office 2007: Complete Concepts and Techniques - Windows Vista Edition 89
Positioning a Text Box
Microsoft Office 2007: Complete Concepts and Techniques - Windows Vista Edition 90
Saving a Document Again• Save the newsletter again with the same fi le
name, Health Bits Newsletter
Microsoft Office 2007: Complete Concepts and Techniques - Windows Vista Edition 91
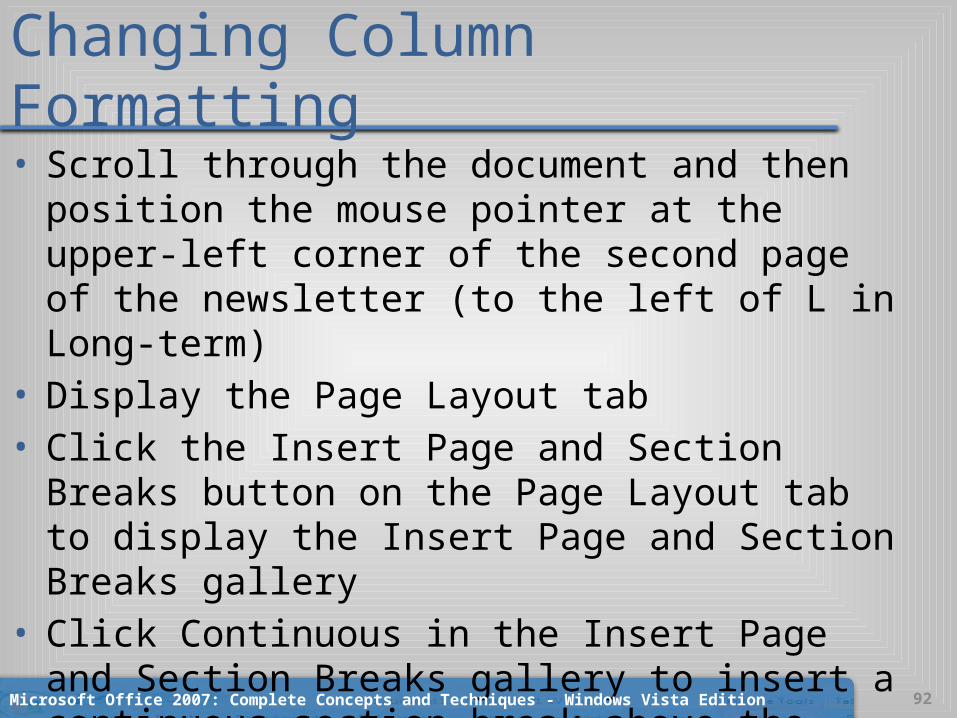
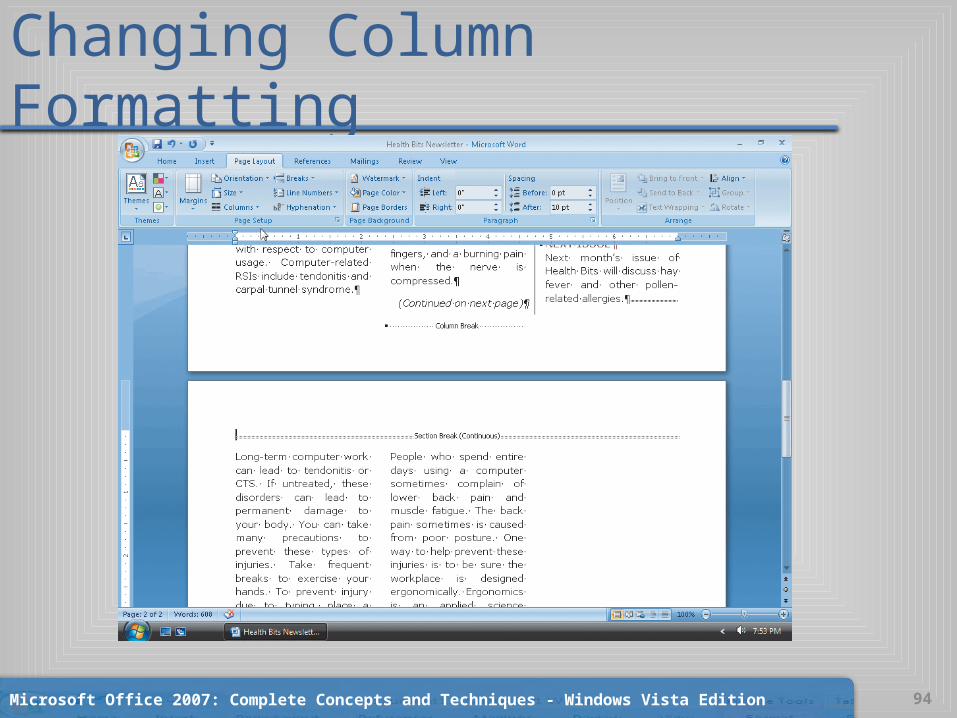
Changing Column Formatting• Scroll through the document and then position the
mouse pointer at the upper-left corner of the second page of the newsletter (to the left of L in Long-term)
• Display the Page Layout tab• Click the Insert Page and Section Breaks button on the
Page Layout tab to display the Insert Page and Section Breaks gallery
• Click Continuous in the Insert Page and Section Breaks gallery to insert a continuous section break above the insertion point
Microsoft Office 2007: Complete Concepts and Techniques - Windows Vista Edition 92
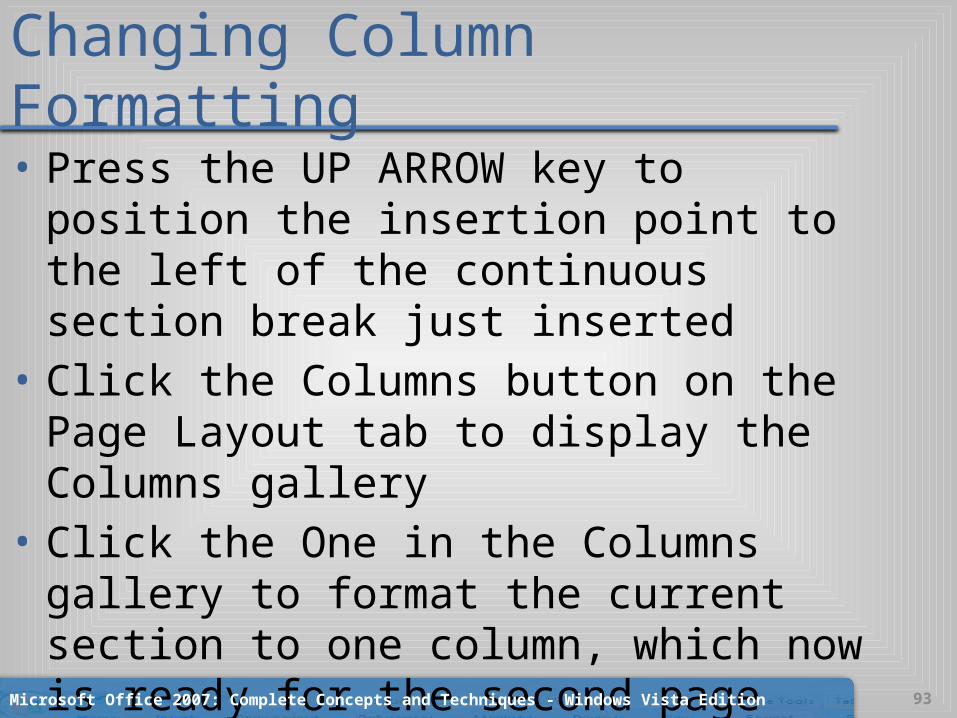
Changing Column Formatting• Press the UP ARROW key to position the
insertion point to the left of the continuous section break just inserted
• Click the Columns button on the Page Layout tab to display the Columns gallery
• Click the One in the Columns gallery to format the current section to one column, which now is ready for the second page nameplate
Microsoft Office 2007: Complete Concepts and Techniques - Windows Vista Edition 93
Changing Column Formatting
Microsoft Office 2007: Complete Concepts and Techniques - Windows Vista Edition 94
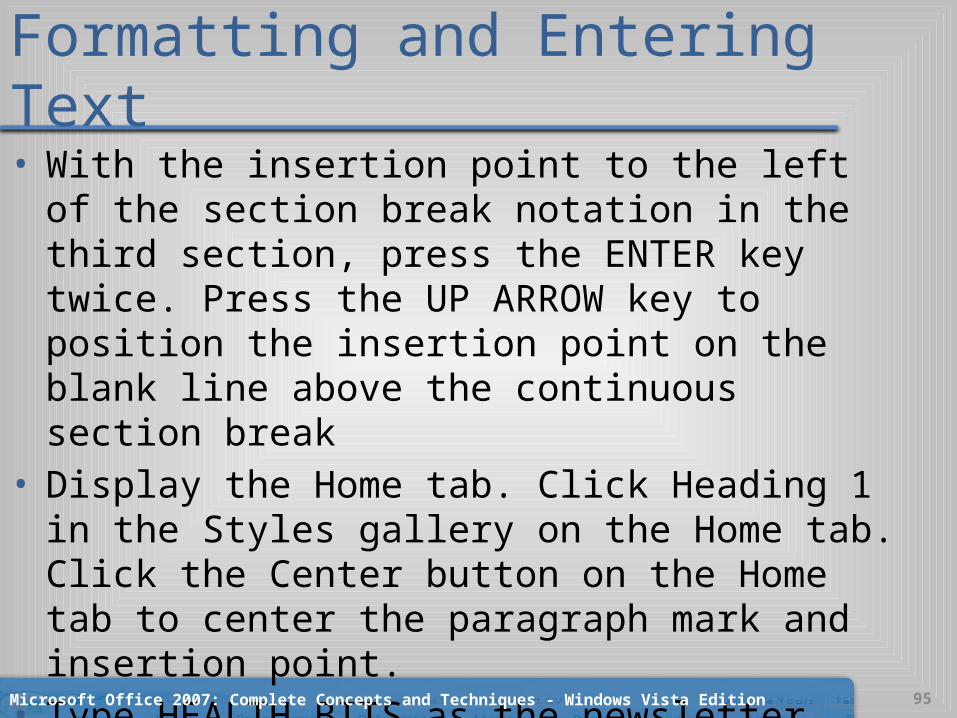
Formatting and Entering Text• With the insertion point to the left of the section break
notation in the third section, press the ENTER key twice. Press the UP ARROW key to position the insertion point on the blank line above the continuous section break
• Display the Home tab. Click Heading 1 in the Styles gallery on the Home tab. Click the Center button on the Home tab to center the paragraph mark and insertion point.
• Type HEALTH BITS as the newsletter title and then press the ENTER key
Microsoft Office 2007: Complete Concepts and Techniques - Windows Vista Edition 95

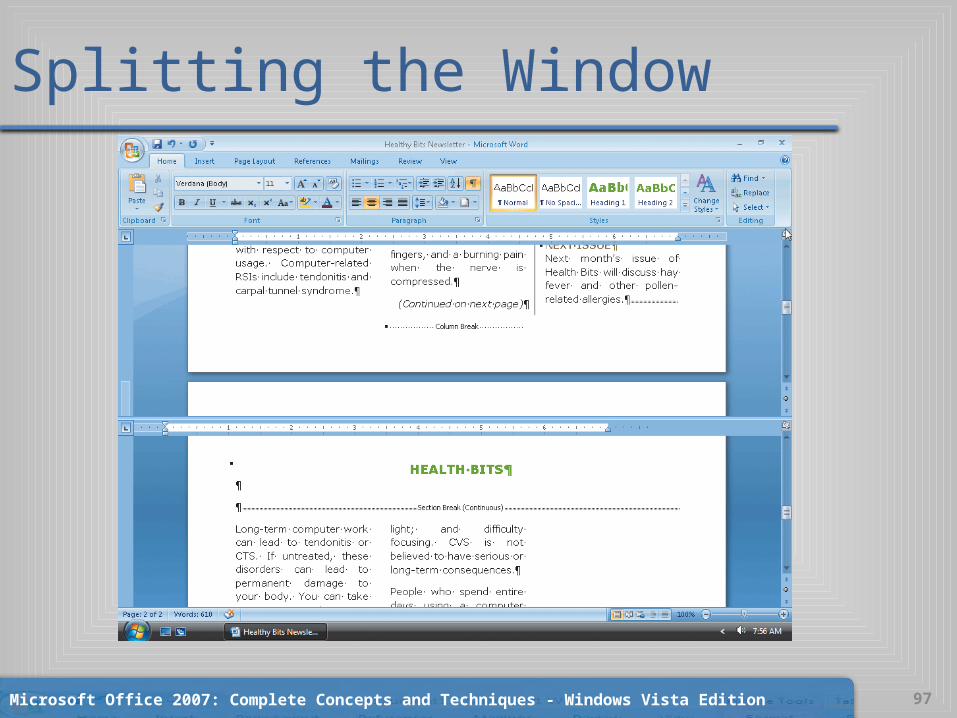
Splitting the Window• Position the mouse pointer on the split box at
the top of the vertical scroll bar, which changes the mouse pointer to a resize pointer
• Double-click the resize pointer to divide the document window in two separate panes - both the upper and lower panes display the current document
Microsoft Office 2007: Complete Concepts and Techniques - Windows Vista Edition 96
Splitting the Window
Microsoft Office 2007: Complete Concepts and Techniques - Windows Vista Edition 97
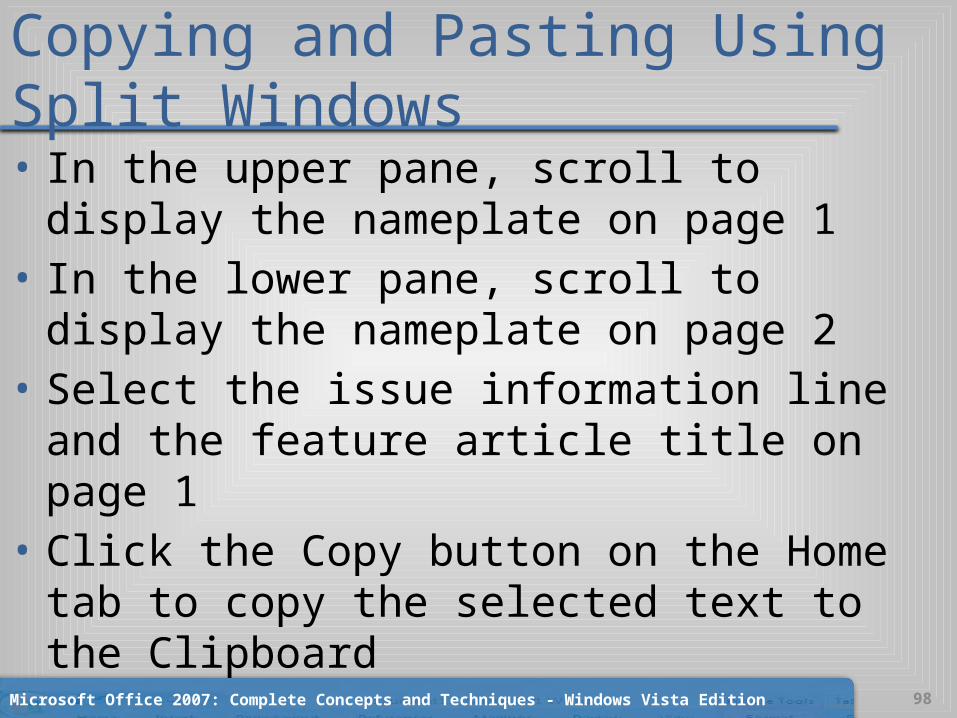
Copying and Pasting Using Split Windows• In the upper pane, scroll to display the
nameplate on page 1• In the lower pane, scroll to display the nameplate
on page 2• Select the issue information line and the feature
article title on page 1• Click the Copy button on the Home tab to copy
the selected text to the Clipboard
Microsoft Office 2007: Complete Concepts and Techniques - Windows Vista Edition 98
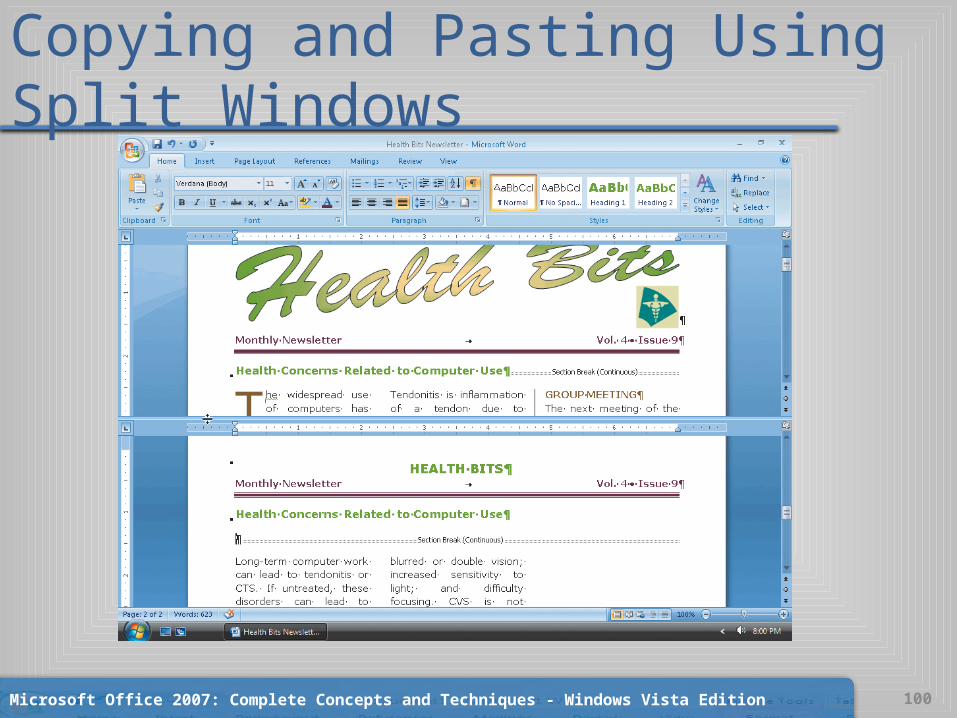
Copying and Pasting Using Split Windows• Position the insertion point in the lower pane on
the paragraph mark below the newsletter title.• Click the Paste button on the Home tab to paste
the issue information line and feature article title on the second page of the newsletter
• If an extra paragraph mark appears below the feature article title, remove it
Microsoft Office 2007: Complete Concepts and Techniques - Windows Vista Edition 99
Copying and Pasting Using Split Windows
Microsoft Office 2007: Complete Concepts and Techniques - Windows Vista Edition 100
Removing a Split Window• Double-click the split bar, or click the Remove
Split button on the View tab, or press ALT+SHIFT+C, to remove the split window and return to a single Word window on the screen
Microsoft Office 2007: Complete Concepts and Techniques - Windows Vista Edition 101
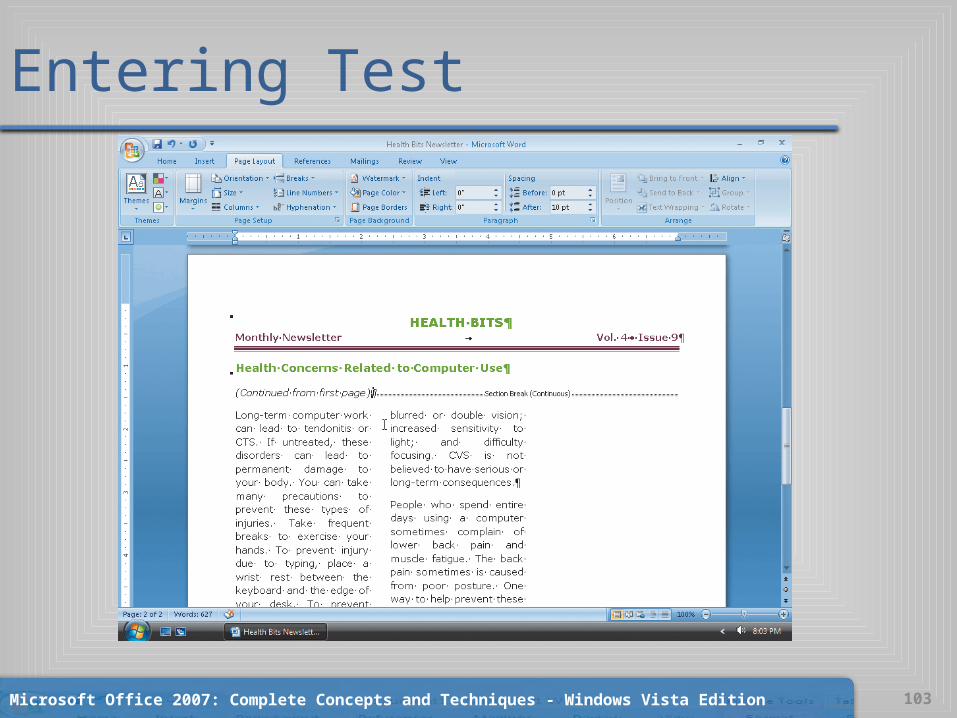
Entering Test• With the insertion point on the line immediately
below the pasted text, press CTRL+I to turn on the italic format. Type (Continued from first page) and then press CTRL+I to turn off the italic format
• If the continuous section break is on the line below the jump-from line, press the DELETE key to move it up to the same line as the jump-from line
Microsoft Office 2007: Complete Concepts and Techniques - Windows Vista Edition 102
Entering Test
Microsoft Office 2007: Complete Concepts and Techniques - Windows Vista Edition 103
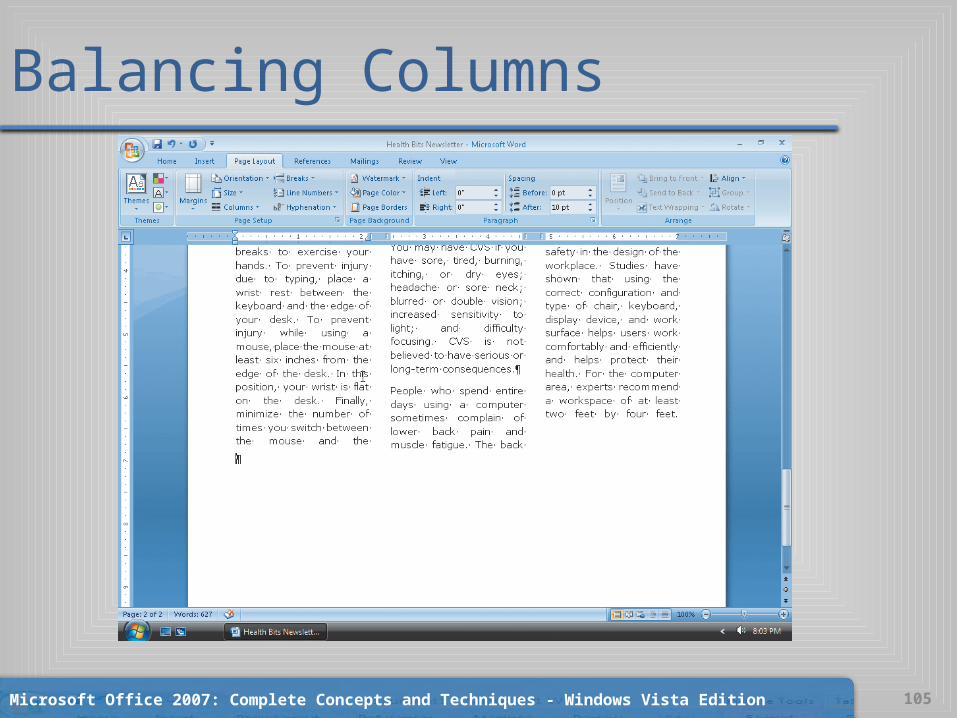
Balancing Columns• Scroll to the bottom of the text in the second column on the
second page of the newsletter and then position the insertion point at the end of the text
• If an extra paragraph mark is below the last line of text, press the DELETE key to remove the extra paragraph mark
• Display the Page Layout tab• Click the Insert Page and Section Breaks button on the Page
Layout tab to display the Insert Page and Section Breaks gallery• Click Continuous in the Insert Page and Section Breaks gallery to
insert a continuous section break, which balances the columns on the second page of the newsletter
Microsoft Office 2007: Complete Concepts and Techniques - Windows Vista Edition 104
Balancing Columns
Microsoft Office 2007: Complete Concepts and Techniques - Windows Vista Edition 105
Saving a Document Again• Save the newsletter again with the same file
name, Health Bits Newsletter
Microsoft Office 2007: Complete Concepts and Techniques - Windows Vista Edition 106
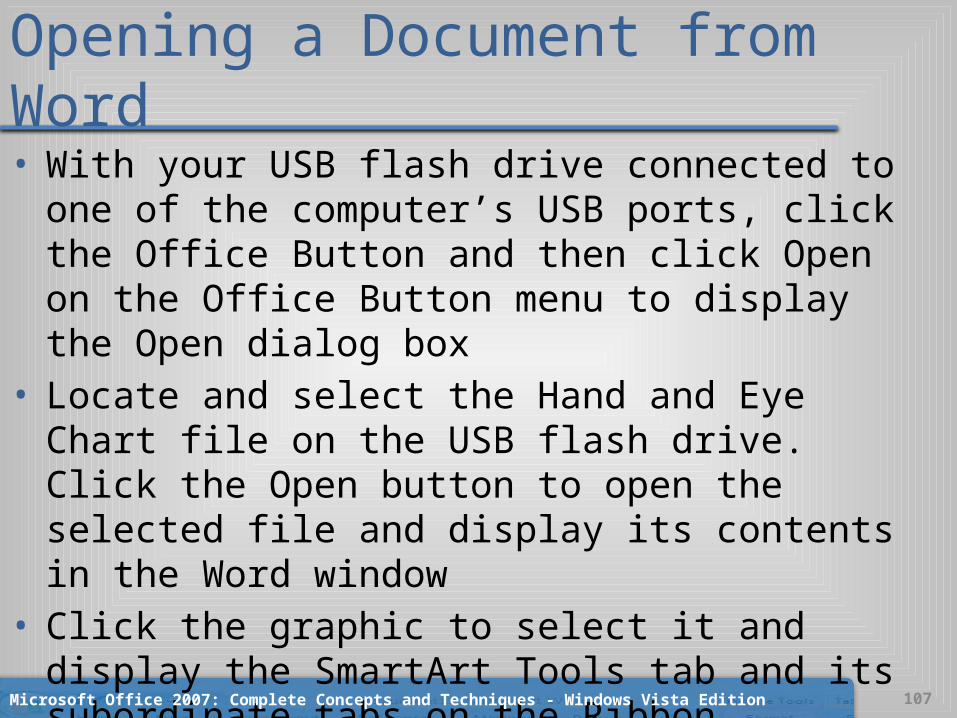
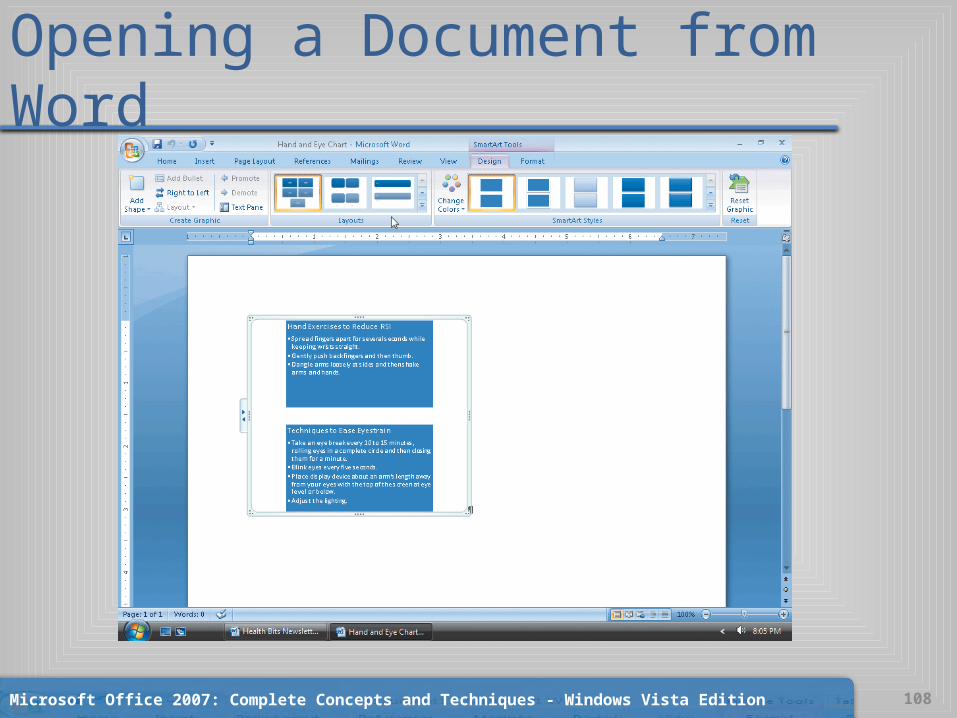
Opening a Document from Word• With your USB flash drive connected to one of the
computer’s USB ports, click the Office Button and then click Open on the Office Button menu to display the Open dialog box
• Locate and select the Hand and Eye Chart file on the USB flash drive. Click the Open button to open the selected file and display its contents in the Word window
• Click the graphic to select it and display the SmartArt Tools tab and its subordinate tabs on the Ribbon
Microsoft Office 2007: Complete Concepts and Techniques - Windows Vista Edition 107
Opening a Document from Word
Microsoft Office 2007: Complete Concepts and Techniques - Windows Vista Edition 108
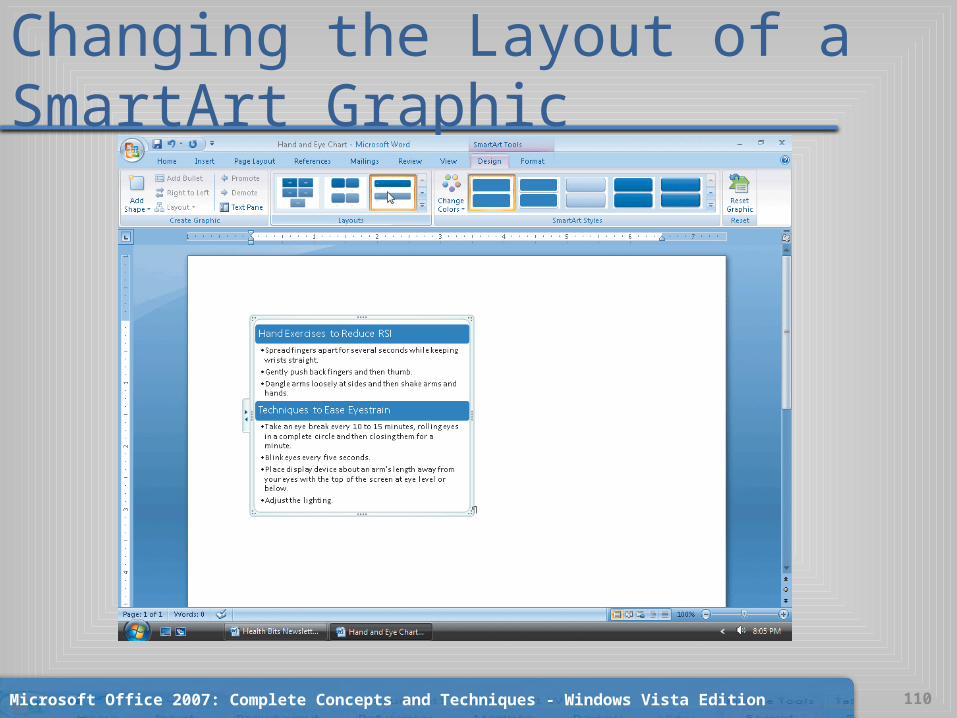
Changing the Layout of a SmartArt Graphic• If necessary, display the SmartArt Tools Design
tab• With the SmartArt graphic selected, locate and
click the Vertical Bullet List layout in the Layouts gallery to change the layout of the SmartArt graphic
Microsoft Office 2007: Complete Concepts and Techniques - Windows Vista Edition 109
Changing the Layout of a SmartArt Graphic
Microsoft Office 2007: Complete Concepts and Techniques - Windows Vista Edition 110
Adding a Shape to a SmartArt Graphic• With the diagram selected, click the Add Shape
button on the Design tab to add a shape to the SmartArt graphic
Microsoft Office 2007: Complete Concepts and Techniques - Windows Vista Edition 111

Adding a Shape to a SmartArt Graphic
Microsoft Office 2007: Complete Concepts and Techniques - Windows Vista Edition 112
Adding Text to a SmartArt Graphic through the Text Pane• Click the Text Pane button on the Design tab to
display the Text pane to the left of the SmartArt graphic
• Scroll to the bottom of the Text pane and then, if necessary, position the insertion point to the right of the bullet that has no text to its right
• Type Methods to Minimize Fatigue as the text for the shape
Microsoft Office 2007: Complete Concepts and Techniques - Windows Vista Edition 113

Adding Text to a SmartArt Graphic through the Text Pane
Microsoft Office 2007: Complete Concepts and Techniques - Windows Vista Edition 114
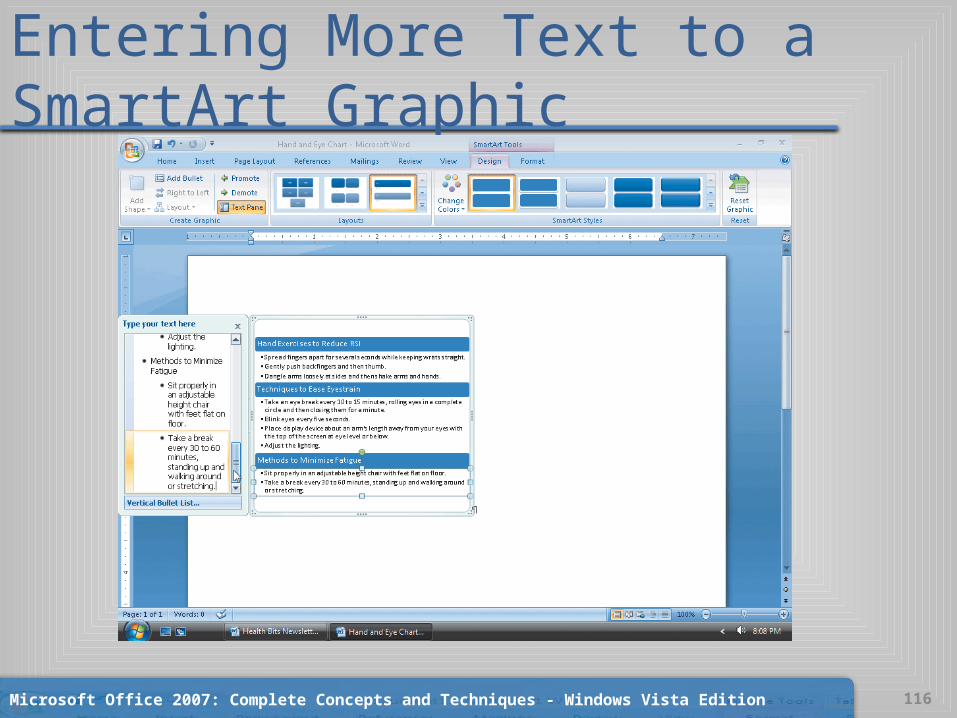
Entering More Text to a SmartArt Graphic• Press the ENTER key to add a new bullet and then press
the TAB key to indent the bullet.• Type Sit properly in an adjustable height chair with feet flat on floor
• Press the ENTER key to add a new bullet• Type Take a break every 30 to 60 minutes, standing up and walking around or stretching
• Click the Close button on the Text Pane title bar to close the Text pane
Microsoft Office 2007: Complete Concepts and Techniques - Windows Vista Edition 115
Entering More Text to a SmartArt Graphic
Microsoft Office 2007: Complete Concepts and Techniques - Windows Vista Edition 116
Saving an Active Document with a New File Name• With the USB flash drive containing the Hand and
Eye Chart file connected to one of the computer’s USB ports, click the Office Button and then click Save As on the Office Button menu to display the Save As dialog box
• Save the document on the USB flash drive with the file name, Hand and Eye Chart Modified
Microsoft Office 2007: Complete Concepts and Techniques - Windows Vista Edition 117

Copying and Pasting a SmartArt Graphic• Display the Home tab• Click the Clipboard Dialog Box Launcher on the
Home tab to display the Clipboard task pane• If the Office Clipboard in the Clipboard task pane
is not empty, click the Clear All button in the Clipboard task pane
• If necessary, click the SmartArt graphic to select it
Microsoft Office 2007: Complete Concepts and Techniques - Windows Vista Edition 118
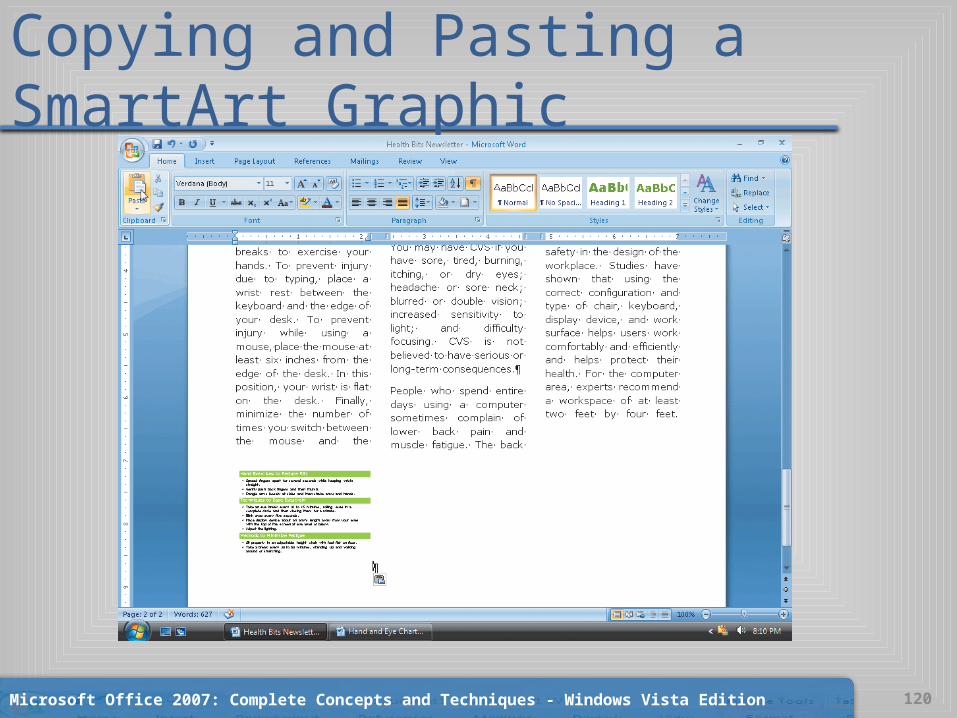
Copying and Pasting a SmartArt Graphic• Click the Copy button on the Home tab to copy the
selected SmartArt graphic to the Office Clipboard• Click Health Bits Newsletter - Microsoft Word
program button on the Windows Vista taskbar to display the newsletter document.
• Position the insertion point at the bottom of the second page of the newsletter and then click the Paste button on the Home tab to paste the SmartArt graphic in the newsletter
Microsoft Office 2007: Complete Concepts and Techniques - Windows Vista Edition 119
Copying and Pasting a SmartArt Graphic
Microsoft Office 2007: Complete Concepts and Techniques - Windows Vista Edition 120

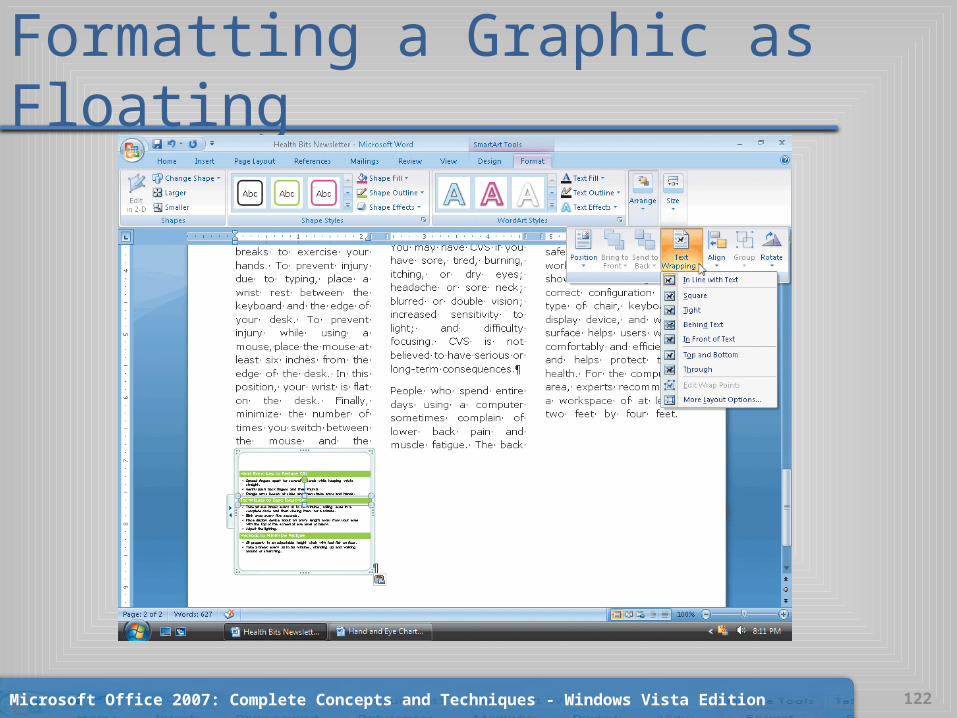
Formatting a Graphic as Floating• If necessary, double-click the SmartArt graphic to select
it• Display the SmartArt Tools Format tab on the Ribbon• With the SmartArt graphic selected, click the Arrange
button on the Format tab and then click the Text Wrapping button on the Arrange menu to display the Text Wrapping menu
• Click Square on the Text Wrapping menu to change the graphic from inline to floating with square wrapping
Microsoft Office 2007: Complete Concepts and Techniques - Windows Vista Edition 121
Formatting a Graphic as Floating
Microsoft Office 2007: Complete Concepts and Techniques - Windows Vista Edition 122
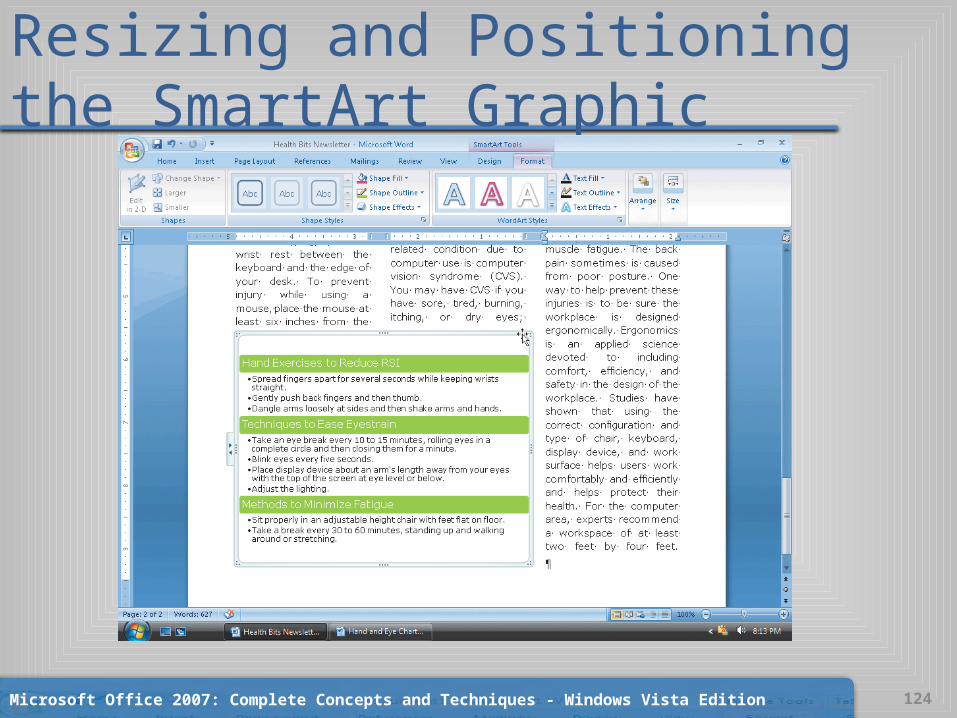
Resizing and Positioning the SmartArt Graphic• Drag the upper-right corner sizing handle
outward• Point to the frame on the graphic and when the
mouse has a four-headed arrow attached to it, drag the graphic to the location. You may have to drag the graphic a couple of times to position it similarly to the figure
Microsoft Office 2007: Complete Concepts and Techniques - Windows Vista Edition 123
Resizing and Positioning the SmartArt Graphic
Microsoft Office 2007: Complete Concepts and Techniques - Windows Vista Edition 124
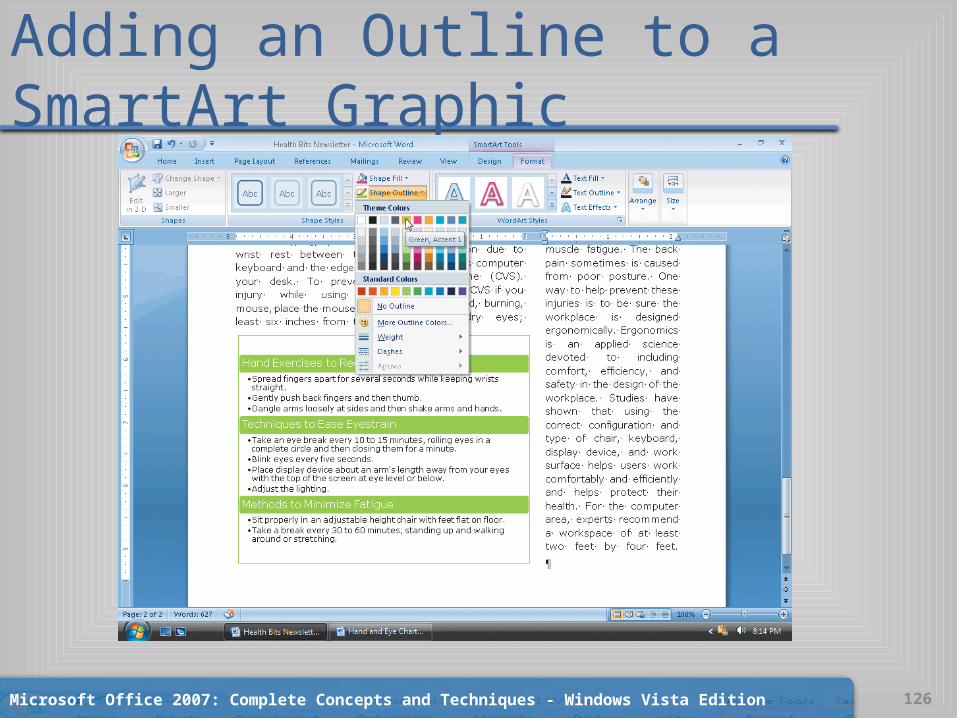
Adding an Outline to a SmartArt Graphic• Click the Shape Outline button arrow on the Format tab
to display the Shape Outline gallery• Point to Green, Accent 1 in the Shape Outline gallery to
display alive preview of that color outline applied to the SmartArt graphic in the document
• Click Green, Accent 1 in the Shape Outline gallery to apply the selected outline color to the SmartArt graphic
• Click outside the graphic so that it is no longer selected
Microsoft Office 2007: Complete Concepts and Techniques - Windows Vista Edition 125
Adding an Outline to a SmartArt Graphic
Microsoft Office 2007: Complete Concepts and Techniques - Windows Vista Edition 126
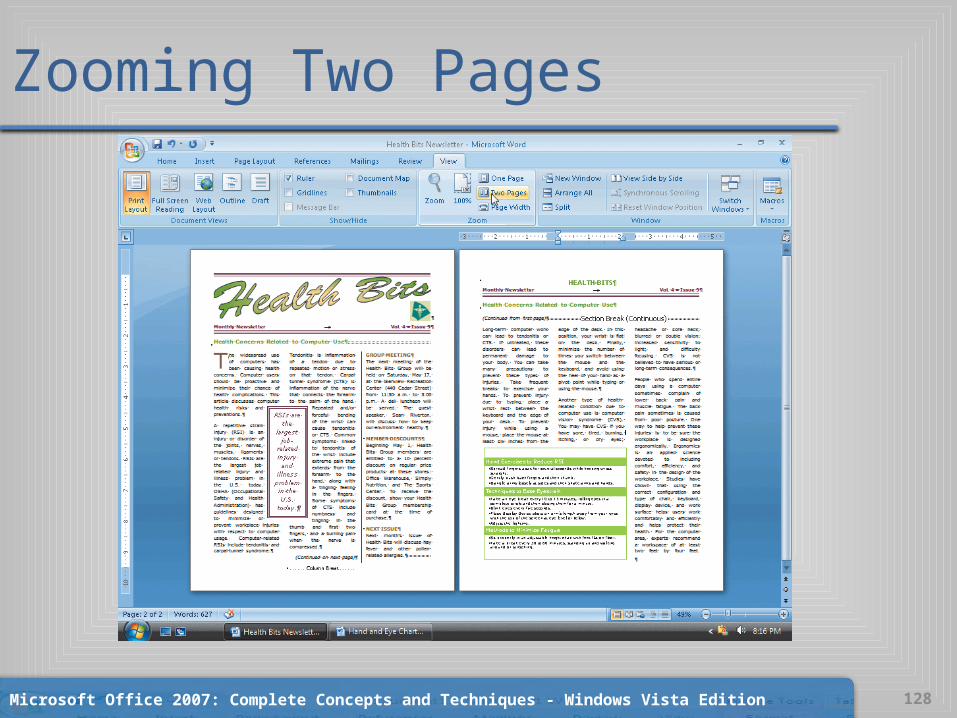
Zooming Two Pages• Display the View tab• Click the Two Pages button on the View tab to
display both entire pages of the newsletter in the document window
Microsoft Office 2007: Complete Concepts and Techniques - Windows Vista Edition 127
Zooming Two Pages
Microsoft Office 2007: Complete Concepts and Techniques - Windows Vista Edition 128

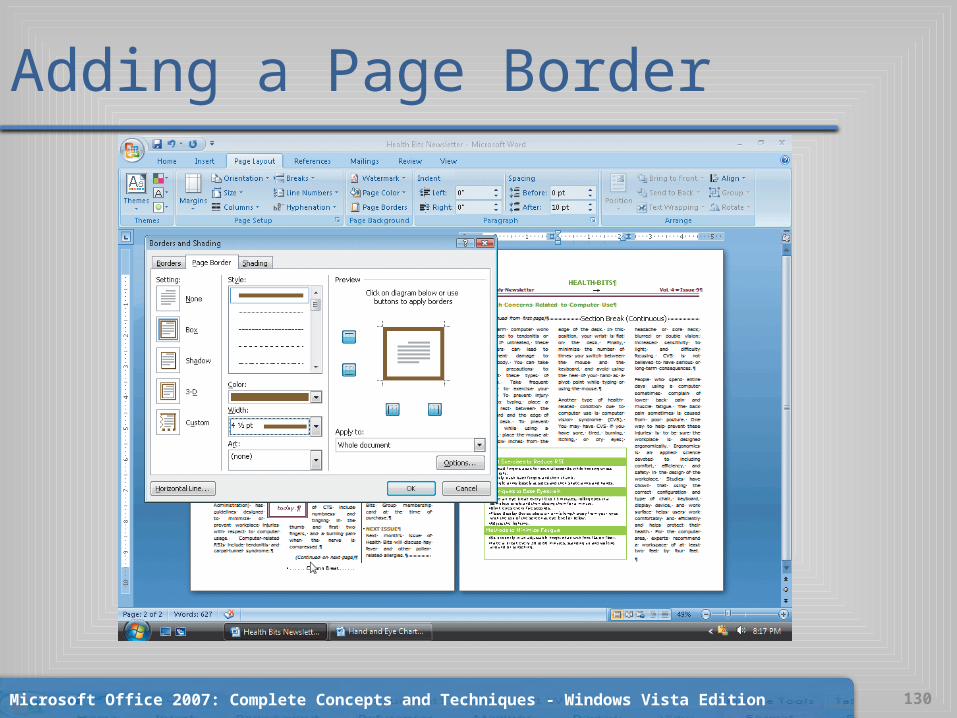
Adding a Page Border• Display the Page Layout tab• Click the Page Borders button on the Page Layout tab to
display the Borders and Shading dialog box. If necessary, click the Page Border tab
• Click Box in the Setting area to specify a border on all four sides
• Click the Color box arrow and then click Gold, Accent 3, Darker 50% in the Color gallery
• Click the Width box arrow and then click 4 ½ pt • Click the OK button to place the defined border on each
page of the newsletterMicrosoft Office 2007: Complete Concepts and Techniques - Windows Vista Edition 129
Adding a Page Border
Microsoft Office 2007: Complete Concepts and Techniques - Windows Vista Edition 130
E-mailing a Document as a PDF• Click the Office Button and then point to Send on the Office
Button menu• Click E-mail as PDF Attachment on the Send submenu, which
converts the current document to a PDF file, starts your default e-mail program, and attaches the PDF file to the e-mail message
• If necessary, maximize the e-mail window• Fill in the To text box with the recipient’s e-mail address• Fill in the message• Click the Send button to send the e-mail message along with
the PDF attachment to the recipient named in the To text box
Microsoft Office 2007: Complete Concepts and Techniques - Windows Vista Edition 131
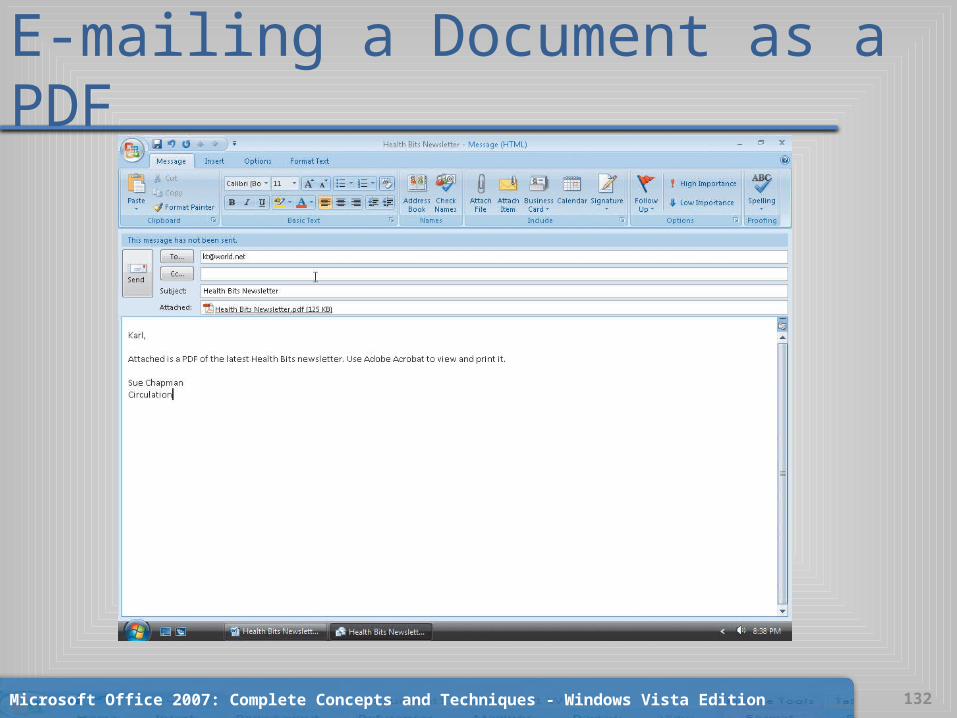
E-mailing a Document as a PDF
Microsoft Office 2007: Complete Concepts and Techniques - Windows Vista Edition 132
Saving, Printing, and Quitting Word• Save the newsletter again with the same file
name• Print the newsletter (shown in Figure 6–1 on
page WD 387)• Quit Word, closing all open documents
Microsoft Office 2007: Complete Concepts and Techniques - Windows Vista Edition 133

Summary• Create and format WordArt• Insert a symbol in a document• Insert and format a floating graphic• Format a document in multiple columns• Format a character as a drop cap• Insert a column break• Modify a style
Microsoft Office 2007: Complete Concepts and Techniques - Windows Vista Edition 134
Summary• Place a vertical rule between columns• Insert and format a text box• Copy and paste using a split window• Balance columns• Modify and format a SmartArt graphic• Add a page border
Microsoft Office 2007: Complete Concepts and Techniques - Windows Vista Edition 135
Microsoft Office 2007Microsoft Word Chapter 6 Complete